Figure 1: drive carrier, Installing a drive into the drive carrier – StorCase Technology 9-Bay 4U SCSI Ultra160 User Manual
Page 7
2
Installation
StorCase Technology, Inc.
InfoStation Installation Guide - Rev. C01
Installing a Drive into the Drive Carrier
NOTE:
Before installing the drive into the carrier, the ID jumpers and spin-up option jumper
on the disk drive must be removed. This is required so that the InfoStation itself can
set the drive SCSI ID and spin-up option.
1.
Install the drive(s) into the drive carrier(s). Drive(s) must be side-mounted into the
drive carrier(s) using #6-32 screws (Figure 2).
2.
After the drive(s) have been installed in to the drive carrier(s), carefully insert the
carrier(s) back into the chassis.
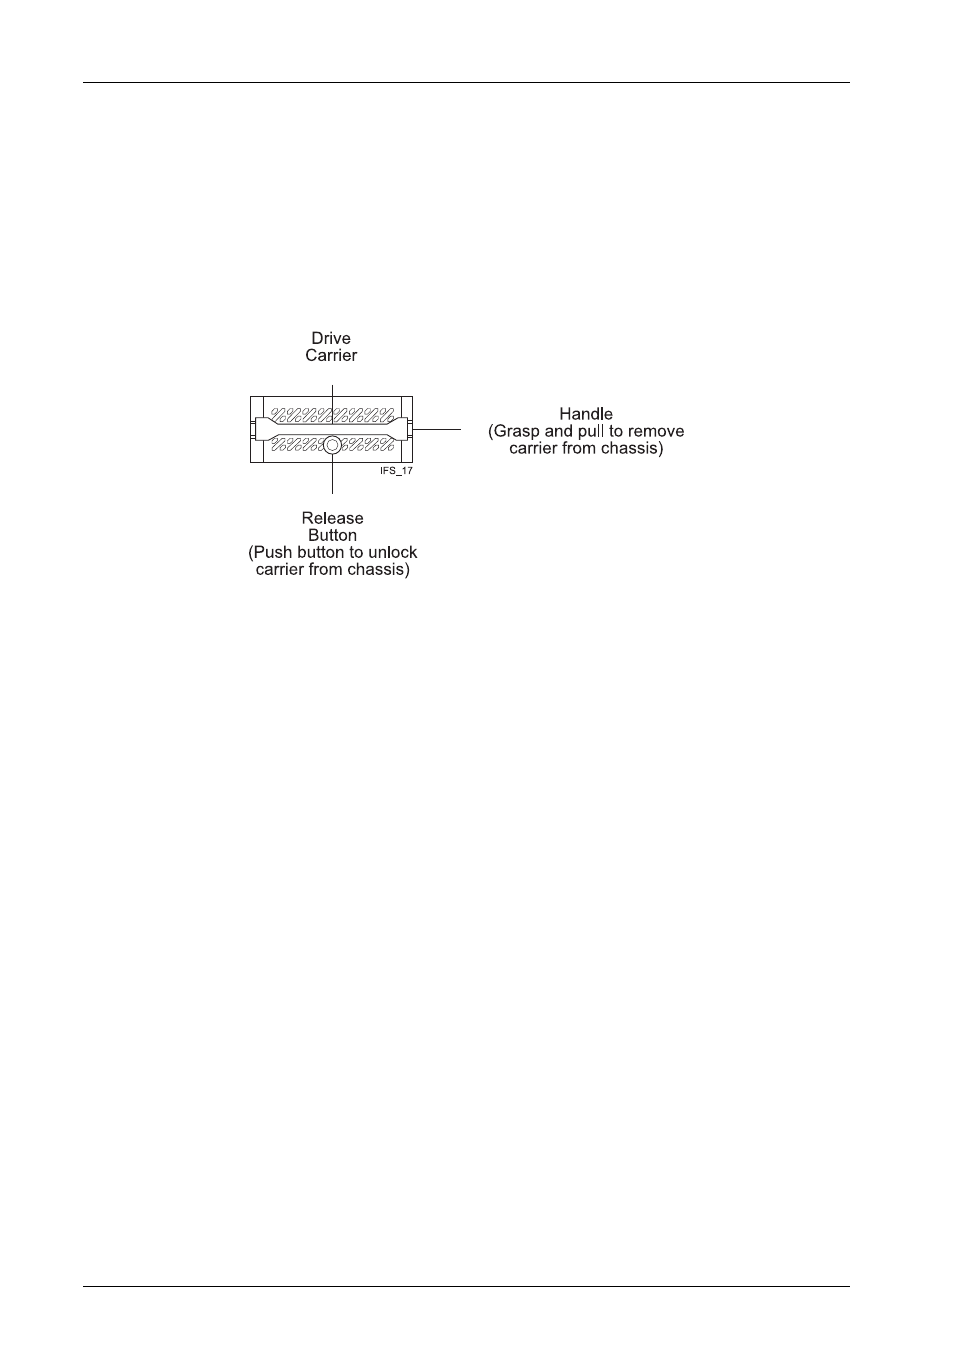
Figure 1: Drive Carrier
Removing a Drive Carrier (without a Drive Installed)
Remove the drive carrier by grasping carrier handle and pushing in the carrier release button
simultaneously. Pushing in the carrier release button will unlock carrier and allow removal from
the InfoStation drive bay (Figure 1 and 3).