Communication with pc — 18, 4848 reactor controller – Parr Instrument 4848 User Manual
Page 19
4848 Reactor Controller
w w w . p a r r i n s t . c o m
19
Communication with PC
The 4848 Controller is provided with RS-485 port
(labeled comm) and may be connected to a USB
port on a PC with optional A1925E4 communication
cable.
Quick Start Instructions for Connecting with PC
1. Put the 576M CD into the CD-ROM.
2. Connect the A1925E4 communication cable
between the comm port on the back of the 4848
Controller and an open USB slot on the PC.
3. The PC should open an "Install Hardware" wizard
automatically when the cable is connected to the
USB slot. If it does not, go to the Control Panel
and select "Add Hardware" to start the wizard.
4. When prompted, check the box to search remov-
able media for the proper driver. The wizard
should find the driver on the 576M CD and install
the USB driver. It may prompt that the driver
has not been validated; select "continue anyway"
to continue the installation. After this it may
repeat the installation process for the RS-485
converter.
5. Copy the controller software to the PC. The soft-
ware is located on the CD at: "software\ParrCom.
exe”.
6. Once copied to the PC, open the ParrCom.exe
file. No installation is necessary.
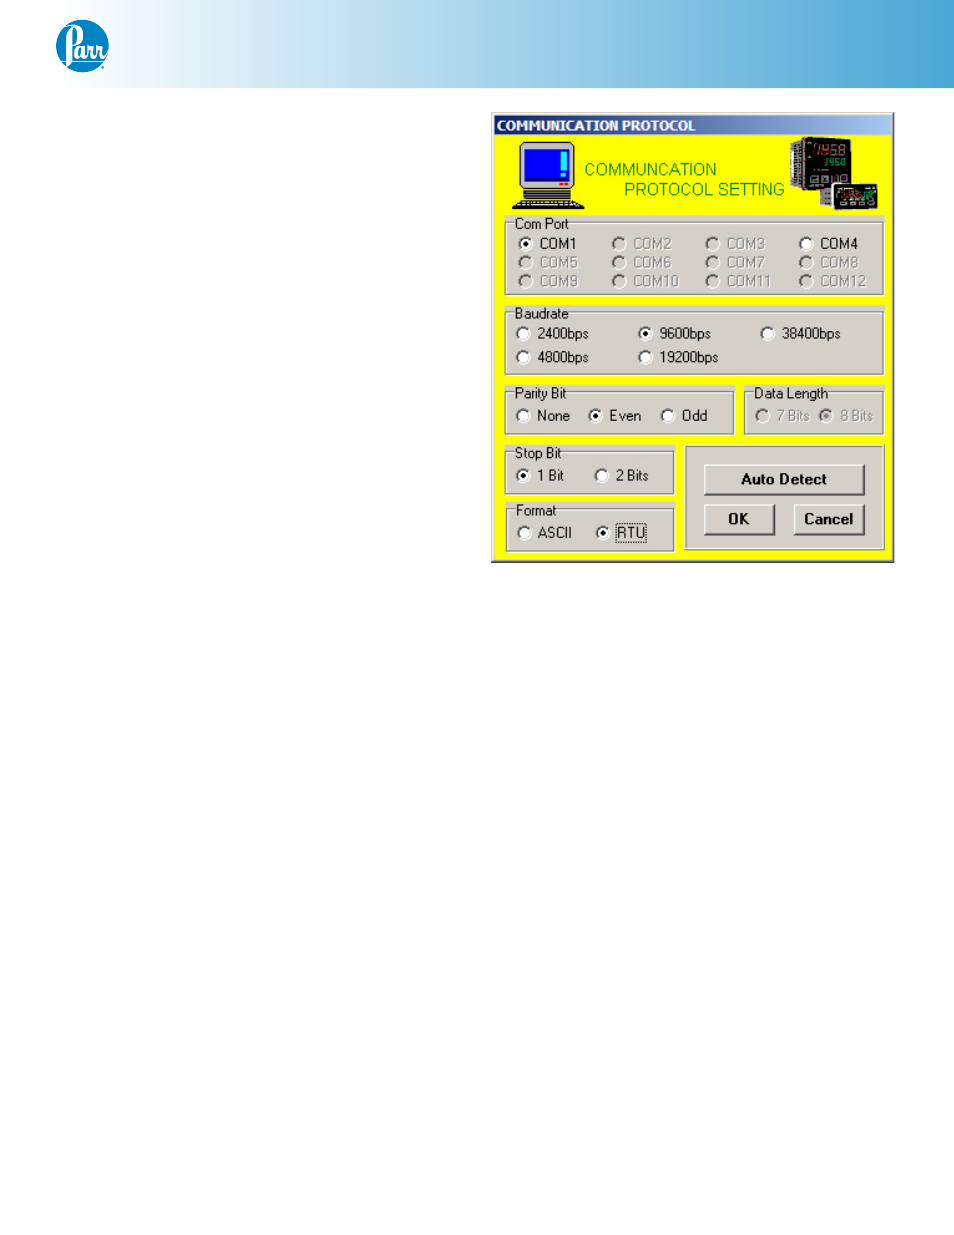
7. At the main ParrCom program screen, select
"protocol >> set PC". Ensure that the following
values are set:
Baud: 9600
Data length: 8
Parity: even
Stop bit: 1
ASCII: RTU
Click OK to return to the main screen.
8. At the main screen, select "Program >> Monitor".
The Monitor screen will come up. There will be
a generic icon on the left, and four mini screens
on the right. Each mini screen can be used to
connect to a different module on the 4848 Con-
troller.
9. In the first mini screen, select 1 for the Address,
and click Connect. It should connect to the
Primary Temperature module on the 4848 Con-
troller, and the bottom half of the screen should
show parameters for the controller. These may
be modified here. Of most interest will be the
"Input >> SV" value, which is the setpoint for
temperature. Also, the "Alarm >> Alarm 3" value
will show the High Limit alarm for this module.
10. Any other modules on the 4848 Controller may
be accessed through the remaining available
mini screens. The modules have addresses
numbered 1-4 starting from the left most module
on the 4848 Controller.