Parr Instrument CAL 9500P User Manual
Parr Instrument Sensors
NO. 569M
Installation Instructions for a CAL 9500P Temperature
Controller into an Existing 4840 Controller
1. Unplug the power cord from the controller.
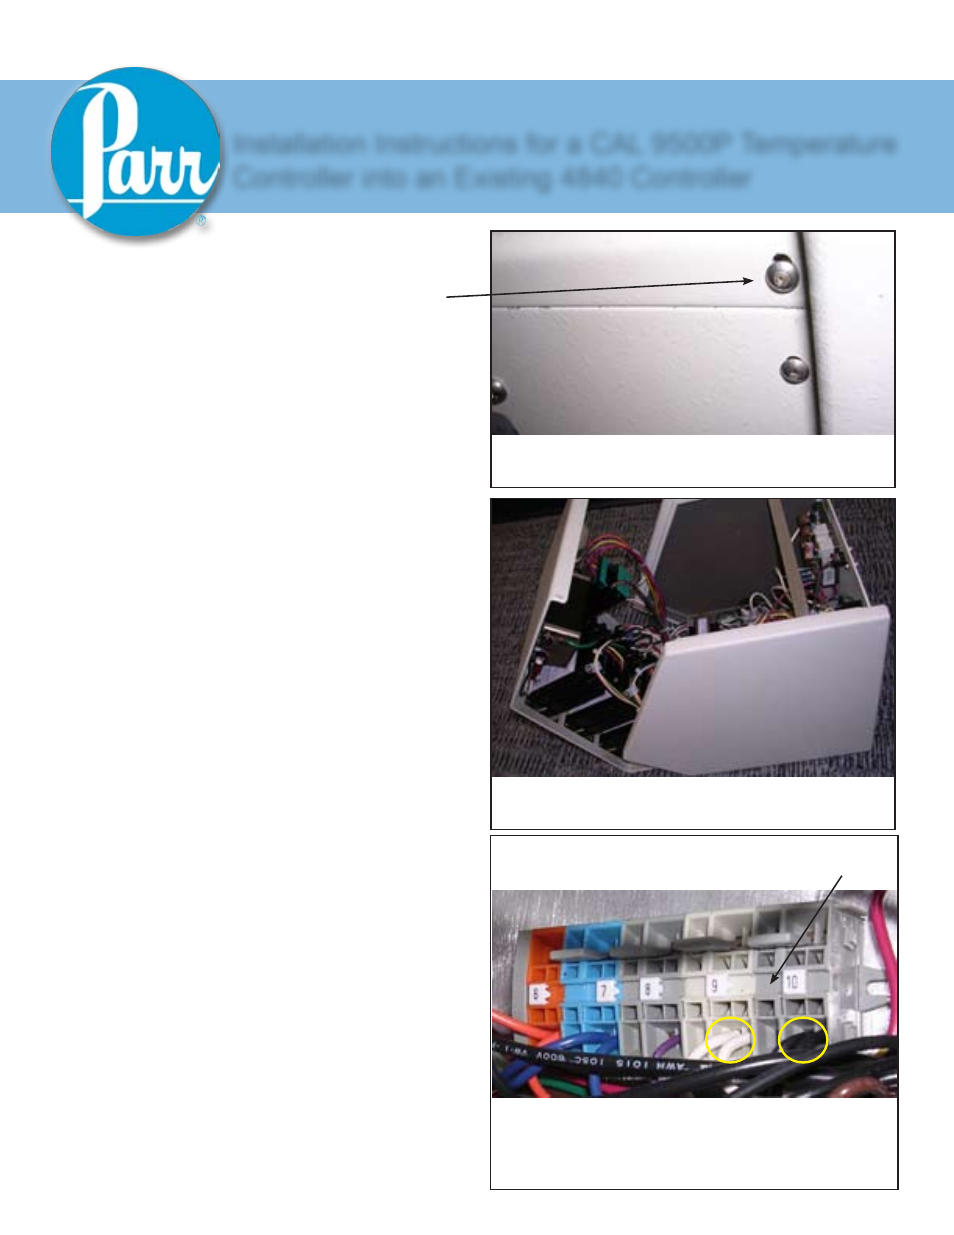
Remove the two screws from the back side of
the controller (at the top corners). (See Figure 1)
2. Lift the top cover which is hinged at the
bottom front of the case; the assembly will open
like a book. (See Figure 2)
3. Disconnect all wire connections from the
existing Watlow Temperature Control module.
Remove the green wire from this set of wires,
and discard the black jumper wire.
4. Cut off the spade connectors from the
remaining wires and strip each one to expose
0.25” of wire.
5. Locate the black wire which is currently not
connected to anything, and trace it to terminal
block location 10. Disconnect it from terminal
block location 10, and attach it to terminal block
location 4. (See Figure 3)
6. Locate the white wire which is currently not
connected to anything, and trace it to terminal
block location 9. Disconnect it from terminal
block location 9, and attach it to terminal block
location 3. (See Figure 3)
7. Remove the Watlow temperature controller
from the front panel of the 4840 Controller.
8. Install the adapter plate to the front panel of
the 4840 temperature controller using the screws
provided.
9. Install the Cal 9500P temperature controller
into the adapter plate in the front panel of the
4840 Controller using the plastic retaining cage.
From the front side, the three buttons on the
colored backing should be at the bottom, not the
top. Check the orientation!
Top screw at corner
Figure 1
4840 with cover open
Figure 2
Tip: The wire will come out easily after inserting a small
flathead screwdriver into the release port.
If there is more than one black wire on terminal block 10,
locate the one which is currently not attached to anything.
Figure 3