Attaching the amputated arms, Setup for simulation – Laerdal SimMan 3G Mystic User Manual
Page 34
31
32
Setup for Simulation
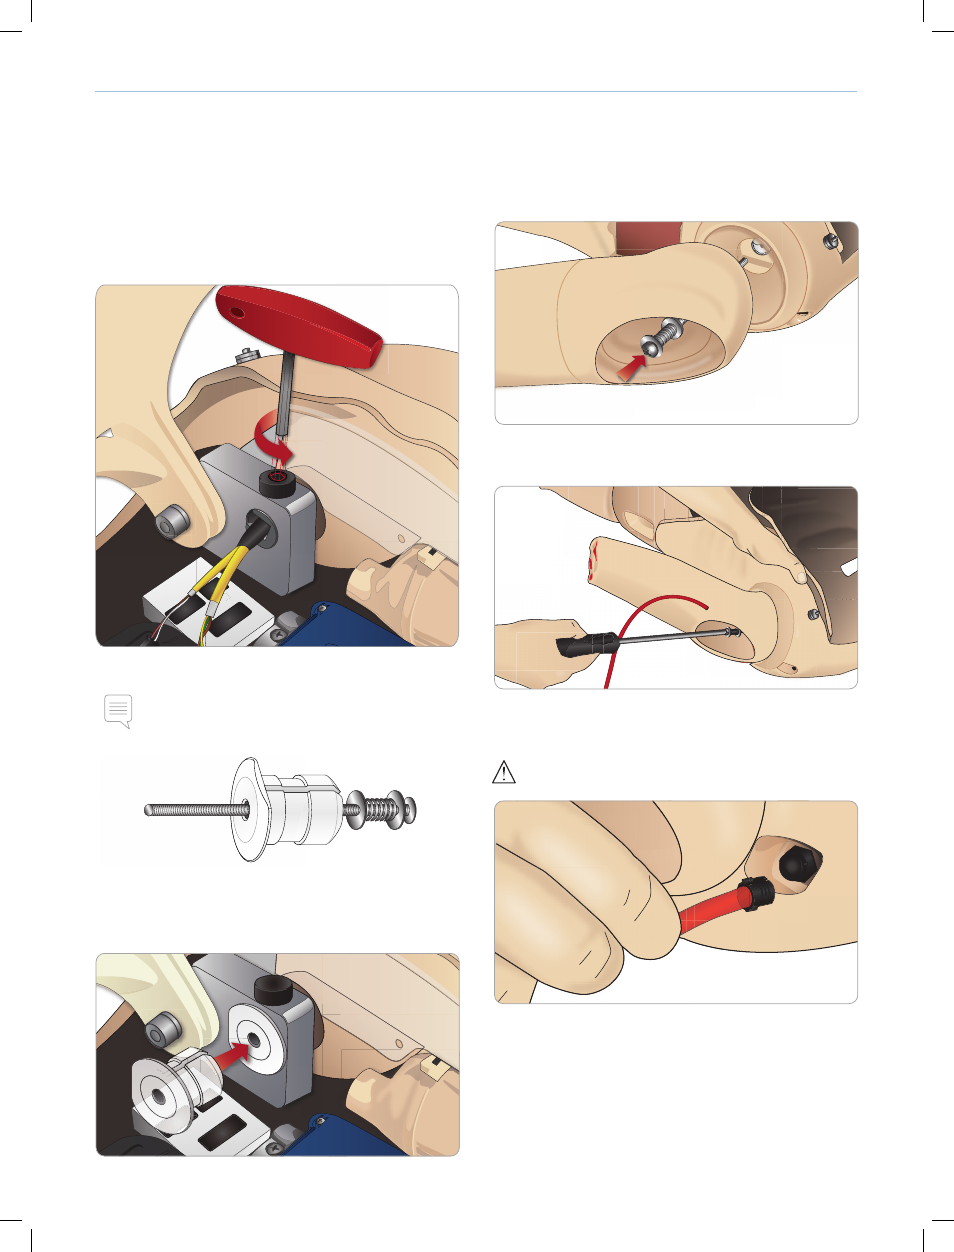
Attaching the Amputated Arms
1
Remove the right or left arm.
2
Open the Torso as described on page 7, steps 1-4.
3
If removing the right arm, remove the deltoid pad and unscrew
the arm. Skip to step 8.
4
If removing the left arm, use the 8mm Allen wrench to loosen
the shoulder bolt. Do not remove the shoulder bolt.
5
Unplug the cables and remove the arm.
The Arm Adapter and Adapter Screw are designed to attach
the Amputated Arms to the manikin. The adapter is already
installed in the right shoulder.
6 Fit the Arm Adapter into the hole in the arm bracket from inside
the torso. Ensure the flat edge of the Adapter is facing the chest
hinge. Hand tighten the shoulder bolt.
7 The Adapter is now in place and the Amputated Arm can be
connected with the Adapter Screw.
8. Thread the Adapter Screw through the Amputated Arm and
align the screw with the hole in the Adapter.
9. Secure the Adapter with one hand from inside the torso. Screw
the Adapter Screw using a Phillips head screwdriver.
10. Connect the red tube from the Amputated Arm to the nearest
blood port on the torso.
Caution: Do not over rotate the arm. Over rotating may cause the
red vinyl tubling to disconnect.
LA PULSES
BP
LA
CONV
BP
B