Transferring media files, System setup – Laerdal SimMan 3G Mystic User Manual
Page 24
21
22
System Setup
Trend parameters.
Selecting the 12-lead ECG button generates a 12-
lead ECG strip. Select
strip printed on the default printer available from
your Patient Monitor computer.
BOTTOM MENU 2
Bottom menu buttons in order from left to right:
Selecting the
desired volume (0-10).
Selecting the
desired volume (0-10).
Select the
been included in the current scenario are shown.
Select the
display. Select the
Media display.
Select the Labs button to open the Labs display.
Select the
display.
Selecting the
menu are identical to the similar options displayed
on the Menu line.
Selecting the
immediate return to the
cancels all submenus. Submenus can also be closed
by selecting the “X” box of the submenu.
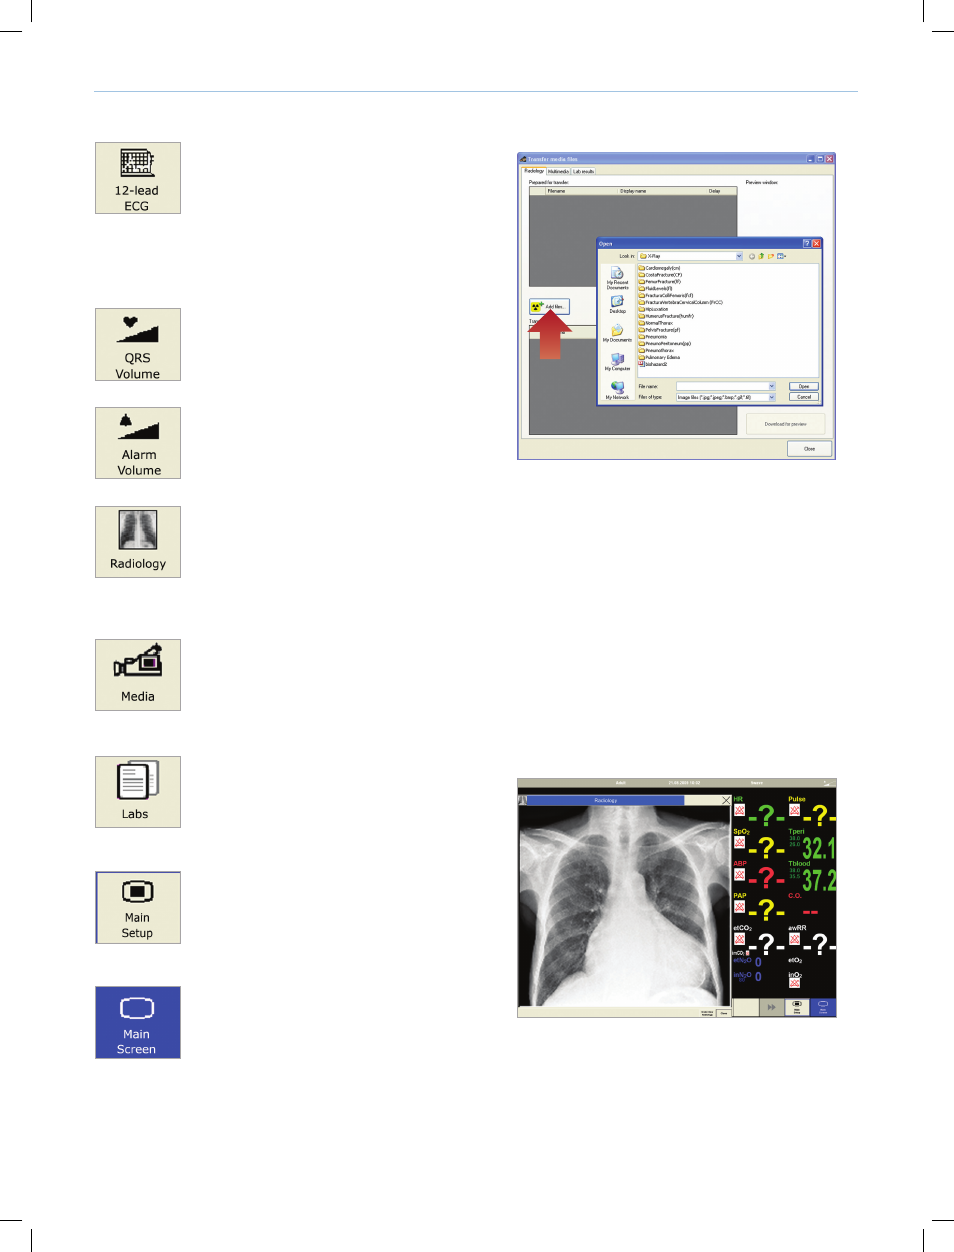
Transferring Media Files
During a session, the Instructor can make media files available to
learners. Media files include Radiology, Video and Lab reports.
To transfer media files to the learner’s patient monitor:
1 In the Instructor Application, click
2 The Instructor may upload any of the existing media files or
browse to upload their own media files.
3 To add media files: Click
4 The Instructor can upload as many media files as required.
5 The Instructor may wish to display the media file(s) immediately,
or after a pre-selected time delay.
FOR A DELAYED DISPLAY:
Click the drop down menu icon below