Installation – Labconco Protector Controlled Atmosphere Glove Boxes 5080102 User Manual
Page 12
INSTALLATION
13
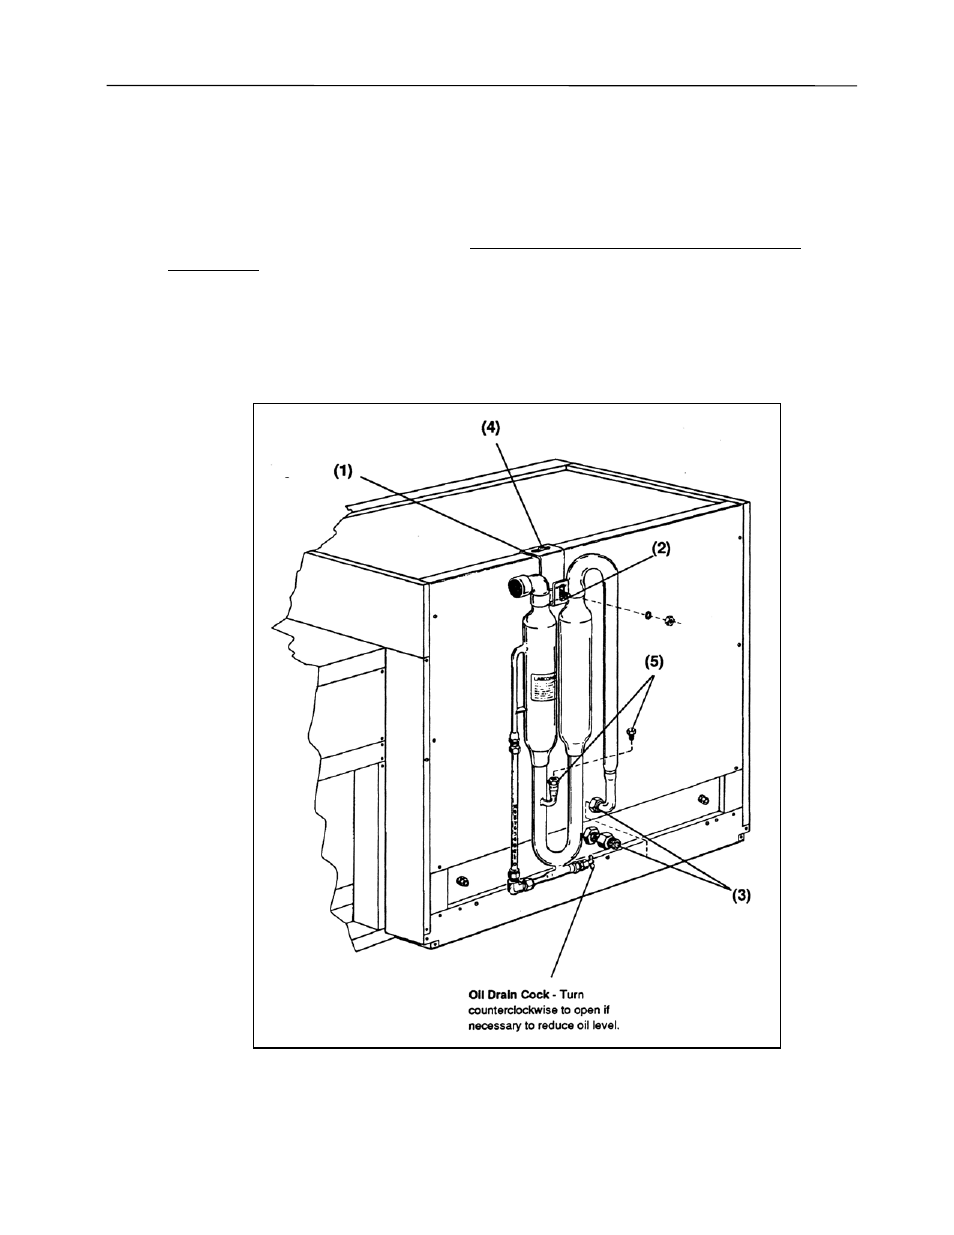
4. Hold the bubbler straight (with the vertical tubes perpendicular to the glove box base) and
tighten the top hanger bracket #8 x 1/2" screw. Secure the bubbler to the hanger bracket by
tightening the _-20 nut.
5. Remove the pipe plug from the fill spout and fill the bubbler with vacuum pump oil (.87
specific gravity) to the desired pressure relief level (must be less than 10) as indicated on
the graduated sight glass (inches H
2
O). The recommended level is 7 inches for most
applications. When nearing the desired fill level, add a small amount of oil at a time and
wait for it to drain into the bubbler and sight glass. When the desired level is reached,
install and tighten the fill spout plug.
NOTE: When loosening or tightening the fill plug or drain cock, be sure to hold the
bubbler’s stationary fitting with a wrench to avoid damage to the bubbler’s soldered joints.
Figure 5
- Protector Controlled Atmosphere Glove Boxes 5070102 Protector Controlled Atmosphere Glove Boxes 5060102 Protector Controlled Atmosphere Glove Boxes 5080100 Protector Controlled Atmosphere Glove Boxes 5070100 Protector Controlled Atmosphere Glove Boxes 5060100 Protector Controlled Atmosphere Glove Boxes 5080002 Protector Controlled Atmosphere Glove Boxes 5070002 Protector Controlled Atmosphere Glove Boxes 5060002 Protector Controlled Atmosphere Glove Boxes 5080000 Protector Controlled Atmosphere Glove Boxes 5070000 Protector Controlled Atmosphere Glove Boxes 5060000