Hanna Instruments HI 700 Series User Manual
Page 20
39
38
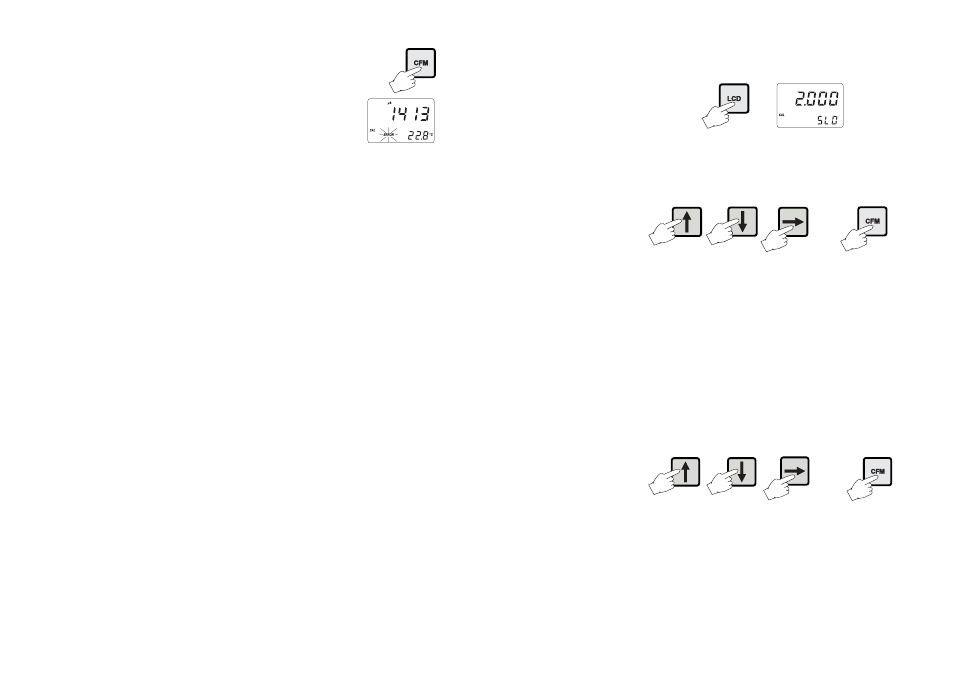
• Press LCD to display the current cell constant on the pri-
mary LCD (factory default value is 2.000 cm
-1
).
• Press SETUP key.
• Using , and , enter the probe cell constant (the
value must be between 1.333 and 4.000 cm
-1
) and con-
firm by pressing CFM.
Note
If the entered cell constant value is invalid, the “ERROR” indi-
cator blinks on the LCD.
Note
Press SETUP before CFM to exit without changing the cell
constant.
CALIBRATION BUFFER DIRECT SELECTION
This feature allows to set a user-defined calibration point, in
order to perform calibration at a point different from the memo-
rized standards.
• Press CAL to enter calibration mode. The LCD will show 0.
• Press SETUP key.
• Using , and , enter the desired buffer value and
confirm by pressing CFM.
Note
Press SETUP before CFM to exit without changes.
Note
It is suggested to calibrate the offset before entering the cali-
bration buffer direct selection.
• Press CFM to confirm the calibra-
tion point; if the reading is close to
the selected solution, the meter
stores the reading.
If the reading is not close to the se-
lected solution, "ERROR" will blink.
Note
A 2-point calibration is always suggested. However the EC
calibration can also be performed at 1 point. To calibrate
offset only, just press CAL after confirmation (with CFM) of
the zero reading; the meter will return to normal operational
mode. To have the cell constant calibrated first, press the up
or down arrow keys after entering the calibration procedure
to skip to the next possible calibration buffer. In this case,
after confirmation of the cell constant, the meter will ask for
the offset calibration displaying zero on the LCD; press CAL
to exit or calibrate the offset, if desired.
Note
The calibration value shown is referenced at 25°C even if the
reference temperature of 20°C has been selected.
Note
During calibration, press LCD to display the cell constant
value on the primary display. Press LCD again to return to
calibration buffer visualization.
Note
To interrupt the calibration procedure press SETUP to restart
the procedure, or CAL to exit to normal operational mode.
Note
If the process meter has never been calibrated or an EE-
PROM reset has occurred, the meter continues to perform
measurements. However, the user is informed of an EC or
TDS calibration requirement by a blinking “CAL” indication
(see “Startup” section).
Note
The device must be calibrated within the temperature range
specified for the EC or TDS buffer solution.
CELL CONSTANT DIRECT SELECTION
Whenever the EC/TDS probe cell constant is known, it is
possible to directly calibrate the meter using that value.
• Press CAL to enter calibration mode. The LCD will show
the default offset of 0.