Hanna Instruments HI 943500A User Manual
Page 15
29
28
Below Setpoint Control Operation
Short the "SET SELECT" and "COM" connec-
tors with a jumper wire. The set contact
relay will close if the measured value is
lower than the setpoint value, and the
"SET ON" LED will light up.
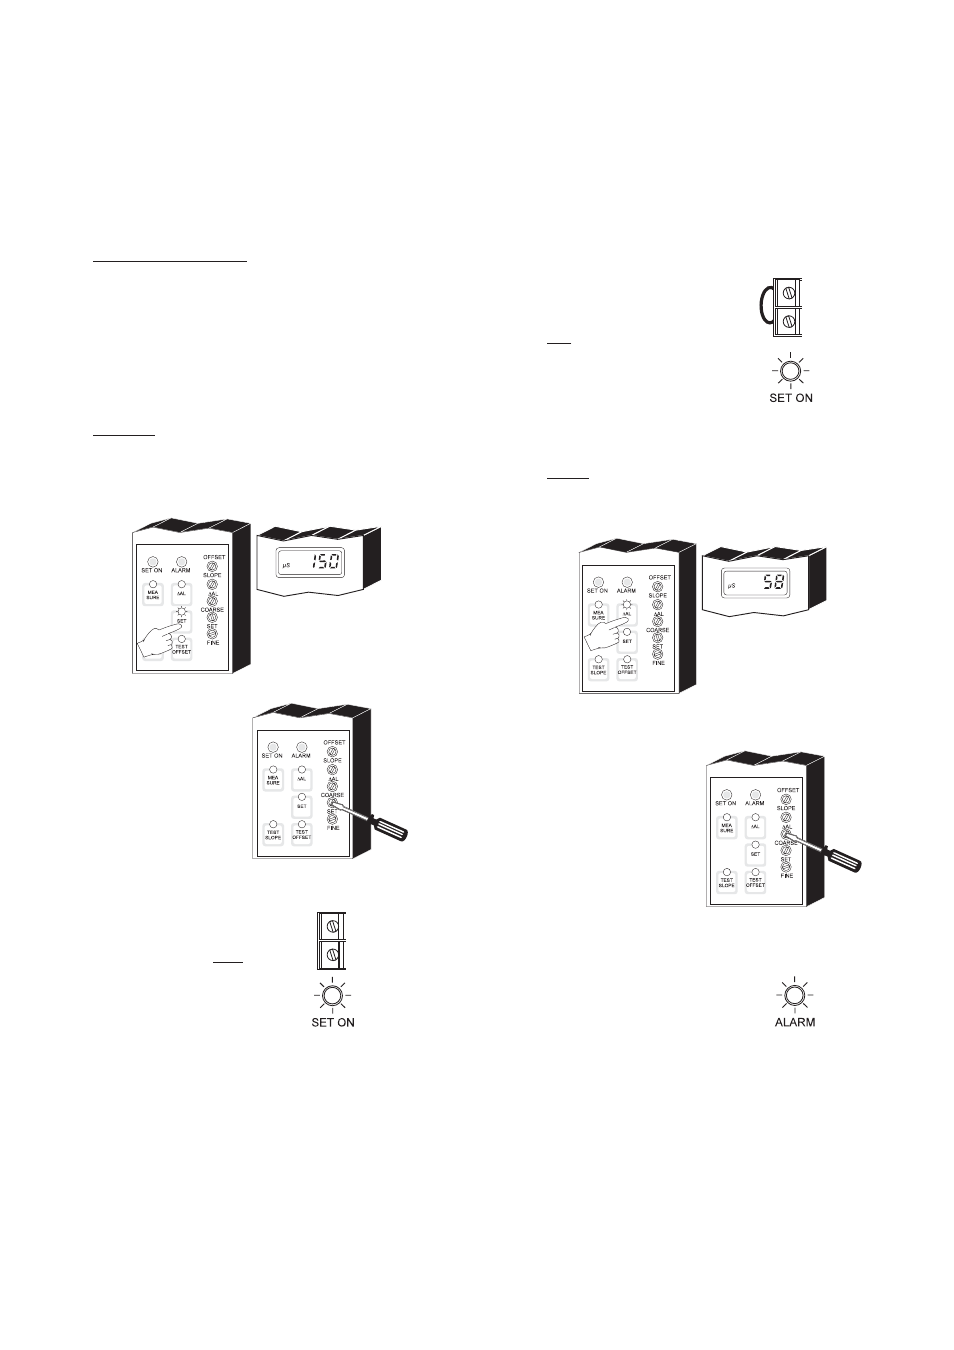
ALARM
Press the "
ΔAL" key and the display will show the set tolerance for
the alarm.
Use a small screwdriver to
adjust the "
ΔAL" trimmer un-
til the desired tolerance is dis-
played.
For example, if the set value
is 200 μS/cm and a
ΔAlarm
of 50 μS/cm is set, an alarm
will be activated every time
the measured value is higher
than 250 μS/cm or lower
than 150 μS/cm.
When an alarm occurs, the "ALARM" LED
lights up.
COM
SET
SELECT
OPERATING INFORMATION
All parameters are set through the front panel keys and trimmers.
When any key is pressed, the corresponding LED lights up to indicate
that the function is active.
Make sure that the conductivity meter, transmitter and probe are
calibrated before taking measurements (see pages 31, 35 and 39 for
calibration procedures).
SET POINT
To set the working point of the controller, press the SET key. The
display will indicate the current set value.
Use a small screwdriver to
adjust the COARSE and FINE
trimmers until the desired
value is displayed.
Above Setpoint Control Operation
Leave the "SET SELECT" and "COM" connec-
tors open. The set contacts relay will close if
the measured value is higher than the
setpoint value, and the "SET ON" LED will
light up.
COM
SET
SELECT