Hanna Instruments HI 98150N User Manual
Page 12
12
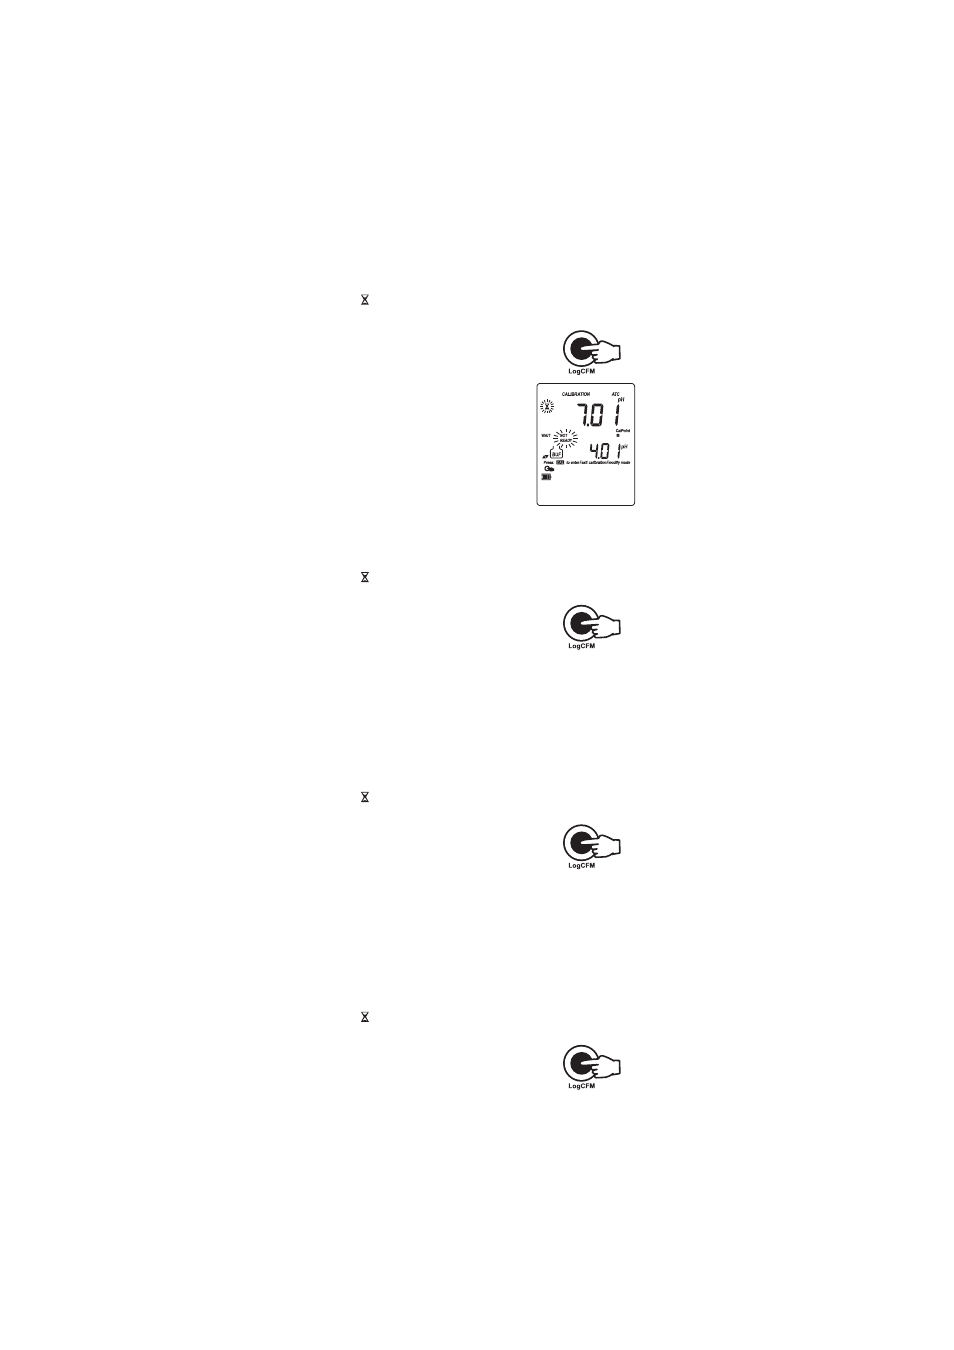
• If necessary, press the
ARROW keys to select a different buffer value.
• The “ ” tag will blink on the LCD until the reading is stable.
• When the reading is stable and close to the selected buffer, “
CFM”
tag blinks.
• Press
CFM to confirm calibration.
• The calibrated value is then displayed on
the primary LCD and the secondary LCD
will display the second expected buffer
value, together with “
CAL” and “Cal
Point 2” tags.
• After the first calibration point is confirmed,
submerse the pH electrode and the temperature
probe (if required) approximately 3 cm (1¼”) into the second buffer solution
and stir gently. The temperature probe should be close to the pH electrode.
• If necessary, press the
ARROW keys to select the appropriate buffer value.
• The “ ” tag will blink on the LCD until the reading is stable.
• When the reading is stable and close to the selected buffer, “
CFM”
tag blinks.
• Press
CFM to confirm calibration.
• The calibrated value is then displayed on the primary LCD and the
secondary LCD will display the third expected buffer value.
• After the second calibration point is confirmed, submerse the pH
electrode and the temperature probe approximately 3 cm (1¼”) into
the third buffer solution and stir gently. The temperature probe
should be close to the pH electrode.
• If necessary, press the
ARROW keys to select a different buffer value.
• The “ ” tag will blink on the LCD until the reading is stable.
• When the reading is stable and close to the selected buffer, “
CFM”
tag blinks.
• Press
CFM to confirm calibration.
• The calibrated value is then displayed on the primary LCD and the
secondary LCD will display the fourth expected buffer value.
• After the third calibration point is confirmed, submerse the pH
electrode and the temperature probe approximately 3 cm (1¼”) into
the fourth buffer solution and stir gently. The temperature probe
should be close to the pH electrode.
• If necessary, press the
ARROW keys to select a different buffer value.
• The “ ” tag will blink on the LCD until the reading is stable.
• When the reading is stable and close to the selected buffer, “
CFM”
tag blinks.
• Press
CFM to confirm calibration.