Ph calibration – Hanna Instruments HI 98170 User Manual
Page 12
1 2
pH CALIBRATION
It is recommended to calibrate the instrument frequently, especially if high
accuracy is required.
The pH range should be recalibrated:
• Whenever the pH electrode is replaced.
• At least once a week.
• After testing aggressive chemicals.
• When calibration alarm time out is expired - “CAL DUE” tags blink (if
feature is enabled).
• If “Outside Cal Range” message blinks during pH measurement (the
measurement range is not covered by current calibration).
PROCEDURE
The instrument offers a choice of 7 memorized buffers (1.68, 4.01, 6.86, 7.01,
9.18, 10.01 and 12.45 pH) and also allows the user to enter five more pH
values for calibration, “Custom 1” to “Custom 5”. The set custom buffers are
the buffer values at 25 ºC.
When a custom buffer is selected during calibration, the “Custom” tag is
displayed on the LCD and its value can be changed in a ±1.0 pH window,
around the set value, in accordance with current temperature.
For accurate pH measurements, it is recommended to perform a five-point
calibration. However, at least a two-point calibration is suggested.
The instrument will automatically skip the buffers used during calibration and
the buffers which are in a ±0.2 pH window, around one of the calibrated buffers.
• Pour small quantities of selected buffer solutions into clean beakers. For
accurate calibration use two beakers for each buffer solution, the first one for
rinsing the electrode and the second one for calibration.
• Remove the protective cap and rinse the electrode with some of the buffer
solution to be used for the first calibration point.
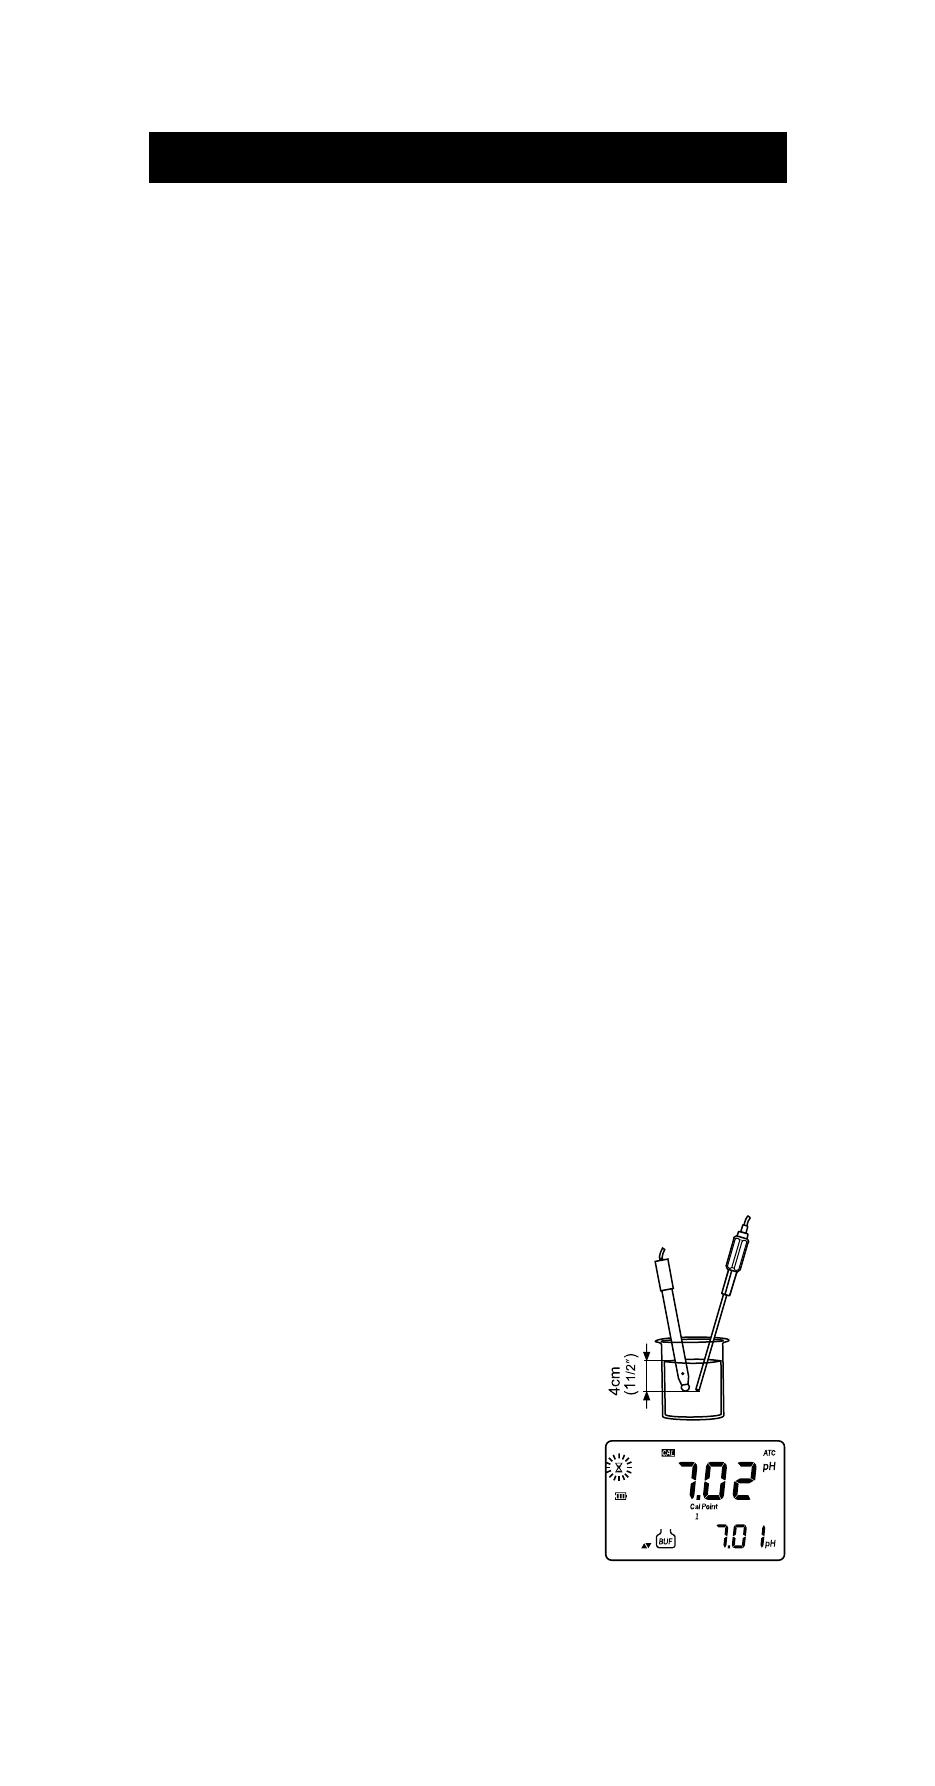
FIVE-POINT CALIBRATION
• Immerse the pH electrode and the temperature
probe approximately 4 cm (1½”) into a buffer
solution of your choice (pH 1.68, 4.01, 6.86,
7.01, 9.18, 10.01, 12.45 or a custom buffer)
and stir gently. The temperature probe should
be close to the pH electrode.
• Press CAL. The instrument will display the mea-
sured pH on the primary LCD and “7.01” buffer
on the secondary LCD, together with “CAL” and
“Cal Point 1” tags.
• If necessary, press the ARROW keys to select a different buffer value.