3. adjusting the print line, 4. adjusting the cutter, Ab 1 2 – GoDEX EZ1100Plus series User Manual
Page 36
EZ1000 Plus User Manual
32
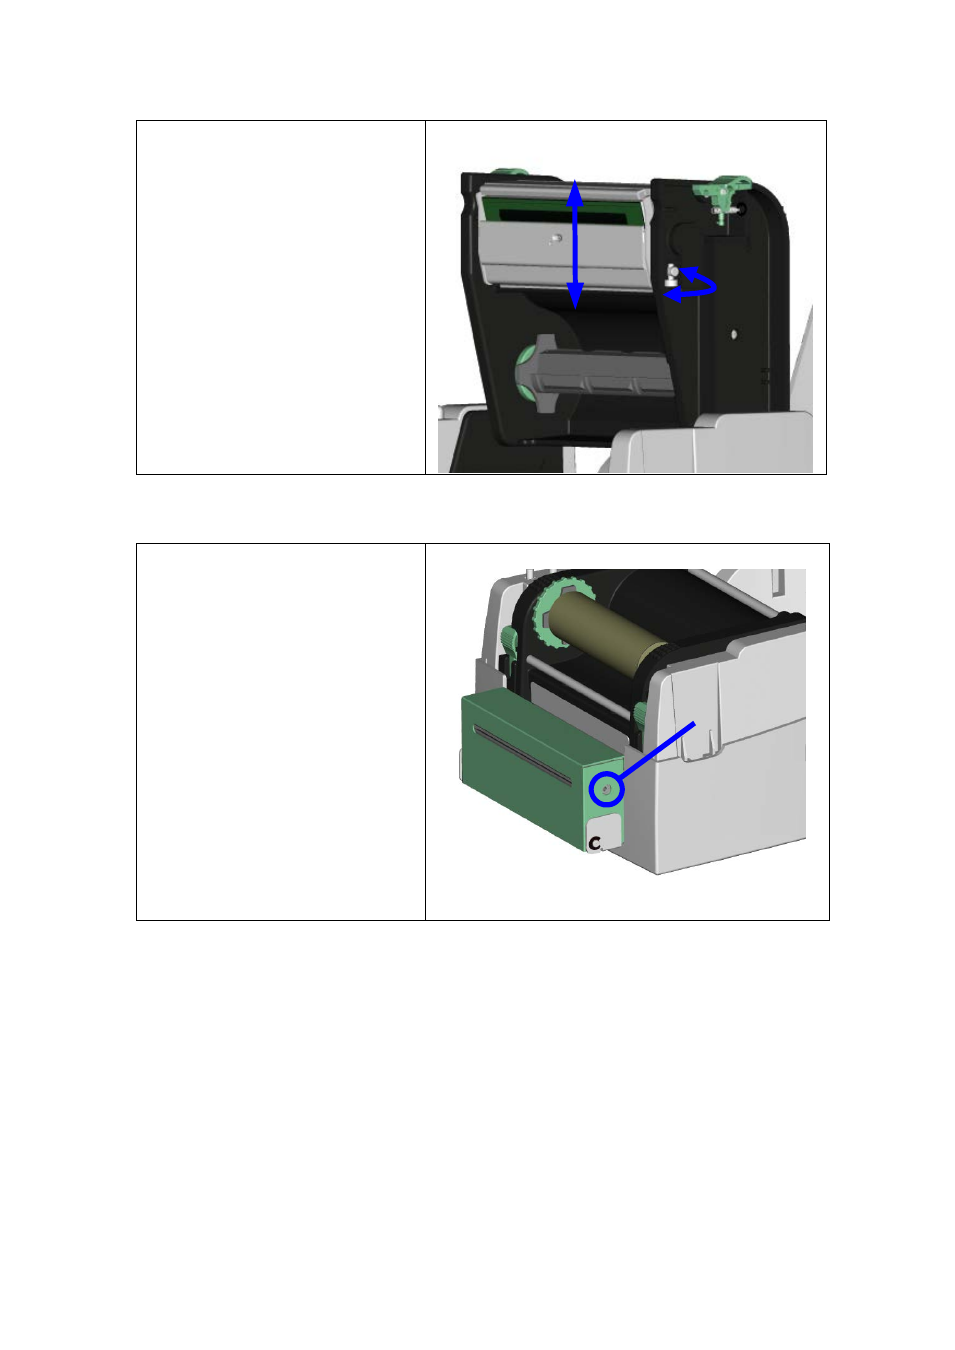
5-3. Adjusting the print line
When the print line is incorrectly
set, the print quality on one side of
the medium may suffer.
In such a case, the print line must
be adjusted so it is positioned
parallel to the paper feed roller.
1. To move the print head in
direction A as indicated by
the blue arrow, turn the
adjustment wheel
anticlockwise (see arrow 1).
2. To move the print head in
direction B as indicated by
the blue arrow, turn the
adjustment wheel clockwise
(see arrow 2).
A
B
1
2
5-4. Adjusting the cutter
1. A socket head screw for
adjusting the cutter is located
on the side of the printer, as
shown in illustration A.
While using the cutter, paper
jams may occur. Switch off the
printer and use a hex key
(# M3) to turn the socket head
screw anticlockwise.
2. When you have cleared the
paper jam, switch on the printer
again. The cutter will
automatically reset.
【
Note
】
Labels should be at least 30 mm high
to ensure correct functioning of the
cutter.
A