GoDEX EZ1100Plus series User Manual
Page 26
EZ1000 Plus User Manual
22
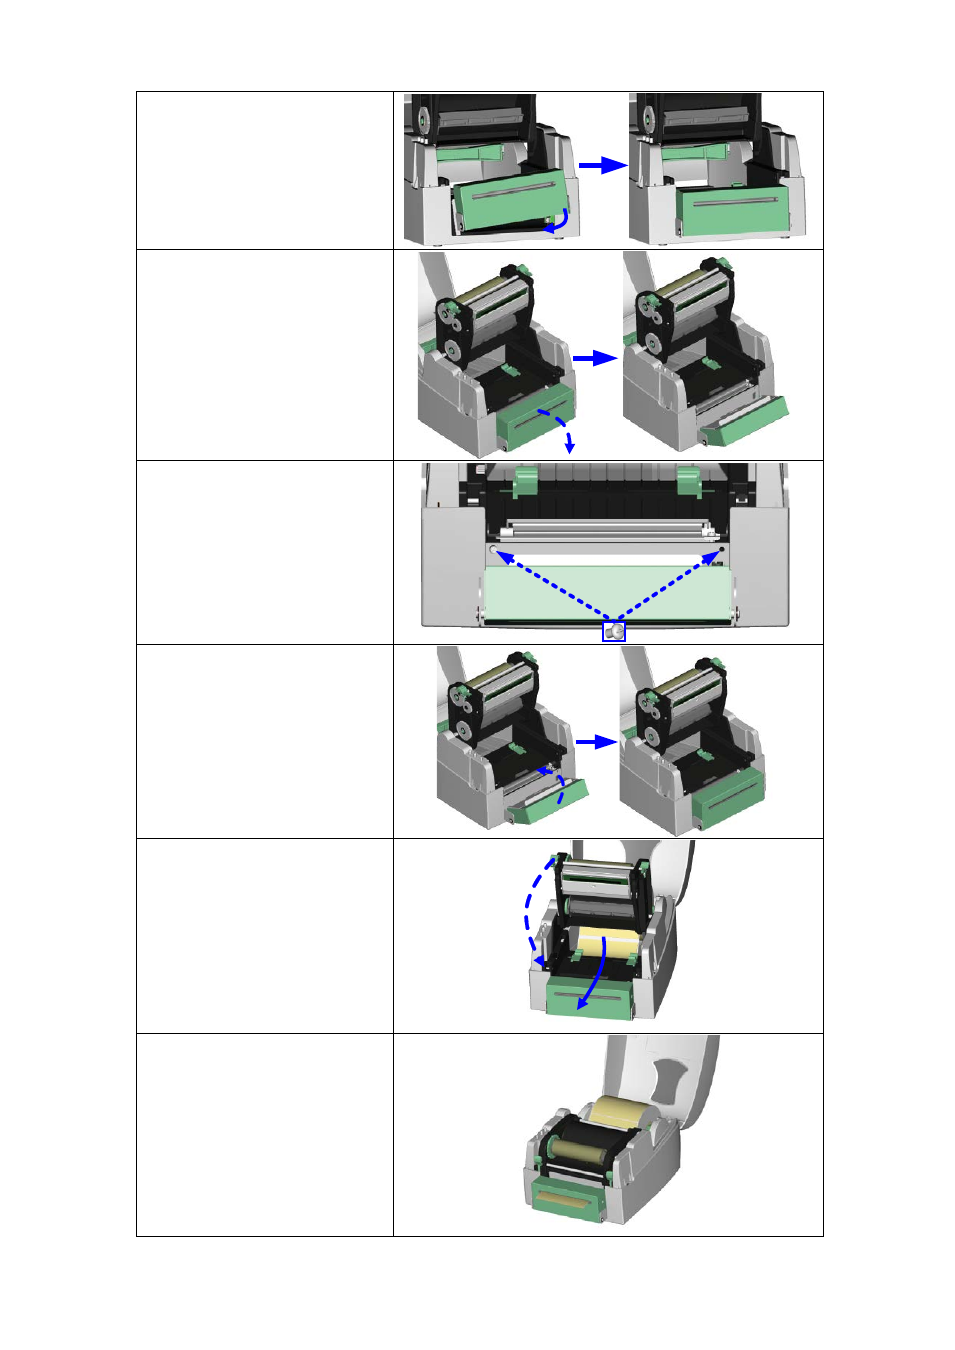
6. Install the cutter by
pressing down first its
left-hand side and then its
right-hand side.
7. Fold out the cutter as
shown in the illustration.
8. Secure the cutter using
the screws provided for
this purpose.
9. Once you have secured
the cutter with the
screws, fold it back in
again.
10. Pass the labels through
the guides.
11. Close the print
mechanism.
【
Note
】
We advise against using inside
wound label stock.
12. To finish, press the FEED
button to set the label
position.
【
Note
】
Labels should be at least 20
mm high. When using the
printer with the cutter, you
should set the stop position
(^E) to 30.