2. installing the cutter – GoDEX EZ1100Plus series User Manual
Page 25
EZ1000 Plus User Manual
21
4-2. Installing the cutter
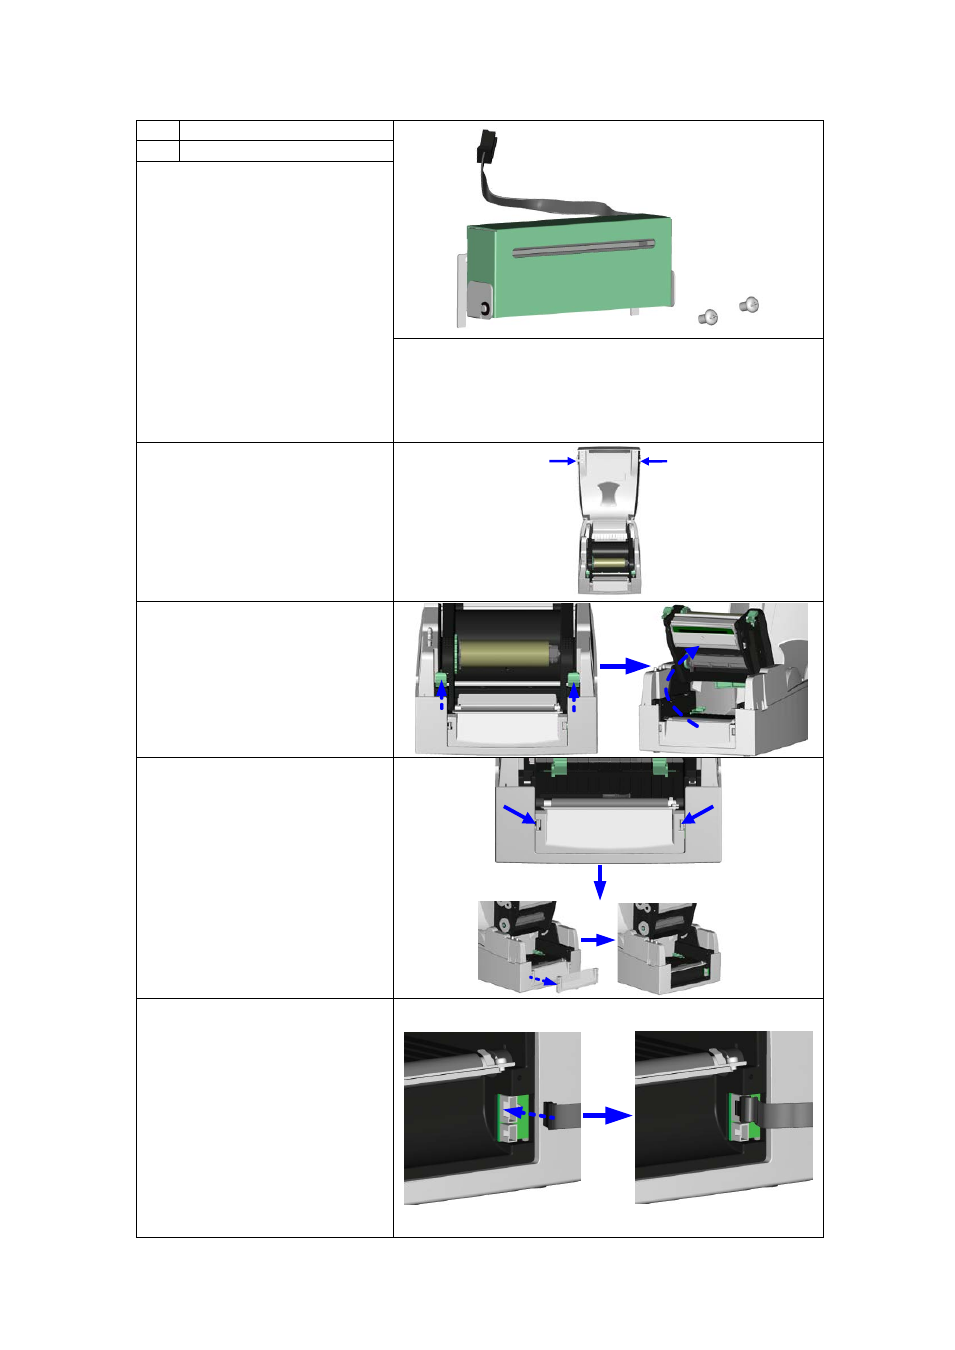
1 Cutter module
2
1
2 Tap screws (3x8 – set of 2)
【
Note 1
】
Remember to switch off the
printer before installing the
cutter.
【
Note 2
】
Do not use to cut adhesive
labels! Glue residue will be left
on the cutter blade and impair
its functioning. The cutter has a
blade life of 500,000 cuts when
using paper weighing 160
g/m², and of 250,000 cuts
when using paper weighing
200 g/m².
【
Note 3
】
You can cut paper with a max. width of 116 mm.
【
Suggestion
】
With the cutter installed, set the stop position in
Qlabel to 30, and the E value to 30.
1. Open the printer cover by
pressing the release
buttons on both sides of
the printer housing.
2. Press the release catches
on both sides of the print
mechanism to open and
lift the print mechanism.
3. To remove the front
cover, press in the two
plastic release tabs.
4. Remove the front cover
as shown in the
illustration.
5. Connect the cutter cable
to the upper jack as
shown in the illustration on
the right.
【
Important
】
The printer must
be switched off, or the
motherboard may be
destroyed!
There are 2 jacks: the lower
jack is for the dispenser, the
upper jack for the cutter.