Da-Lite Multi Format Imager User Manual
Page 14
14
The Multi-Format imager has been preset to four different
formats. The screen can be set to any format by simply pressing
the corresponding button on the remote. Below is a list of each
button function.
IMPORTANT! When operating the switch, press and release the
buttons. Do not hold the button for more than five (5) seconds
or the button will be reprogrammed to the current screen
position.
Test installation by carefully running mask surfaces in and out
2-3 times. Be prepared to stop screen.
Standard Duty Cycle: 1 Min. On. / 3 Min. Off.
CAUTION! Excessive continuous operation may cause
overheating. If motor overheats do not press on remote
and allow motor to cool for 30 minutes.
ATTENTION! Le fonctionnement continu et excessif peut
provoquer une surchauffe. Si le moteur surchauffe,
n'utilisez pas la télécommande et laissez le moteur
refroidir pendant 30 minutes.
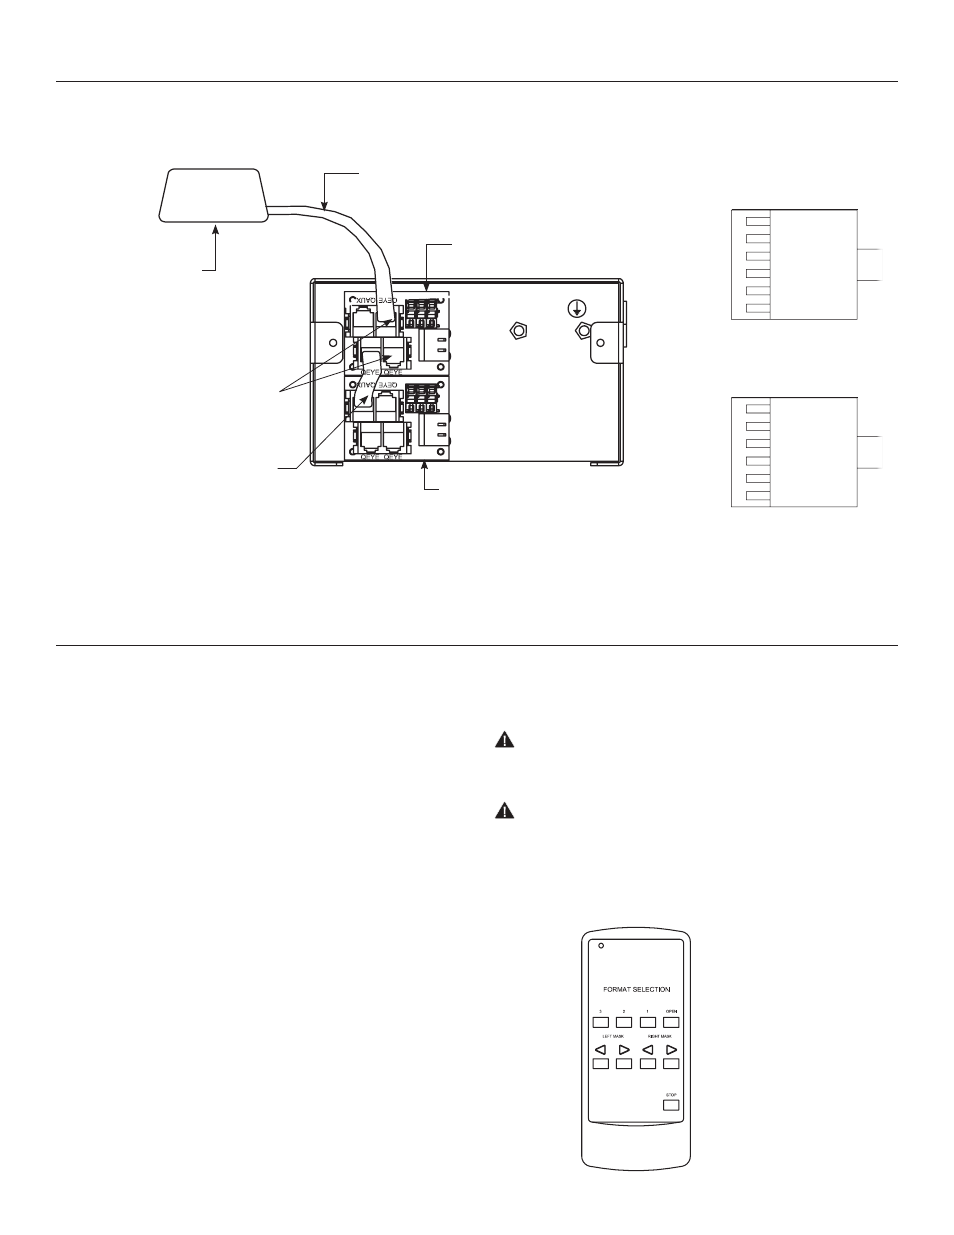
Multi Format Imager Wiring Diagram
Multi Format Imager Operation
3. Connect IR eye to splitter for screen operation. IR eye shall be plugged into a QEYE port on the primary
splitter as shown in Figure 27.
Figure 27
Figure 28
IR EYE
QEYE Inputs
6P6C
RJ-22 Cable
From QAUX
To QEYE
Primary Splitter
6P4C
RJ-14 Cable
Secondary Splitter
NOTES:
1. 6P6C = 6 Pins 6 Conductor Wire
2. 6P4C = 6 Pins 4 Conductor Wire
Green
RJ-22
Bus (RP Data)
+12V
RQ Clock
RQ Data
+5V
Ground
Yellow
Red
Black
White
Blue
RJ-14
Bus (RP Data)
RQ Data
+5V
Ground
White
Green
Red
Black
3 – Sets format to NTSC (1.33:1) format.
2 – Sets format to HDTV (1.78:1) format.
1 – Sets format to Letterbox (1.85:1) format.
OPEN – Sets format to Anamorphic (2.35:1) format.
STOP – Stops the masks at any position when pressed.
< > – Individual Control of left and right mask.