Multi format imager installation – Da-Lite Multi Format Imager User Manual
Page 10
10
Wall Mounting Assembly:
1. Depending on size of screen it will be shipped with either
2 wall brackets that are 48" long or 2 wall brackets that are
64" long. Two small "L" brackets included will be used to hold
frame securely to wall at bottom.
2. To install the Multi-Format Imager over a Da-Lite Perm-Wall
screen you will need to place the supplied wooden spacers
between the screen and the wall.
Da-Snap, Imager and Cinema Contour frame do not require
any spacers.
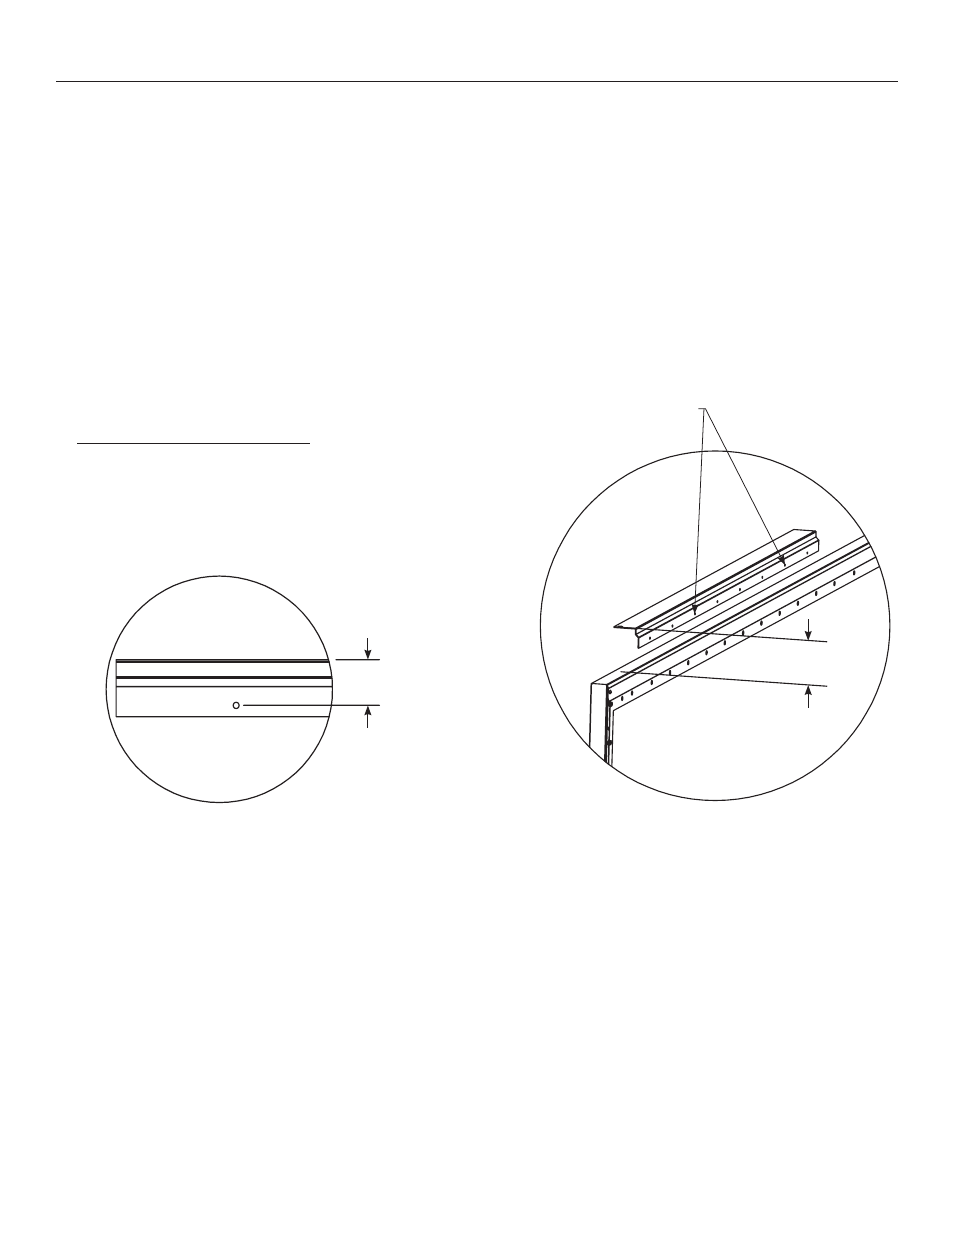
3. Refer to Figure 16 for hanger bracket location. Dimension "A"
will vary depending on the type of screen you have.
Dimension "A" is measured from the top of the screen
frame to the top of the hanger bracket.
Screen Type:
Dimension "A"
Cinema Contour
3-3/4"
Perm-Wall
4-3/4"
Imager 4-3/4"
Da-Snap
5-1/4"
4. Both wall brackets must be mounted into at least two wall
studs. Two mounting points must be spaced at least 24" away
from each other. Wall studs must be 2 x 4 construction.
Check to make sure both brackets are vertically level with
each other.
5. Drill hole for mounting bracket in to wall. Dimension for hole
is shown from the top bracket to center hole position. It is
recommended to use a 1/4" x 1-1/2" Lag Screw (not supplied)
to fasten bracket to wall.
Multi Format Imager Installation
Figure 20
Figure 19
Mount Locations Must
Be Spaced At Least Three
Holes From One Another.
"A"
1 1/2"