2 dip, Switches, 2 hardware – ADLINK aTCA-N700 User Manual
Page 15: Installation, 1 front blade
aTCA-RN720 User's Guide
15
Step 5: When the chassis was powered up and in operation, during plugging-in the board (Hot
Swap situation), the board starts booting up as soon as the handles is fully closed in Step 4.
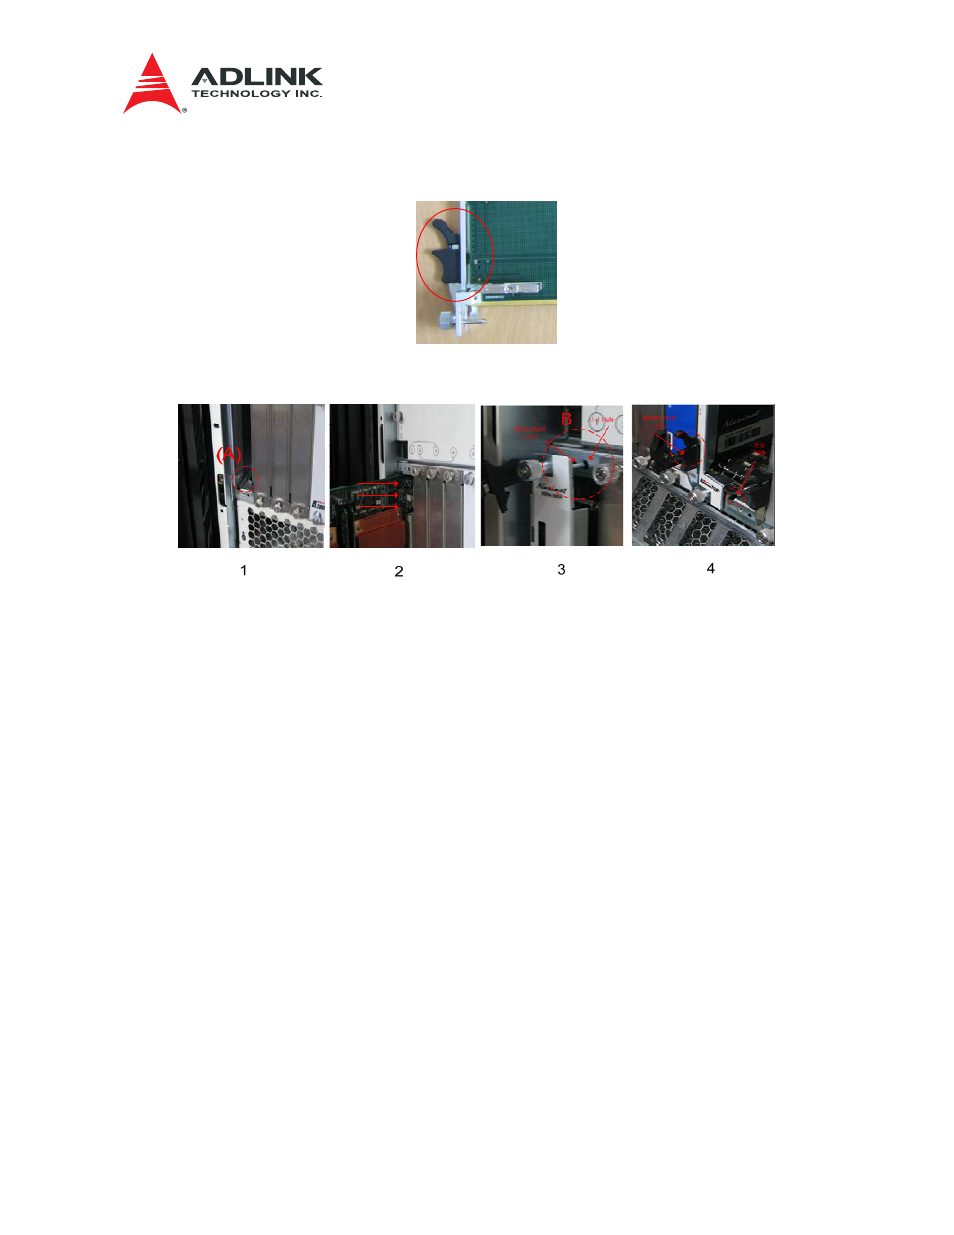
Figure 4-3 Injector (Bottom side)
Figure 4-4 Plugging the Board
Note:
After plugging in the board, make sure that the injector handle is locked into the hole on the faceplate. This will
activate the hot swap switch and the booting will start.
To pull out the main board, follow the steps described in the following:
Step 1: The bottom side injector handle should be slightly pulled out to the front from the hole
without pulling out the board.
Step 2: Once the injector handle is out from the hole, the Hot Swap switch becomes OPEN
Step 3: The Hot Swap LED (or Blue LED) should then start blinking and it will stay ON after
several seconds, which indicates the READY status.
Step 4: At the READY status, completely open the top and the bottom handles and pull out the
board from the chassis.