Installing your balance, Display symbols and key oiserafion – A&D GR Series GR-300 User Manual
Page 10
Attention! The text in this document has been recognized automatically. To view the original document, you can use the "Original mode".
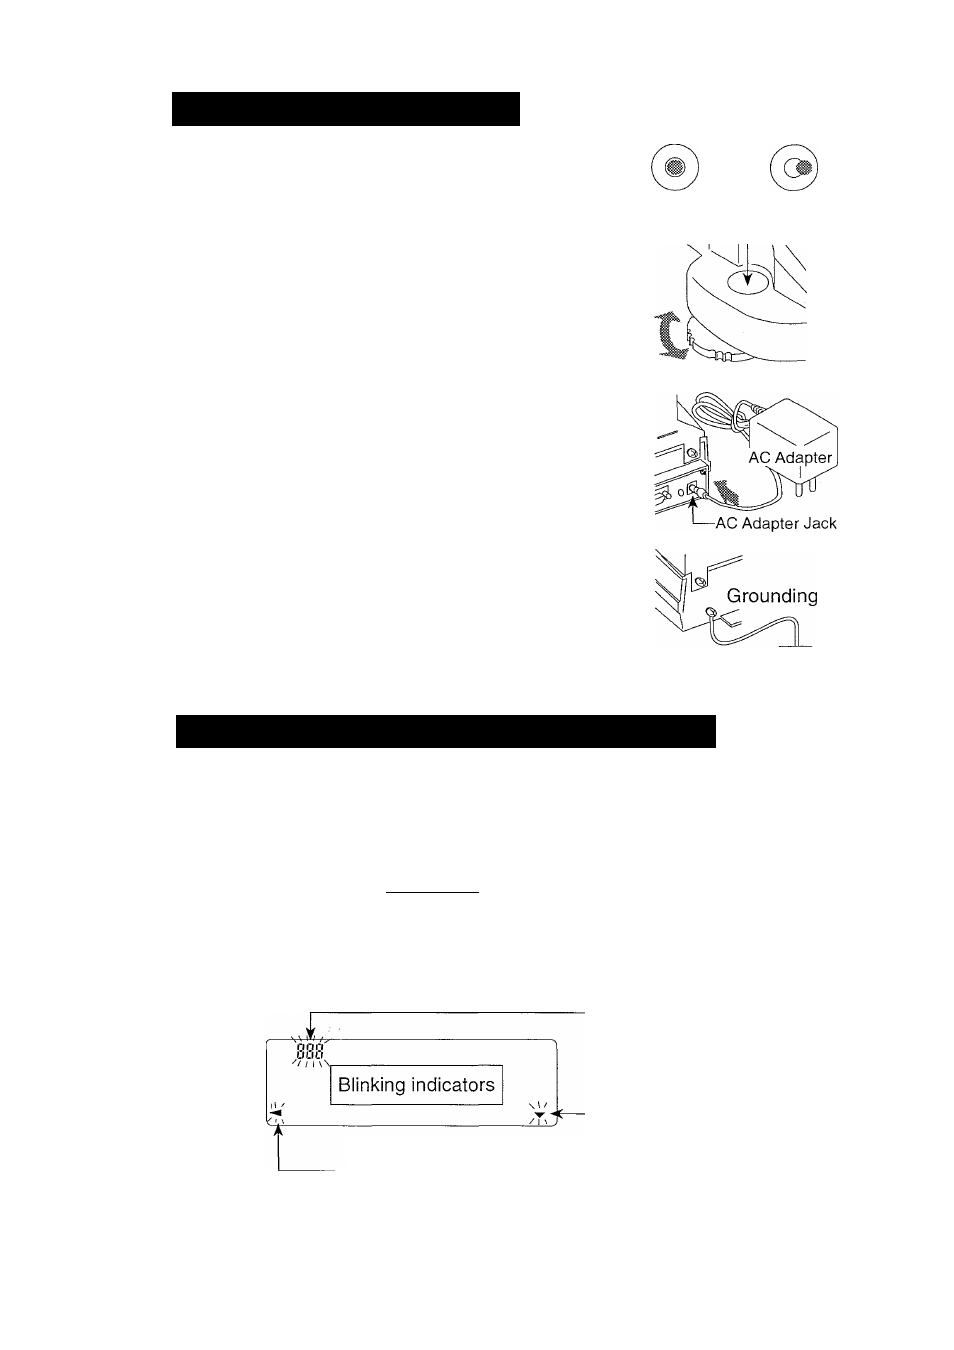
Installing your Balance
Step 1 Consider the section "2. Caution" for installing
your balance. Place the balance on a firm weigh
ing table.
Step 2 Assemble the "Dust Plate", "Breeze Break Ring"
and "Weighing Pan" on your balance. There is a
reference illustration on the previous page.
Step 3 Adjust the level of the balance using the leveling
feet. Ground the balance chassis for discharging
static electricity if you have a static problem.
Step 4 Please confirm that the adaptertype is correct for
your local voltage and power receptacle type.
Step 5 Connect the AC adapter to the balance. Warm up
the balance for at least one hour with nothing on
the weighing pan.
Step 6 Calibrate the balance before use.
(Refer to "7. Calibration")
OK
NG
Bubble Sprirt Level
Leveling Foot
Display Symbols and Key Oiserafion
Processing
indicator
Stabilization
indicator -
Stand-by _
indicator
^ StIS
response
iF^lMiPnfSLW]
r-
>0
Weighing data
or stored data
iDZtpCS t
jniDnig I
•;CtEHfvi
The amount of stored data
with memory data function
Response indicator
Units
Stand-by indicator of
interval memory function
Data number of
displaying data
Active indicator of
interval memory function
A previous notice indicator of automatic self calibration
Basic operation
page 9
3. Unpacking your balance