Bernina 740E User Manual
Page 46
Attention! The text in this document has been recognized automatically. To view the original document, you can use the "Original mode".
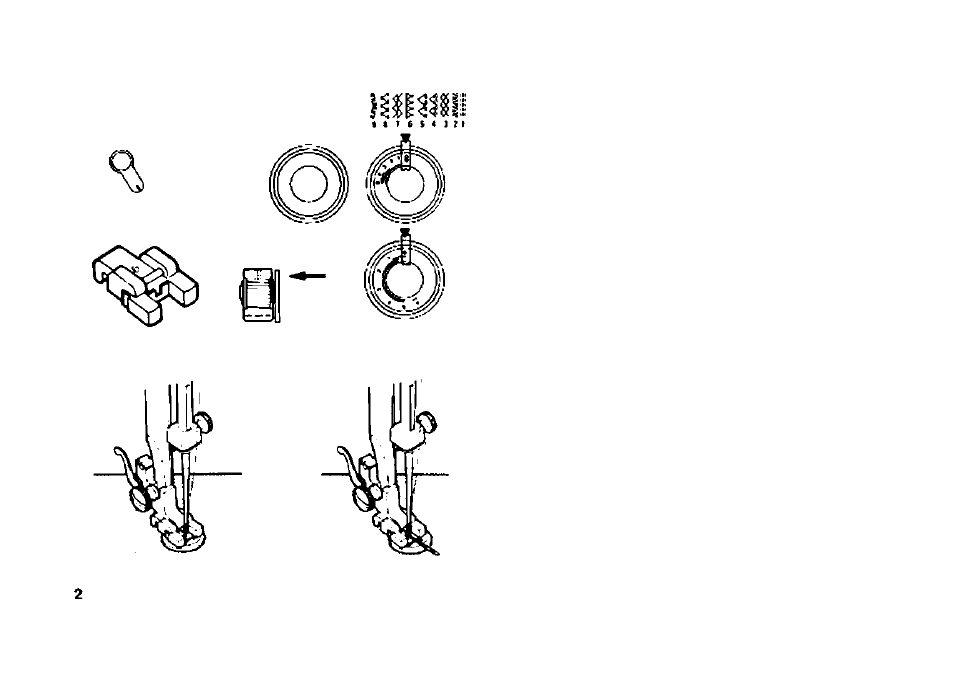
Sewing on buttons
iMooe 740feonty,
O O O O O O O O O C O v * f O *
i u l i
» « ?i » t» a II It 8 u IJ Kti - a-'
y O O I- •• 'i
9 9 9
<33
Set the machine as illustrated. Lower
the feed dog. Needle position righi
Position the worK under the foot.
Place the button on the marked posi
tion. lower the foot, adjust stitch width
to 'O' arid sew a tew securing stit
ches. Adjust the stitch width (rv^rmal-
ly between 3 and 4). Turn the hand-
wheel to check that the needle goes
cleanly into the leM hole ol the button
(adjust the stitch width according to
the button), and sew on the buttort.
Adjust the stitch width to '0* and sew
a tew securing stitches. (2}
If a shank is required, place adarnmg
needle on top ot the button and sew.
(3) For buttons with 4 holes, sew
through the front two holes first (Ftg.
2). push work forward arxf ttien sew
ttuough the back two holes as des
cribed. (3)
84