Bernina 740E User Manual
Page 42
Attention! The text in this document has been recognized automatically. To view the original document, you can use the "Original mode".
Buttonholes
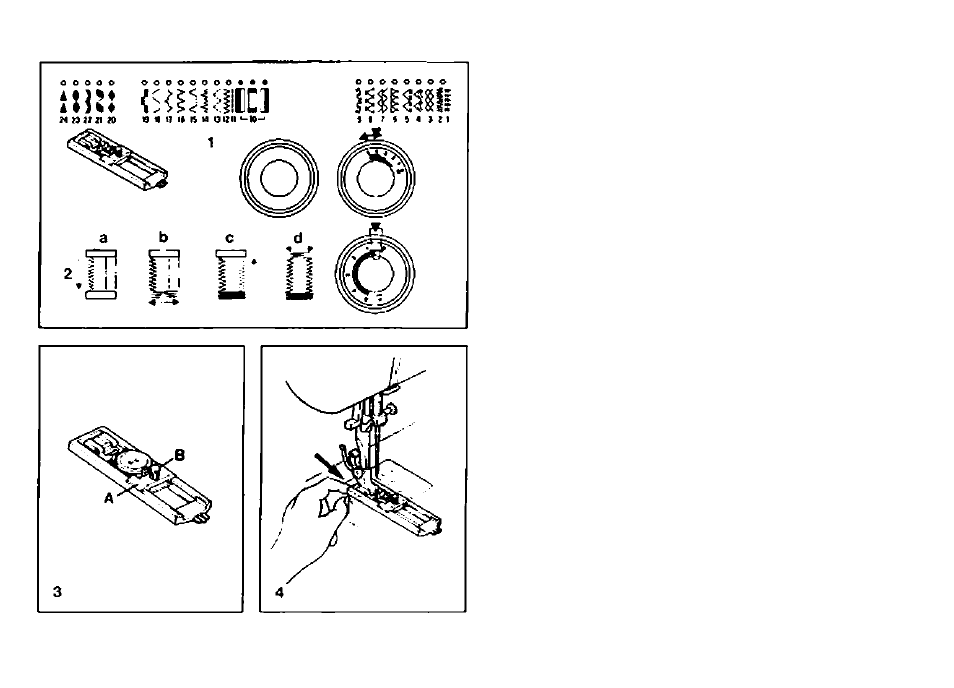
Set the machine as illustrated. (i)
(Adjust the stitch length dial >n the
green marked area for a correct stitch
density - varies according to the fab
ric). Always test sew a buttonhole.
Follow the sequence- (2)
Position the button on the loot as
iDustraied Loosen the large screw
*6" of the part *A" and slide it towards
the button until it lightly touches the
other edge, then re-tighten screw "B*
Remove the button ar>d attach the
Bunonhole foot. The gauge is now
set for sewing perfectly even length
buttonholes. (3)
When starting to sew the buttonhole,
the gauge on the foot should be
pushed fully forwards. (4)
Use the seam ripper and cut button
hole open from both ends towards
the middle.
r - A slightly reduced upper thread tension produces better results. - Use a bacKir>g for fine or stretchy fabrics. - It IS advisable to use gimp cord for stretch or knit fabrics The zig-zag 76
should sew over the gimp.