Ariens 935000 User Manual
Page 8
Attention! The text in this document has been recognized automatically. To view the original document, you can use the "Original mode".
In
order
to
perform
some
maintenance
it
may
be
necessary to remove the mower pan as follows:
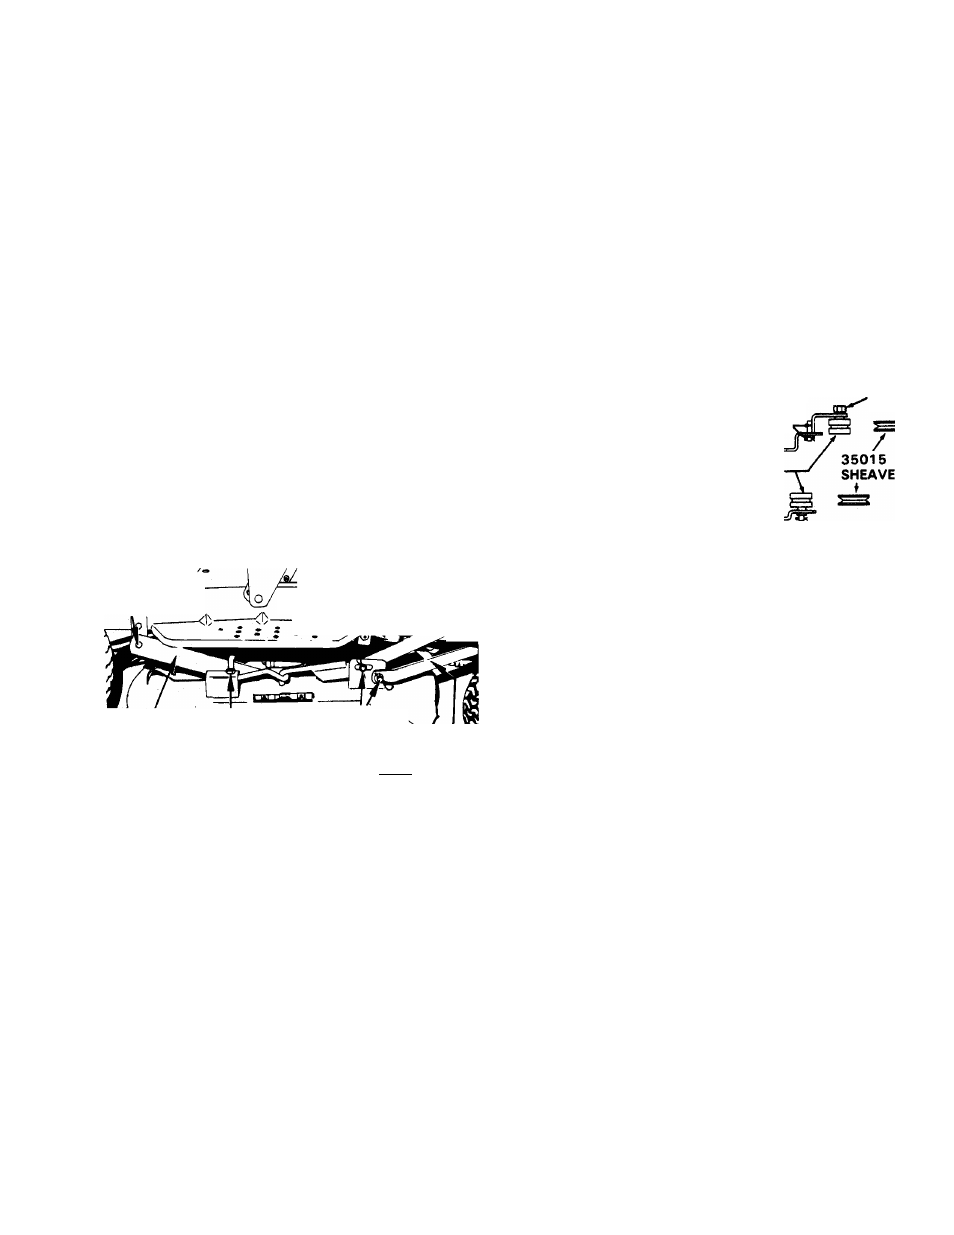
REMOVAL OF MOWER PAN - FIGURES 7 & 9
1.
Lower the mower pan. Remove the hairpin cotter
and washer from the stud on the attachment idler
(Figure 9) and disconnect the mower brake link.
2.
Raise the mower deck. Loosen the belt fingers on
the tractor PTO sheave, slide them to one side,
and remove the mower belt from this sheave. See
Figure 9.
3.
Lower the mower pan and remove the hairpin
cotters and washers. The two pins and washers
on the front secure the mower pan to the front
hangers and can be disconnected to free the front
of the pan. The other two pins and washers join
the front of the pan to the belt tightener bracket.
Loosen the hex nuts and turn the rear hanger
hooks to the side to free them from the rear
hangers. See Figure 7.
4.
Place front hanger on top of rear hanger. Raise the
Attachment Lift Lever to pull the hangers up out
of the way. Pull the mower pan from under the
tractor.
The front and rear hangers may be assembled and
engaged with washers and hairpin cotters.
CLEVIS PIN
FRONT HANGER
REAR BRACKET
HAIR PINS &.
WASHERS BELT*
TIGHTENER
REAR HANGER HOOK'^^^-^ RRAPkPT
FIGURE 7
INSTALLATION OF MOWER PAN - FIGURES 7 & 8
Position the tractor on a smooth, level surface and in
stall the mower pan as follows:
1.
Lower the Attachment Lift LeVer. One front set of
pins and washers will connect the tabs on the
front of the mower pan to the front hangers, the
second set of pins and washers connect the front
of the pan to the belt tightener bracket. The rear
set of pins and washers connect the rear hangers
to the frame.
2.
With the Mower Belt in place on the pan and the
lift arm in its highest position, position the pan
under the tractor and forward against the front
wheels.
3.
Lower the Attachment Lift Lever. Slide the pan
back (while lifting the rear of the pan) so that thé
pan hanger hooks slide up on the rear hanger.
Assemble the front hangers to the tabs on
mower pan, while, at the same time, assemb'
the front and rear hangers. Secure with fo^i
washers and hairpin cotters. Connect the Belt
Tightener Bracket to the pan.
4.
Raise
the
Attachment
Lift
Lever
to
maximum
height. Connect the Mower Belt to the tractor
PTO Sheave.
5.
Connect the blade brake arm to the stud on the
center
of
the
Attachment
Clutch
Idler.
Secure
with a washer and a hairpin cotter.
6.
Adjust the belt fingers on the tractor PTO Sheave
to clear the belt by 1 /8 to 1 /1 6”. Tighten the belt
finger hardware.
INSTALL BLADE BRAKE ARM AS SHOWN
35261 BRACKET
64093 WASHER
67020 HAIRPIN
NUT
32235 (32” MOWER) 73108
IDLER
35248 (38” MOWER)
64093
WASHER
/
67020 HAIRPIN
FIGURE 8
MOWER PAN LEVELING - FIGURES 7, 9 &13
The mower pan is designed to cut evenly with the rear
of the pan 1/8 inch higher than the front. To level the
mower pan proceed as follows:
1.
Position the tractor on a smooth, level surface.
Adjust tire pressure as follows (light loading):
Front - 10 psi / Rear - 6 psi
2.
Measure the distance from surface to mower
blades at the front and rear of the pan. The rear of
blades should be 1/8 inch higher than front and
blades should hang even side to side.
3.
If adjustment is required, turn the hex nuts on the
rear hanger hooks to mo\/e the hooks up or down
to secure the proper adjustment. When the pan is
leveled and hangs evenly, tighten the hex nuts
securely. See Figure 7.
4.
Adjust mower belt for proper center distance. See
Figure 9 and 13. Adjust nuts on the adjustor rod
to move mower pan forward or backward. Adjust
1 to 1
'h
inch clearance between belt as shown in
Figure 13 with mower pan in highest position.
CAUTION: ADJUSTMENT TOO FAR FORWARD W,.^
NOT ALLOW MOWER BELT TO DECLUTCHI CHECK
FOR PROPER MOWER BELT DECLUTCHING IN ALL
HEIGHT POSITIONS. IF MOWER BELT DOES NOT
- 8 -