Engine controls – Troy-Bilt 15009 User Manual
Page 24
Attention! The text in this document has been recognized automatically. To view the original document, you can use the "Original mode".
b.
Use Photo 3-7 to determine which hole in
the swivel plate you should insert the lower
end of the Forward Clutch Rod into. For exam
ple, if you have the handlebar height setting at
position number 1 (on the curved handlebar
height adjustment bracket) insert the lower
end of the Forward Clutch rod into hole num
ber 1 on the swivel plate.
Photo 3-7: Handlebar Height setting and Forward
Clutch positioning.
c.
Insert the lower end of the Forward Clutch
Rod into the proper hole in the swivel plate.
Secure it in place by reinstalling the hairpin
cotter in the inner hole in the Forward Clutch
Rod.
d.
To make sure that the amount of tension
the Forward Clutch Lever applies is correct;
(1) . Stand on the right-hand side of the tiller.
Pull the Forward Clutch Lever up and hold it
in place.
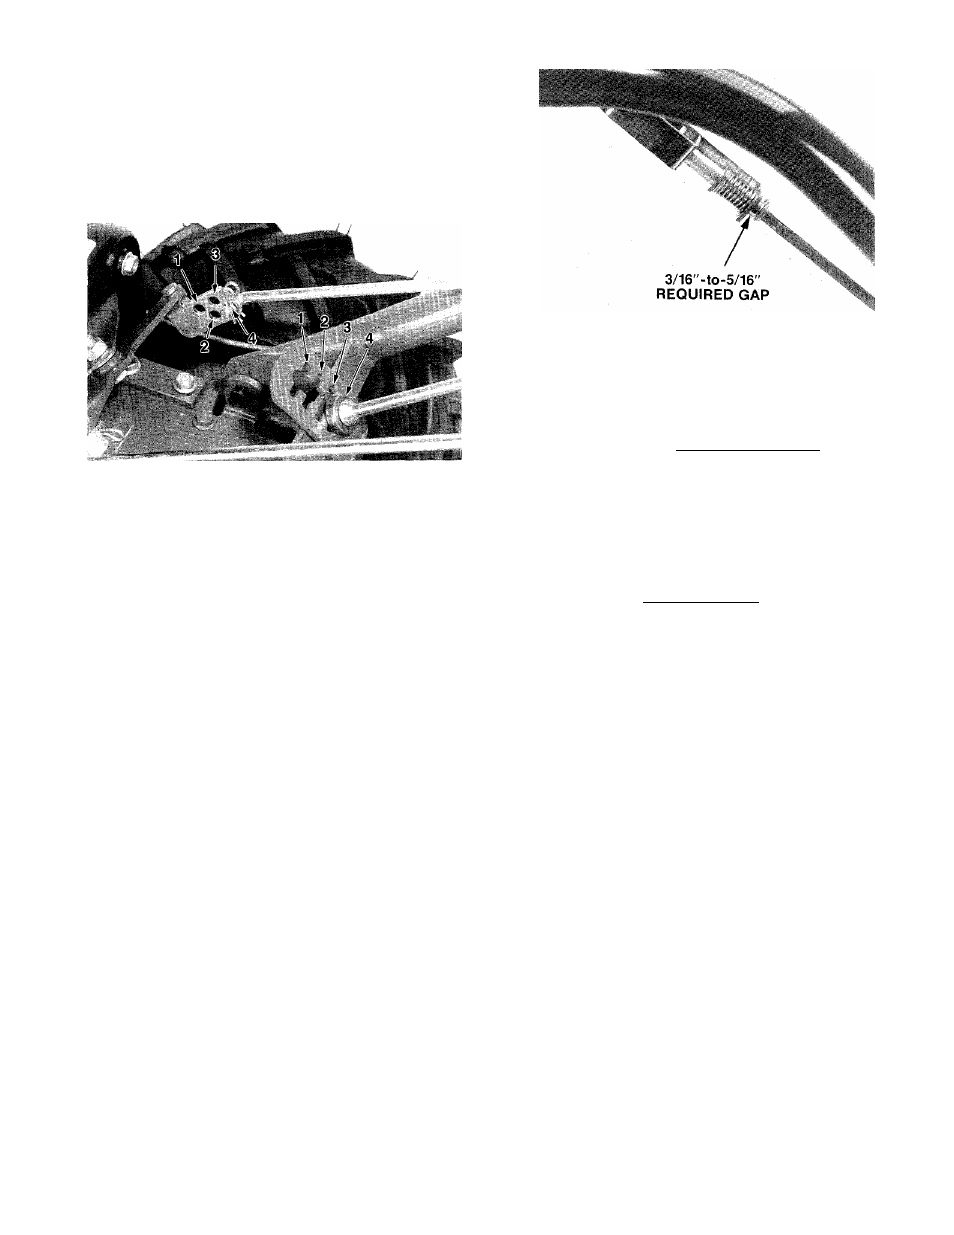
(2) . Check the gap between the E-Ring and
the lower end of the bracket on the Forward
Clutch Lever. The gap should be 3/16" to
5/16". If you do not have a ruler handy, five
pennies are approximately 5/16“ thick.
Refer to Photo 3-8.
e.
If you are unable to get the 3/16" to 5/16"
gap, you’ll have to readjust the Forward Clutch
Rod as follows:
(1). Pull the Forward Clutch Lever up and
hold it in place.
Photo 3-8: Measuring the gap between the Forward
Clutch Bracket and the E-Ring.
If the gap is greater than 5/16". you’ll
have to release the Forward Clutch Lever,
remove the hairpin cotter from the inner
hole in the lower end of the Forward Clutch
Rod, move the Forward Clutch Rod away
from the swivel plate, and turn the rod coun
terclockwise (as viewed from the front of the
tiller) to decrease the gap.
If the gap is less than 3/16". you’ll have to
release the Forward Clutch Lever, remove
the hairpin cotter from the inner hole in the
lower end of the Forward Clutch Rod, move
the Forward Clutch Rod away from the
swivel plate, and turn the rod clockwise (as
viewed from the front of the tiller) to in
crease the gap.
f.
After getting the correct gap, make sure that
you return the Forward Clutch Rod to the right
hole in the swivel plate, then reinstall the hair
pin cotter in the inner hole in the lower end of
the Forward Clutch Rod.
ENGINE CONTROLS
Please read the following information about engine controls and operation. You should also read the
Engine Owner’s Manual that you received in your literature package.
Starting
Your
Engine—Recoil
Start
and
Electric Start Models
1. Check to make sure that the spark plug wire is
securely attached to the spark plug.
2. Make sure that the Wheel Gear Lever is in
“ENGAGE” on Econo-Horse and Pony Models.
On Junior Models, there is no Wheel Gear Lever,
but the Wheel Drive Pins should be through the
wheel hubs and wheel shaft holes in “ENGAGE.”
3. Move the Depth Regulator Lever all the way
DOWN so the tines are in the “travel” position
(they should clear the ground by about V'^").
22