Step 13: installing the battery vent tube, Awarning, Warning – Troy-Bilt 15009 User Manual
Page 19
Attention! The text in this document has been recognized automatically. To view the original document, you can use the "Original mode".
4. Use a 3/8" wrench to check the tightness of
the upper mounting bolt on the starter solenoid.
This bolt secures the Negative Cable to its
ground location. Scrape away any paint between
the cable and the bolt as this would prevent a
proper electrical ground.See Photo 2-27.
Photo 2-27: The Negative Battery Cable must be se
curely grounded to the Upper Mounting Bolt on the
Solenoid.
STEP 13: INSTALLING THE
BATTERY VENT TUBE
1. Push the battery vent tube down into the vent
tube sheath. Attach the upper end of the vent
tube to the side vent on right side of battery.
A
warning
Be sure that the vent tube does not become
kinked, folded, or pinched when you install it.
Improper venting could cause the battery to
explode, resulting in personal injury or prop
erty damage.
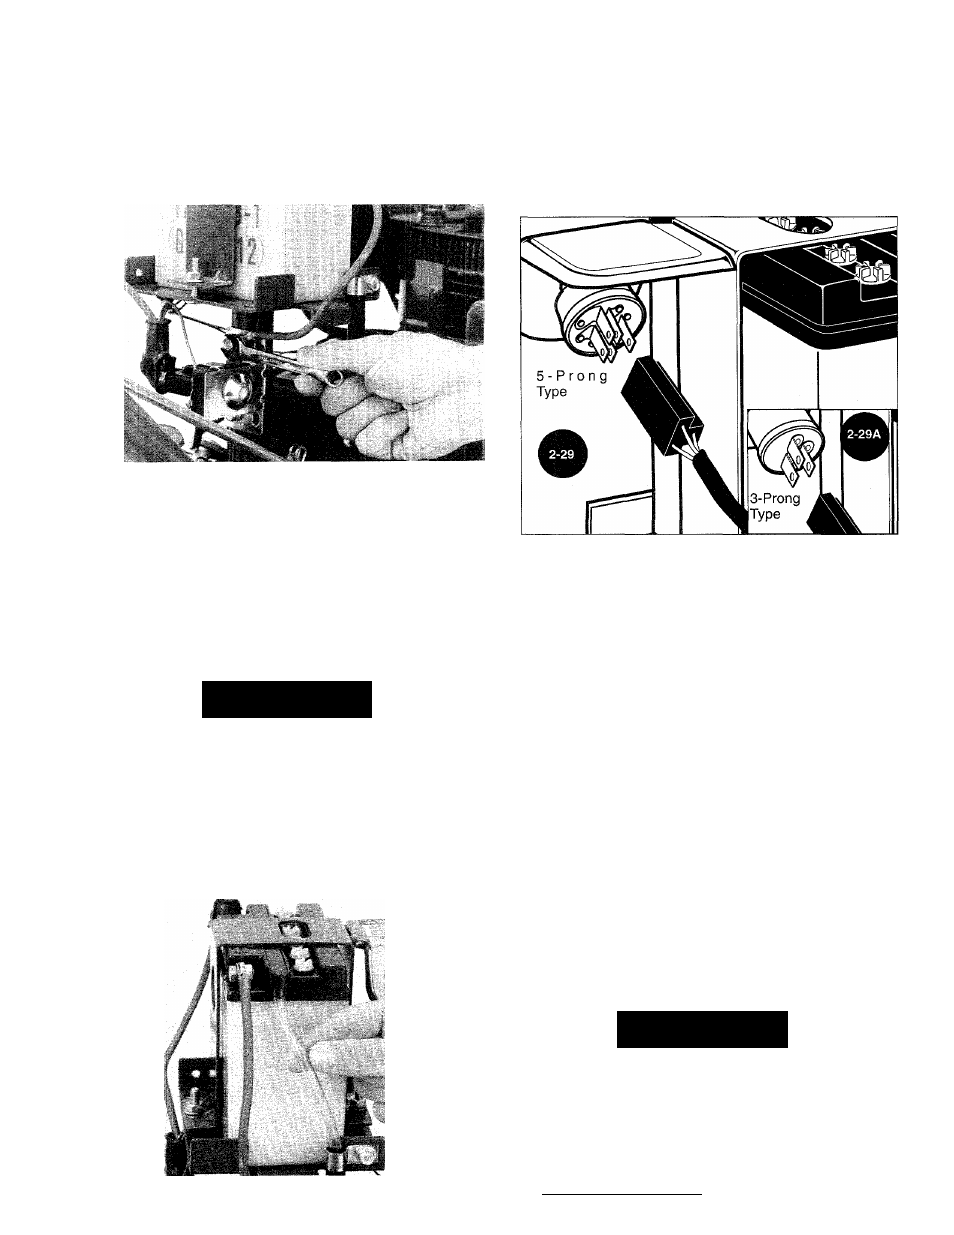
STEP 14: CONNECT WIRING HAR
NESS TO IGNITION KEYSWITCH
Slide the wiring harness connector over the
prongs on the back of the Ignition Keyswitch,
Your keyswitch has either a 3-prong or 5-prong
design. See Sketch 2-29 or 2-29A.
Sketch 2-29: Connect the Wiring Harness to the
Ignition Keyswitch. The 5-prong design is shown.
Inset Sketch 2-29A—shows the 3-prong type which
you may have instead of the 5-prong type.
You’re now finished assembling the electric
start PONY® Model tiller.
Before you add gasoline to the gas tank and
begin to operate the tiller, please read the rest of
this Owner/Operator Manual so that you become
familiar with the location of, and the operation of,
the various tiller and engine controls.
Without starting your tiller’s engine, operate
the tiller controls so that you understand what
each one does. After you’ve done this, move the
tiller to a safe, level area to practice starting the
engine and maneuvering the tiller without actu
ally tilling. Make sure that the depth regulator
lever is in the “travel” position (one of the higher
notches) while you’re becoming familiar with
your new tilier.
Take this Manual along for ready reference
while you’re practicing in case you have any
questions about operating your tiller.
A
warning
Photo 2-28: Installing the Battery Vent Tube.
To avoid serious personal injury or damage
to equipment, do not attempt to operate the
tiller or its engine until after you’ve read and
understood all of the Safety, Controls, and
Operating Instructions in this Manual, in the
Engine Owner’s Manual, and in other litera-
ture you may receive._____________________
17