Awarning, Warning – Troy-Bilt 15009 User Manual
Page 23
Attention! The text in this document has been recognized automatically. To view the original document, you can use the "Original mode".
Depth Regulator
The lever at the rear of the tine hood is the
Depth Regulator Lever. Pulling back on this lever
and moving it either up or down allows you to
control the depth of tine penetration in the soil.
When you move the Depth Regulator Lever all
the way down (engaging the highest notch on
the depth regulator), you put the tiller in the
“travel” position. This position allows you to
move the tiller without damage to your lawn by
allowing the tines to clear the ground by approxi
mately 1-1/2 inches.
When you move the Depth Regulator Lever all
the way up (engaging the lowest notch on the
depth regulator), you get the deepest tilling
depth (approximately six to eight inches, de
pending on soil conditions).
You should begin tilling at one of the shal
lower Depth Regulator Lever settings and
gradually increase the tilling depth and not
attempt to till too deeply too soon.
A
warning
To avoid injury, always place the Depth
Regulator Lever in the TRAVEL position be
fore starting the engine. This position pre
vents the tines from touching the ground
until you are ready to begin tilling.
...' i.i
t
'.P
■
а - о ' ' ' f ■ i f :
.f'r’-'r'-' ■ ■; '
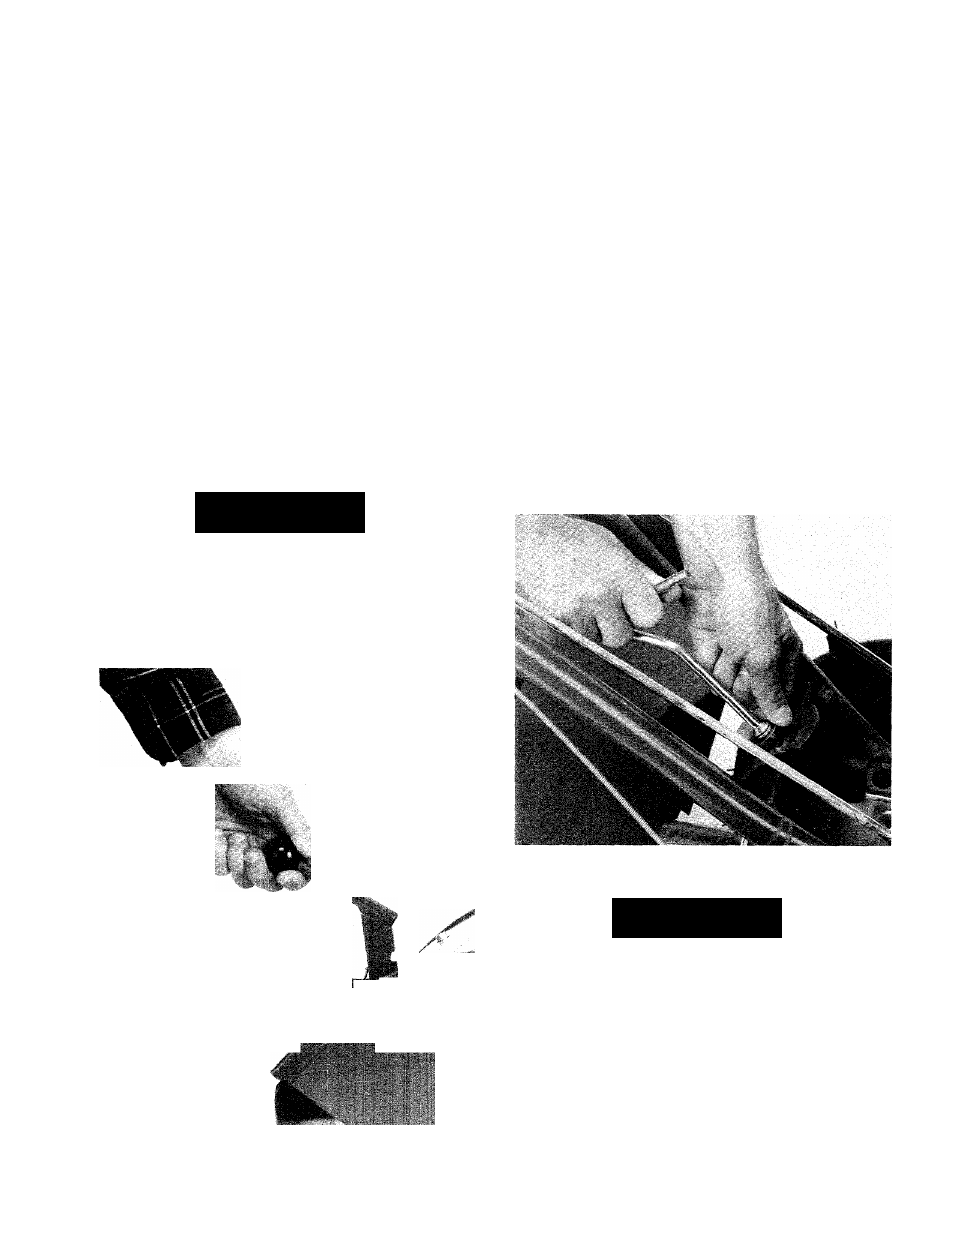
Handlebar Height Adjustment
To adjust the handlebar height:
1. Loosen both bolts at the bottom of the handlebar.
2. Loosen the handlebar height adjustment han
dle until the keys on the bottom of the keyed
washer can clear the slots in the curved handle
bar height adjustment bracket.
3. Move the handlebar up or down to the height
you desire. Align the hole in the handlebar cross
brace with one of the four slots In the curved
handlebar height adjustment bracket.
4. Align the keys on the bottom of the keyed
washer with the slot in the curved handlebar
height adjustment bracket. Screw the handlebar
height adjustment handle into the hole in the
handlebar crossbrace. Tighten it securely.
5. Retighten both bolts at bottom of handlebar.
6. Readjust the Forward Clutch mechanism by
performing the following steps:
a.
Remove the inner hairpin cotter from the
lower end of the Forward Clutch Rod.
Photo 3-6: Adjusting the Handlebar height.
A
warning
Photo 3-5: The Depth Regulator Lever.
• When you change the handlebar height,
you MUST readjust the Forward Clutch
mechanism.
•
When adjusting or checking Forward
Clutch mechanism, shut engine off, discon
nect spark plug wire and prevent it from
touching the spark plug.
Failure to do this could allow the Forward
Clutch mechanism to operate improperly,
which could result in personal injury or
property damage.
21