SINGER 301 User Manual
Page 8
Attention! The text in this document has been recognized automatically. To view the original document, you can use the "Original mode".
15
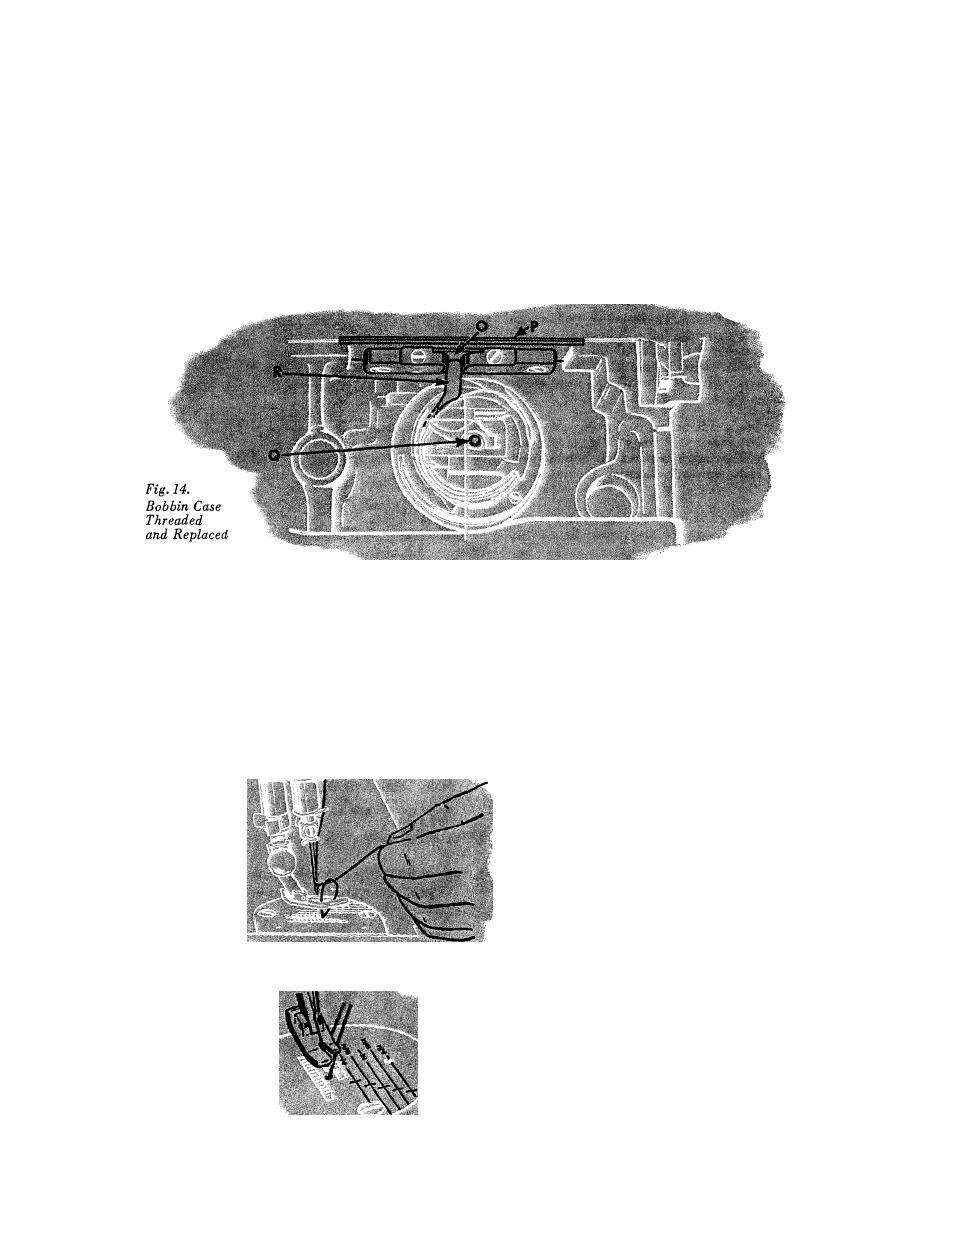
T O R E P L A C E B O B B I N C A S E
Hold bobbin case by latch and place it on stud
Q, having thread draw from top of bobbin
case.
Release latch and press bobbin case back until
latch enters groove in stud. Allow about three
inches of thread to hang free from bobbin case
and turn down bed extension.
CAUTION:
If throat plate P is removed for cleaning stitch
forming mechanism, etc., make certain,
when replacing throat plate, that position
finger R, Fig. 14 of bobbin case base enters
notch O, Fig. 14 of position plate attached
to underside of throat plate.
16
Fig. 15, Drawing Up Bobbin Thread
Fig. 16. Threads in Position to Start Seiving
T O P R E P A R E F O R S E W I N O
Hold end of needle thread with left hand and
turn hand wheel over toward you until needle
goes down and up again and thread take-up
lever S, Fig. 17 is at its highest point. Pull
up needle thread and bobbin thread will come
with it, as shown in Fig. 15.
Lay both threads back under the presser foot,
diagonally across the feed, as shown in Fig.
16, to the right or left, depending upon which
side of the needle the material is to be located,
so that when the presser foot is lowered, the
threads will be firmly held between the feed
and the presser foot.
NOTE: On the throat plate, there are distinct
markings to guide the edges of seams and
hems. These markings are at 1/8" intervals
from 1/4" to 3/4" in distance from the right
of the needle, and assist in guiding the fabric
uniformly. The crosslines on the throat plate
indicate the point at which to pivot on the
needle when turning square corners.