Handle for carrying machine, To replace machine in cabinet, Light – SINGER 301 User Manual
Page 4
Attention! The text in this document has been recognized automatically. To view the original document, you can use the "Original mode".
H A N D L E F O R C A R R Y I N G M A C H I N E
To use handle C, turn it up, as shown in Fig.
3, When not in use, turn handle down.
CAUTION: When you have finished your
sewing, always disconnect plug from electrical
outlet.
T O R E P L A C E M A C H I N E I N C A B I N E T
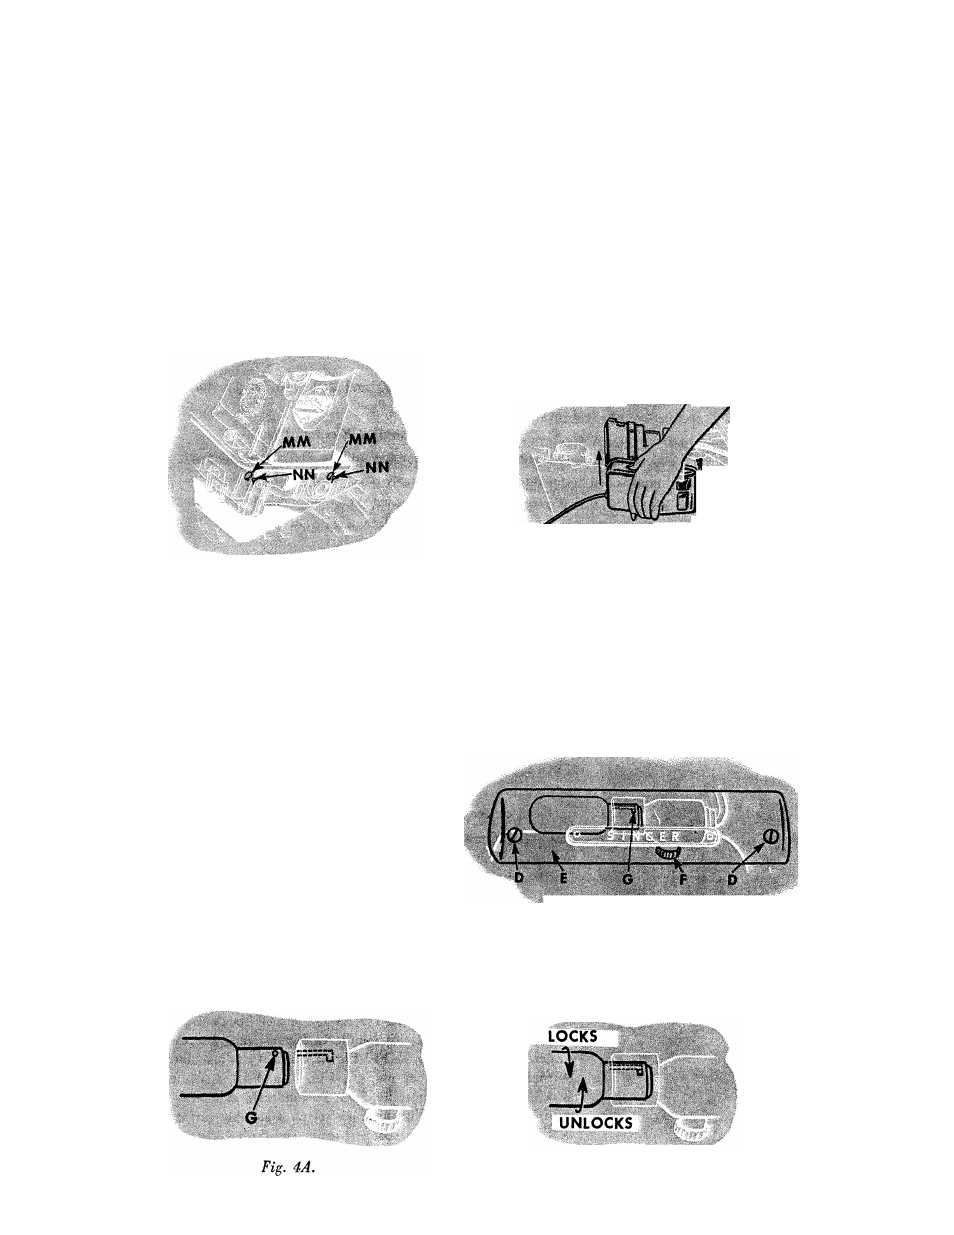
Disconnect both terminal plugs. Grasping han
dle C, Fig. 3, place machine in cabinet so
that holes MM, Fig. 3A, fit over studs NN in
machine cradle. Press down on left end of ma
chine until latch FF, Fig. 2, snaps into posi
tion to hold machine in place. Tilt back ma-
Fig. 3. Showing Handle for Carrying Machine
chine with cradle, install controller in side of
cabinet as shown in Fig. 3B, then connect
2-pin terminal. Lower machine to sewing posi
tion and connect 3-pin terminal.
Fig. 3A.To Replace Machine in Cabinet
Fig. SB. Replacing Controller in Cabinet
L I G H T
The Light is turned, “on” or “off” by the
switch F, Fig. 4.
To Remove Bulb. Remove two screws D and
lamp cover E. Do not attempt to unscrew bulb.
Press it into socket and at same time turn bulb
over in direction shown in Fig. 4B to unlock
bulb pin G, then withdraw bulb.
To Replace Bulb. Press new bulb into socket
with bulb pin G, Fig. 4A entering slo jf
socket and turn it over in direction show in
Fig. 4B to lock bulb pin G in position. Replace
lamp cover E and securely fasten it in position
with two screws D.
Fig. 4. Replacing the Bulb
Fig. 4B.