To regulate letigth of stitch, To regulate direction of feed, To regulate pressure on presser foot – SINGER 301 User Manual
Page 10: Thread tensions
Attention! The text in this document has been recognized automatically. To view the original document, you can use the "Original mode".
19
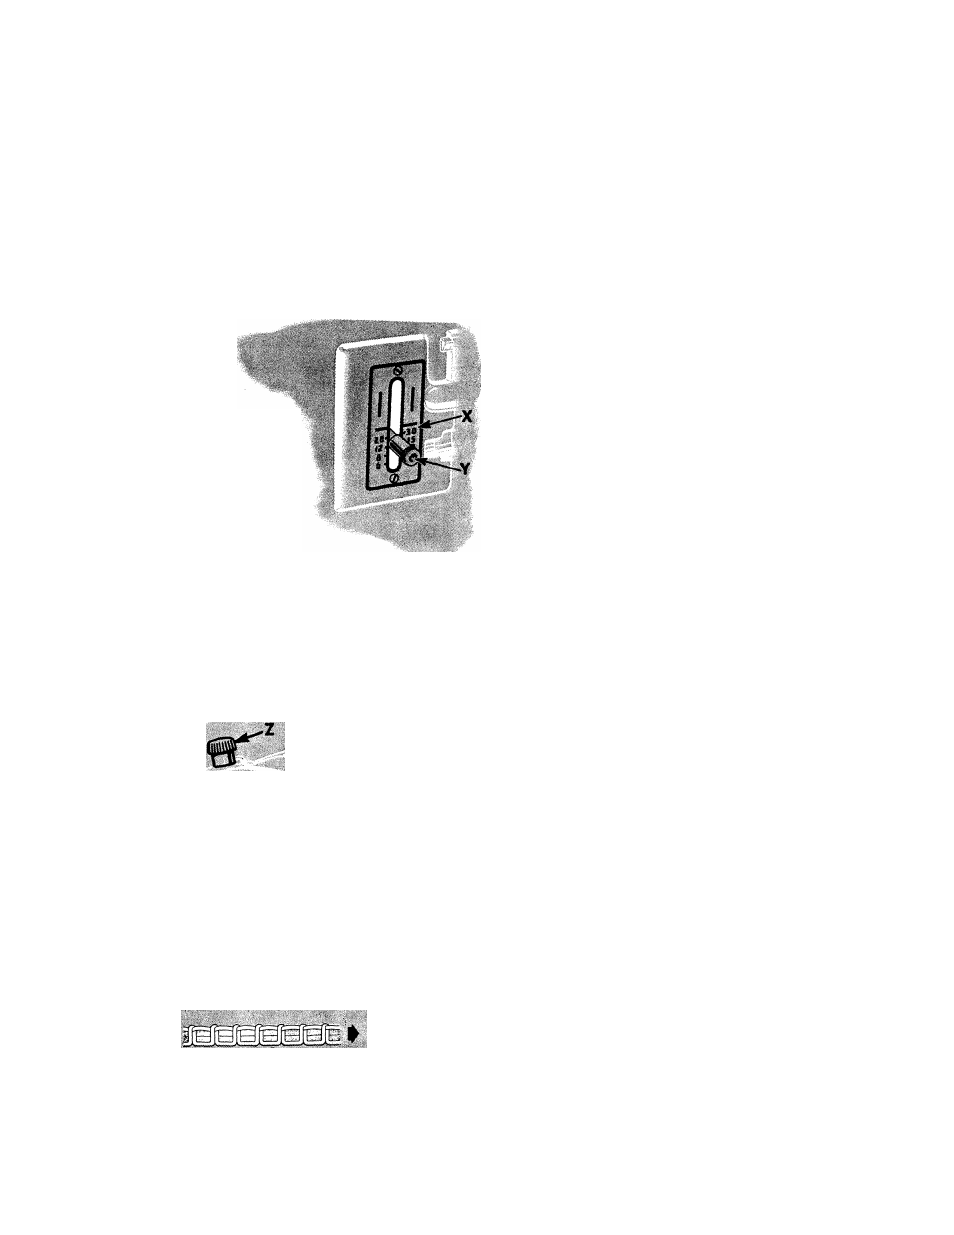
T O R E G U L A T E L E t I G T H O F S T I T C H
The machine is adjustable to make from 6 to
30 stitches per inch, as indicated by numerals
on stitch indicator plate X.
To change length of stitch, turn thumb screw
on stitch regulator lever Y, away from the
stitch indicator plate X, as far as necessary.
Then move the stitch regulator lever until it
is in line with the desired number of stitches
Fig. 18.
Showing Lever for
Regulating Length
of Stitch and
Reversing Direction
of Feed
to the inch and turn the thumb screw inward
only until it touches the stitch indicator plate.
The machine will now make the indicated num
ber of stitches to the inch in either a forward
or reverse direction, depending on whether the
lever Y is at its lowest or highest position.
T O R E G U L A T E D I R E C T I O N O F F E E D
To feed the material from you, push down
the stitch regulator lever Y, as far as it will go.
To feed the material toward you, raise the
stitch regulator lever Y, as high as it will go.
The direction of feed can be reversed at any
point of a seam without removing work from
machine.
The reverse feed makes it easy to “back stitch”
and to fasten ends of seams.
20
Fig. 19. Thumb Screw for Regulating
Pressure on Presser Foot
i Fig. 20. Perfect Stitching
sfig. 21. Imperfect Stitching
Fig. 22. Imperfect Stitching
T O R E G U L A T E P R E S S U R E O N P R E S S E R F O O T
For average materials, the pressure of the presser foot seldom
requires changing. Heavy materials require more pressure than
lightweight fabrics. The pressure should be only heavy enough
to prevent side creeping of material and still obtain a uniform
length of stitch. To increase pressure, turn thumb screw Z clock
wise or downward. To lighten pressure, turn thumb screw so
that it screws upward.
T H R E A D T E N S I O N S
For perfect stitching, the tension on needle and bobbin threads
must be heavy enough to pull threads to center of thickness of
material and make a firm stitch, as shown in Fig. 20.
Needle Thread lies straight along top side of material, caused
by too heavy tension on needle thread or too light tension on
bobbin thread, as shown in Fig. 21.
Bobbin Thread lies straight along underside of material, caused
by too light tension on needle thread or too heavy tension on
bobbin thread, as shown in Fig. 22.