To thread bobbin case – SINGER 301 User Manual
Page 7
Attention! The text in this document has been recognized automatically. To view the original document, you can use the "Original mode".
Allow tension discs to control flow of thread
so that it winds on bobbin in uniform, level
rows.
The bobbin winder will stop automatically
when the bobbin is filled.
^
Remove bobbin from spindle and return bob'
bin winder to its recessed position. Tighten
knurled screw M,
If bobbin does not wind evenly, loosen screw
which holds tension bracket 2 in position and
move bracket to the left if bobbin winds high
on the right; move bracket to the right if
bobbin winds high on the left. When bracket
is properly centered, thread will wind evenly
across bobbin.
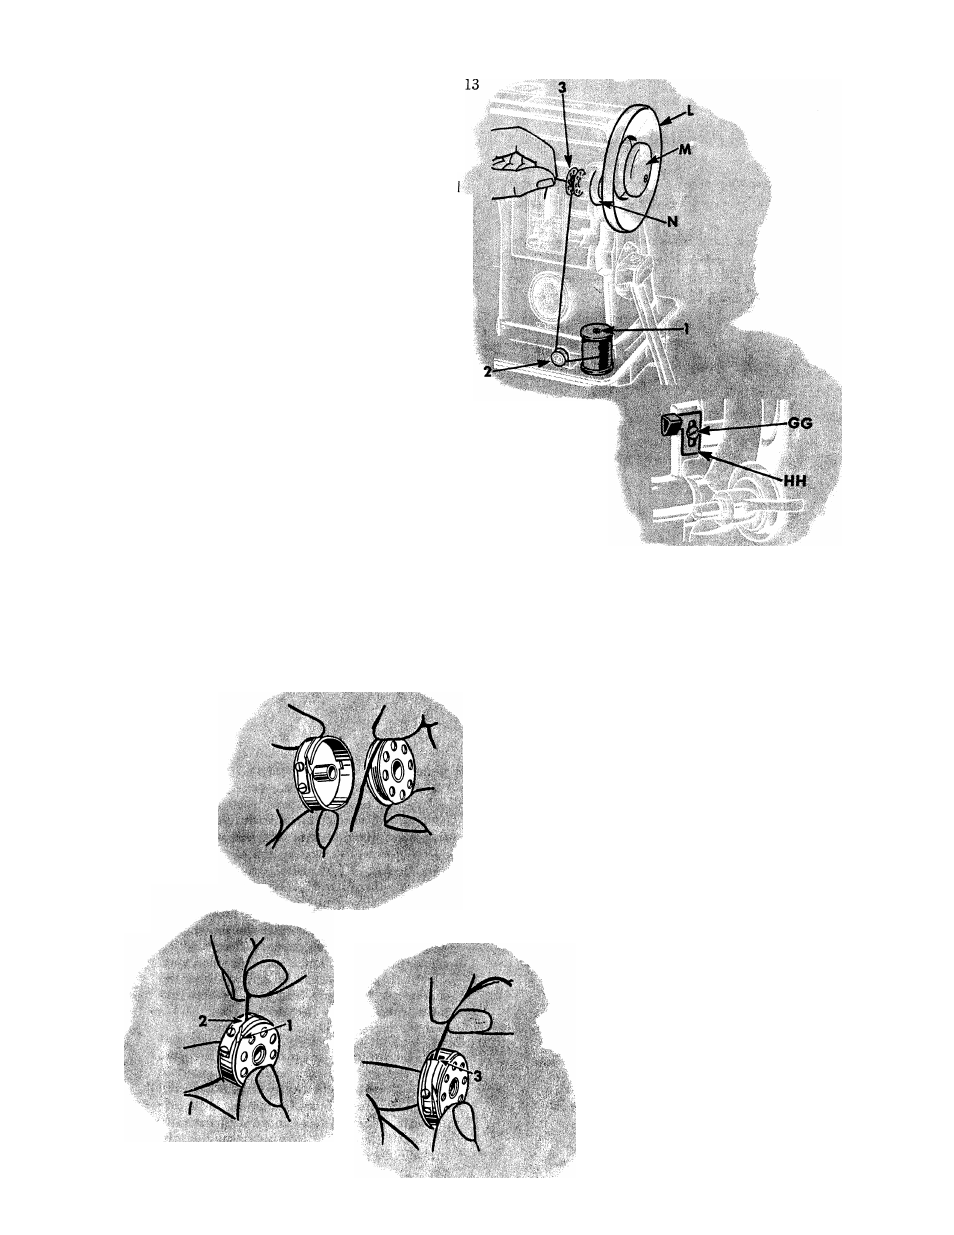
If bobbin winds too fully, loosen screw GG,
Fig. 10 and move plate HH, downward,
slightly. To wind more thread on bobbin, move
plate HH, upward, slightly. Tighten screw
GG.
Bobbin can be wound while machine is sewing.
Fig, 9.
Winding the Bobbin
Fig, 10,
Adjustment for
Regulating
Amount of Thread
Wound on Bobbin
Fig.11
14
Fig. 12
Fig. 13
T O T H R E A D B O B B I N C A S E
Hold bobbin so that thread will unwind in
direction shown in Fig. 11.
Hold bobbin case as shown in Fig. 11, and
place bobbin into it.
Pull thread into slot 1, under
tension spring 2 and into slot
3 at end of spring. Allow
about three inches of thread to
hang free from bobbin case.