Satin stitching, Purchase – SINGER 717 Scholastic User Manual
Page 25
Attention! The text in this document has been recognized automatically. To view the original document, you can use the "Original mode".
satin stitching
Satin stitching, a series of cioseiy spaced zig
zag stitches that form a smooth, satin-like sur
face, is used for both practical and decorative
work, it is suitable for bar tacks when closed
up to form a satin stitch.
When you wish to produce a satin stitch, make
a test sample first so that you can adjust the
stitch length and thread tension properly. Soft
fabric may require a backing to ensure firm
satin stitching. Crisp lawn or organdy is suit
able for this purpose.
ACCESSORIES AND DIAL SETTiNGS
♦ Needle Position: A
Stitch Width: 2 to 5
♦ Stitch Control: in FINE area
♦ Zig-Zag Throat Plate
« Zig-Zag Foot or
Special Purpose Foot (see note)
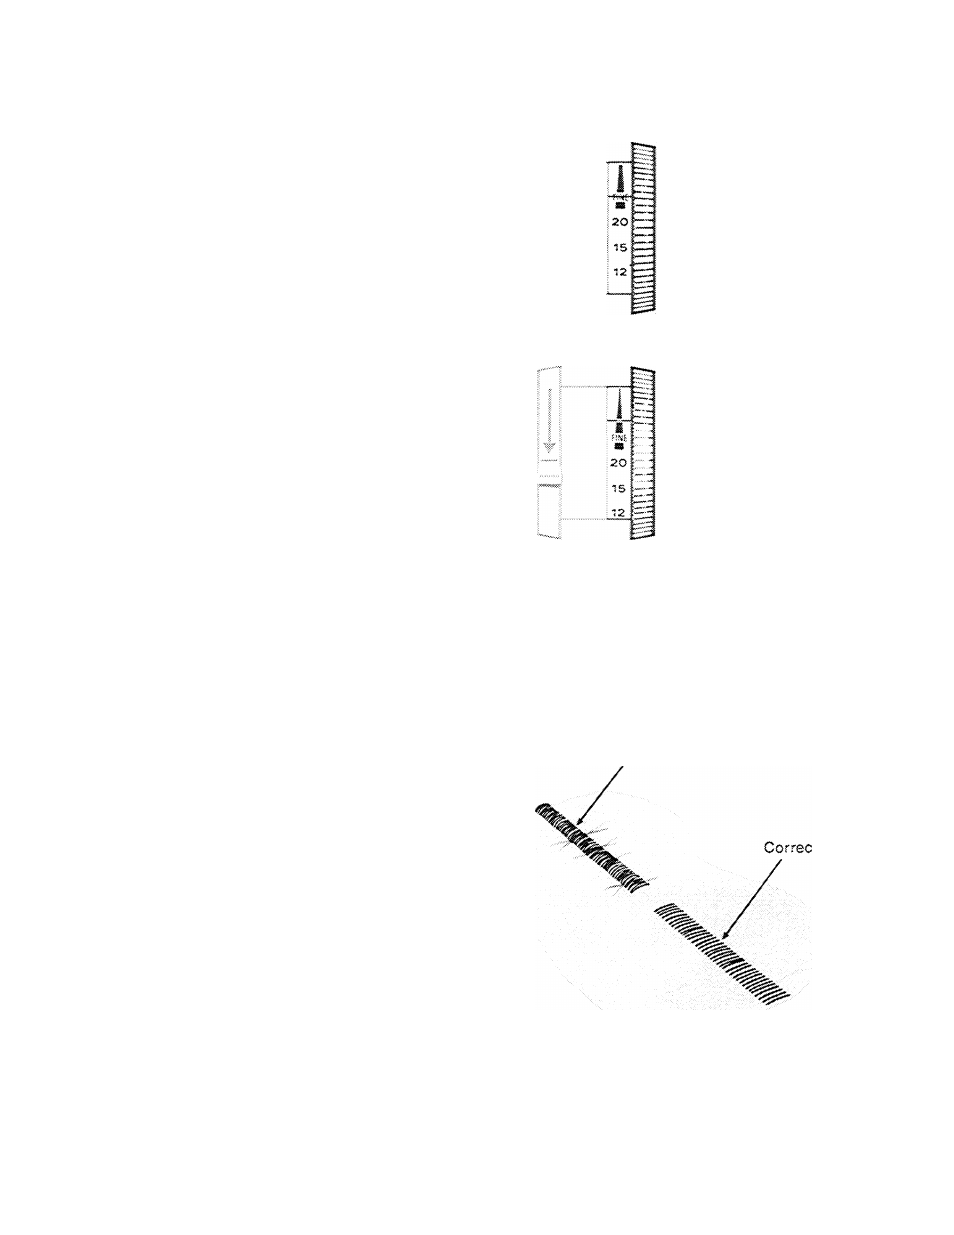
Stitch Control in FINE Area
As the Dial 1$ Rotated, Stitches Close Up
Adjusting Stitch Length
1. Set stitch control dial at bottom of FINE
area,
2. Run machine at SLOW speed.
3. GraduaHy turn dial downward until stitches
are closely spaced and form a smooth sur
face.
AcJfysting Thread Tension
Satin stitching requires less tension than
straight stitching or open zig-zag stitching,
furthermore, the wider the stitch, the lighter
the tension on the thread must be. Notice the
stitching on your sample, lithe fabric is puck
ered, lower the needle-thread tension by turn-
in c the tension dial to a lower number.
Incorrect
NOTE: For best results in satin stitching, the spe
cial purpose foot is recommended (available for
purchase,
see page 43),
Adjusting Thread Tension
23