SINGER 717 Scholastic User Manual
Page 24
Attention! The text in this document has been recognized automatically. To view the original document, you can use the "Original mode".
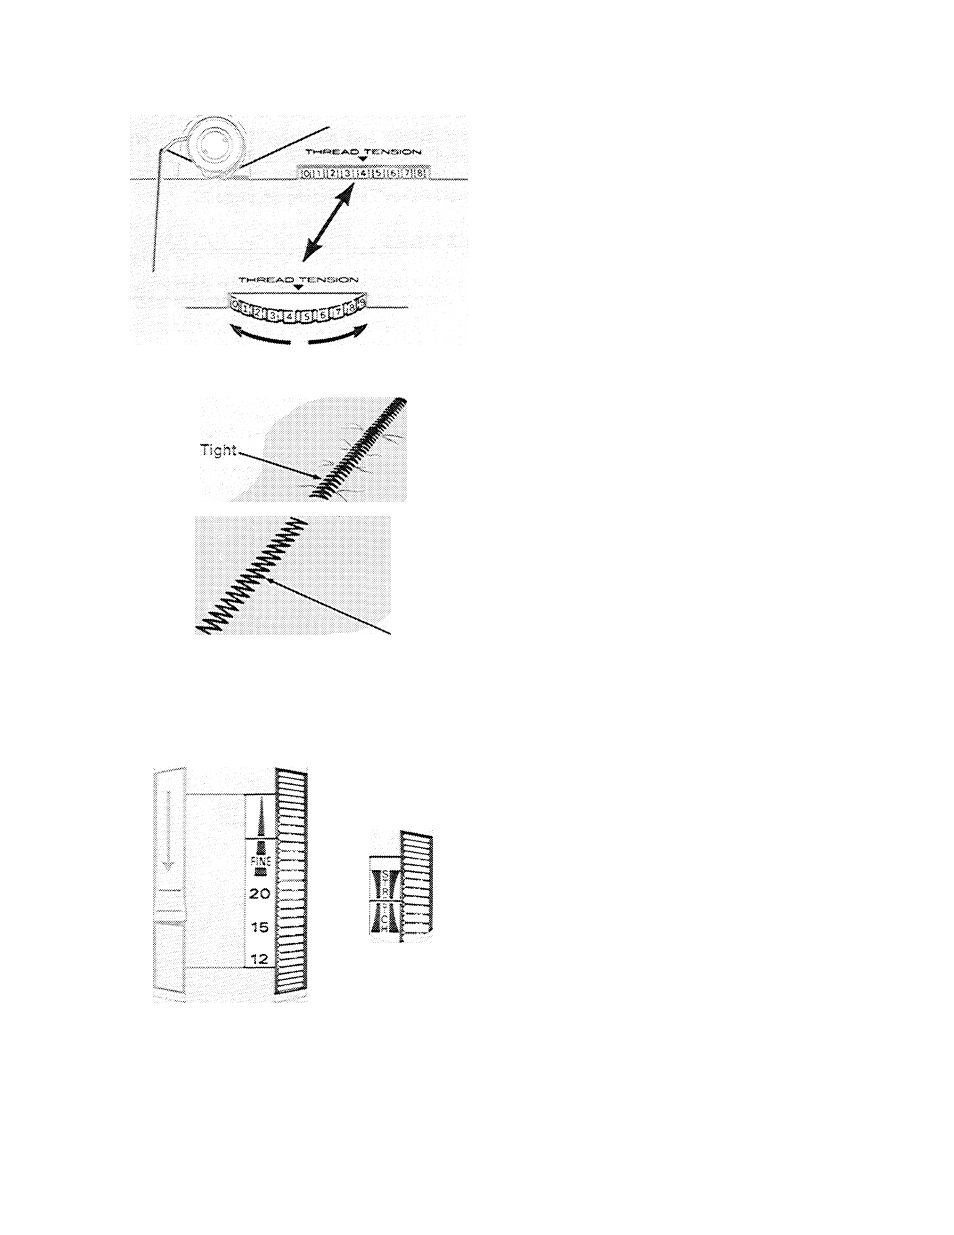
ADJUSTING NEEDLE*.THfiEAD TENSION
Zig-zag stitching requires less needle-thread
tension than straight stitching. Make a test
sample with the fabric and thread you plan to
use so that you can adjust the tension properly.
The stitches should lie flat against the fabric
without causing the fabric to pucker.
If stitches are not flat and the fabric is puck
ered, lower the needle-^rea^i tension by turn
ing the dial to a lower number.
Adjusting Needle-Thread Tension
ADJUSTING STITCH CONTROL
Any stitch control setting from 6 to 20 will give
you an open zig-zag stitch. The lower the num
ber, the more open, or farther apart, your
stitches will be. The symbol on the dial above
20 designates the FINE stitch area and is used
for adjusting zig-zag satin stitching (see next
, page for specific instructions).
For zig-zag stretch stitching (Ric-Bac pattern),
continue turning stitch control dial downward
until the symbol STBETCH appears under the
red line.
ADJUSTING PRESSURE AND
CHOOSING ACCESSORIES
Turn to page 15 under ^^STRAIGHT STITCH
ING” for Instructions on adjusting pressure.
The zig-zag throat plate and zig-zag foot must
be used for all zig-zag stitching.
Stitch Control Dial
22