Adjusting dials, Zig-zag, Mmstiub – SINGER 717 Scholastic User Manual
Page 23: Right, Adjusting
Attention! The text in this document has been recognized automatically. To view the original document, you can use the "Original mode".
The
zig-zag
stitches oulit into your sewing ma~
chine inciude the piain zig-zag pattern and the
open,
reinforced
zig-zag
(Ric-Bac)
pattern.
Piai settings for obtaining these patterns are
shown below and on page 22. You wih find
instructions
for
practical
uses
of
these
pat
terns in the section called ^‘Sewing the Pro-
fessionaJ Way'" beginning on page 27.
ZIG-^ZAG STITCH PATTERNS
Plain Zig-Zag Stilcli: — used for buttonholes, button sewing, bar tacks, mending,
joining and
reMorcmg.
It is especiaiiy useful for flexible seams In knit and
stretch fabrics.
Jip Ric-Rac Stitclit — this open, reinforced zig-zag stitch Is used for heavy-duty
^ stretch sewing and decorative work.
tTrsi$
rs designed for stmrigth end регггг^пепсе and cannot do foadUy rioood out witnoat risk of fabric damage.
adjusting dials
mmsTiuB
stitch
width
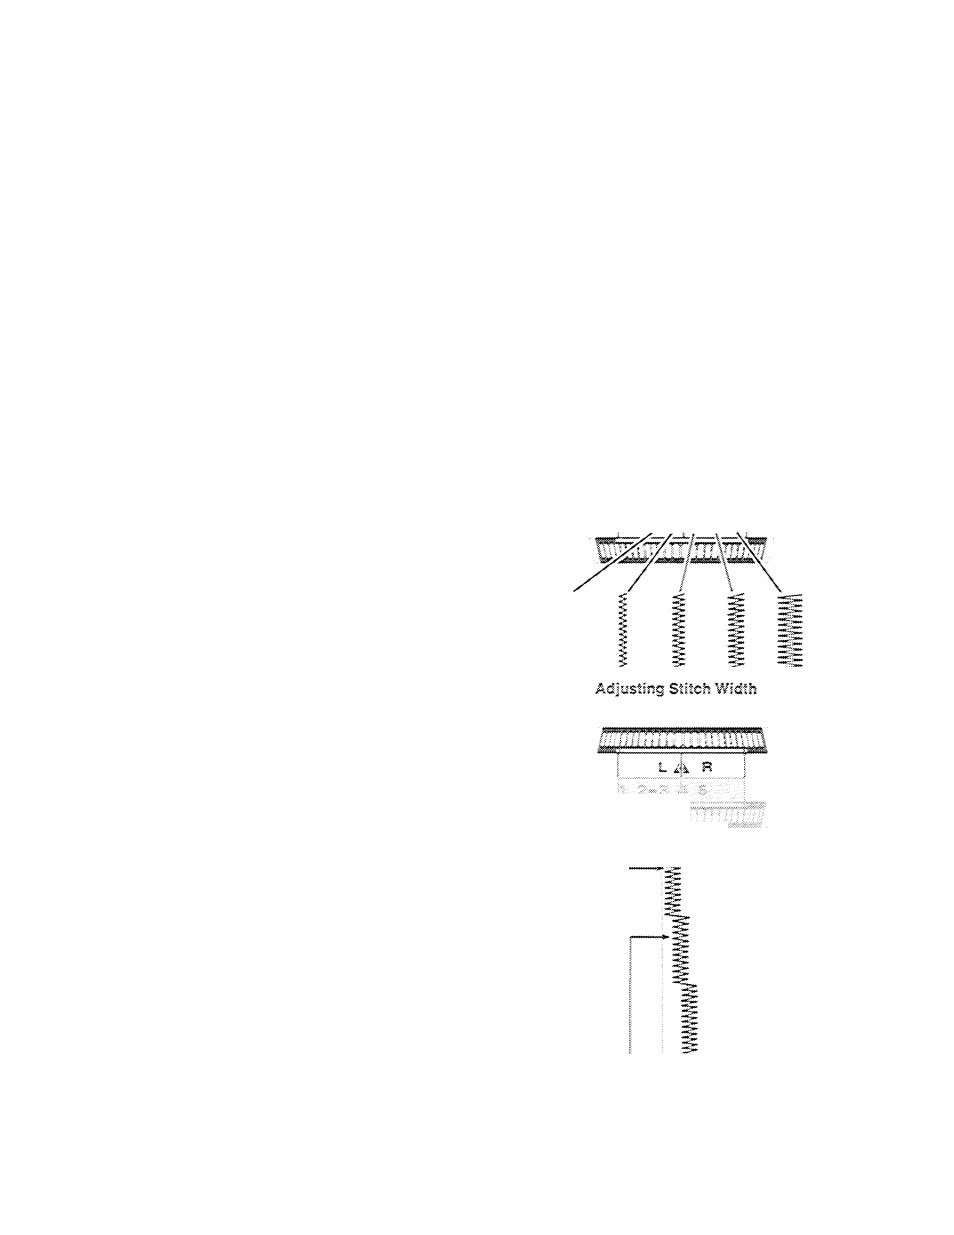
Before moving die!, make sure needle 1$ above
fabric.
To produce a zig-zag pattern, turn the stitch
width dial to any setting between 1 and 5. The
higher the number, the wider the stitch.
2-3 4 5
AOJUSTIHG STITCH PLACEliEHT
Before moving the needle position dial, move
stitch width dial to 5, and make sure needle Is
above fabrio.
Needle position setting
A
places the needle
In center stitching position. Settings L and B
place the needle in left and
right
stitching po
sitions at stitch widths less than 5.
Setting
A
is used most often. Settings
L
and
R
are
used
for
special
placement
of
stitching.
For example, an L setting is required for but
tonholing and button sewing. An L or R setting
can be used to place narrow zig-zag stitching
to the left or right of center in decorative work.
To adjust stitch placement, turn needle posi
tion dial until desired setting is aligned with
red line.
-Left
—Center
Right-
Adjusting
Stitch Placement
21