Setting up your machine, Installing extension table – Sears 1345 User Manual
Page 7
Attention! The text in this document has been recognized automatically. To view the original document, you can use the "Original mode".
Light/power
switch
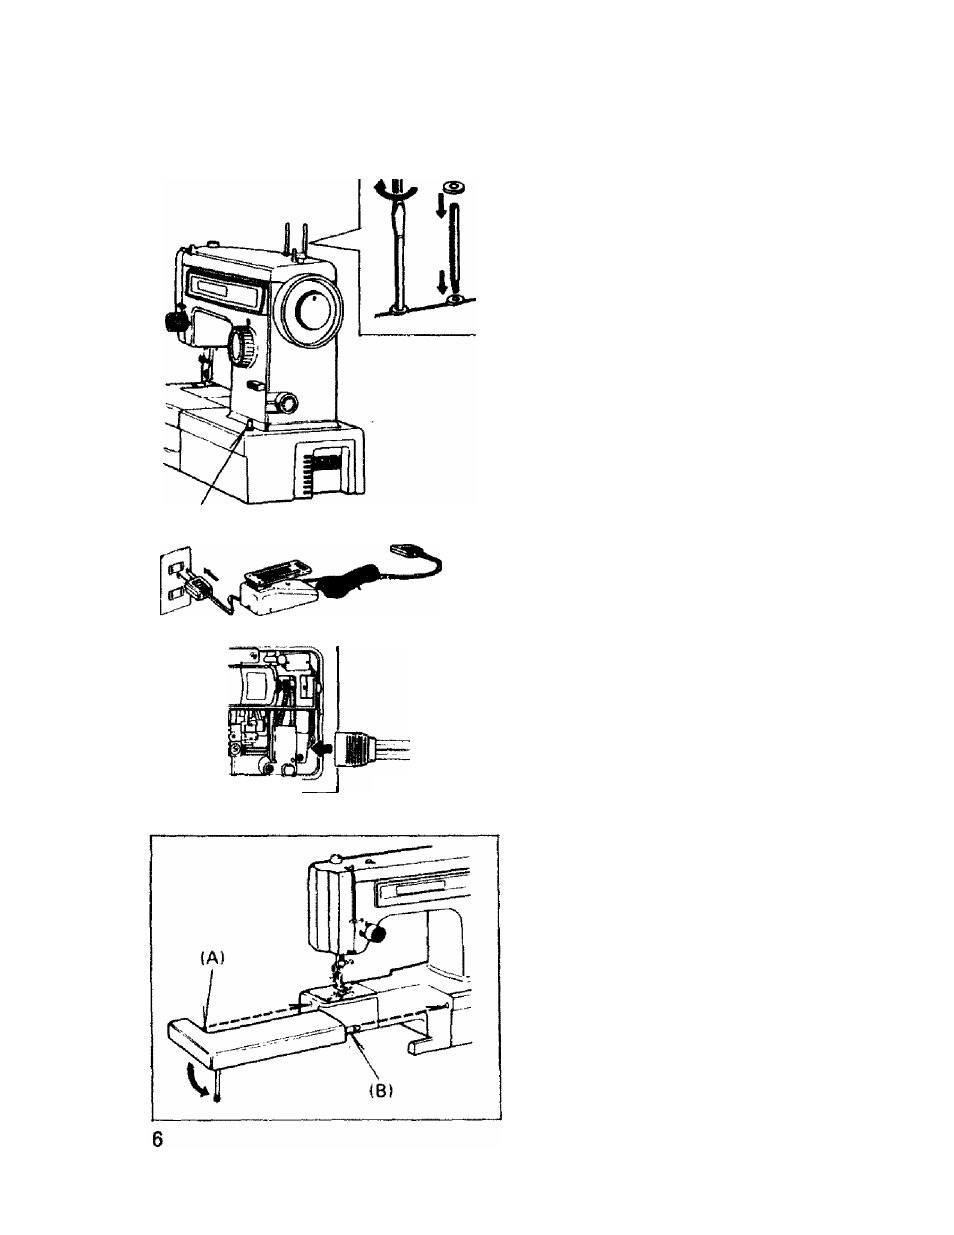
SETTING UP YOUR MACHINE
1.
Install your Kenmore sewing machine In a
Kenmore cabinet, case or set the machine
on a sturdy flat surface.
2.
Your Kenmore sewing* machine has been
throughly oiled at the factory. Be sure to
wipe off the needle plate area, bed plate
and bobbin case carefully before sewing a
garment. It is wise to practice on a scrap
of fabric so any surplus oil is absorbed.
3. SPOOL PINS
YcHj'll find spool pins and nylon discs
packed In the accessory box. Using a
screwdriver, attach spool pins securely on
the top cover and position nylon discs
over the spool pins as indicated.
4. FOOT CONTROL
Plug foot control into machine receptacle.
Then connect cord into any tIO-IM volt
A. C. wall outlet.
5 pQHT/POWER SWITCH
Your machine will not operate unless the
light/power switch is turned on. Turning
on
the
power
automatically
Illuminates
the
whole
stitching
area.
If
you're
interrupted or stop sewing, turn off the
light/power switch.
Model 1358
INSTALLING EXTENSION TABLE
For all flat bed sewing use the extension table
provided with the machine. To install the
extension table, simply slide the table along
the free arm until the two pins !A) and IB)
enter fitting holes in the machine. Lower the
support leg.
To utilize free-arm feature for sewing tubular
material, remove the extension table from the
machine by pulling it to the left.