Mounting scroll saw on leg set, Mounting scroll saw to workbench – Sears 113.20765 User Manual
Page 7
Attention! The text in this document has been recognized automatically. To view the original document, you can use the "Original mode".
SAW SSOUNTtNG HOLES
MOUNTING SCROLL SAW ON LEG SET
1 Place the Scroll Saw on the Steel Legs, position
as shown by aligning the mounting holes in the
base of the Scroll Saw with those in the END
stiffeners
(marked
with
an
X
in
the
illustration)
2 Mount saw to Leg Set using three (3) 1/4-20
carriage bolts, three (3) 1/4-20 nuts, three (3) flat
washers, and three (3} 1/4" lockwashers Tighten
nuts using wrench
..... 7"'
o «
o°0
O
0
0
O
o
O o
o
o
-REAR
0
o
O
q
0
0 o
o
O
O
, 0
o
OoO
0 o
FRONT
..
---- Jv.
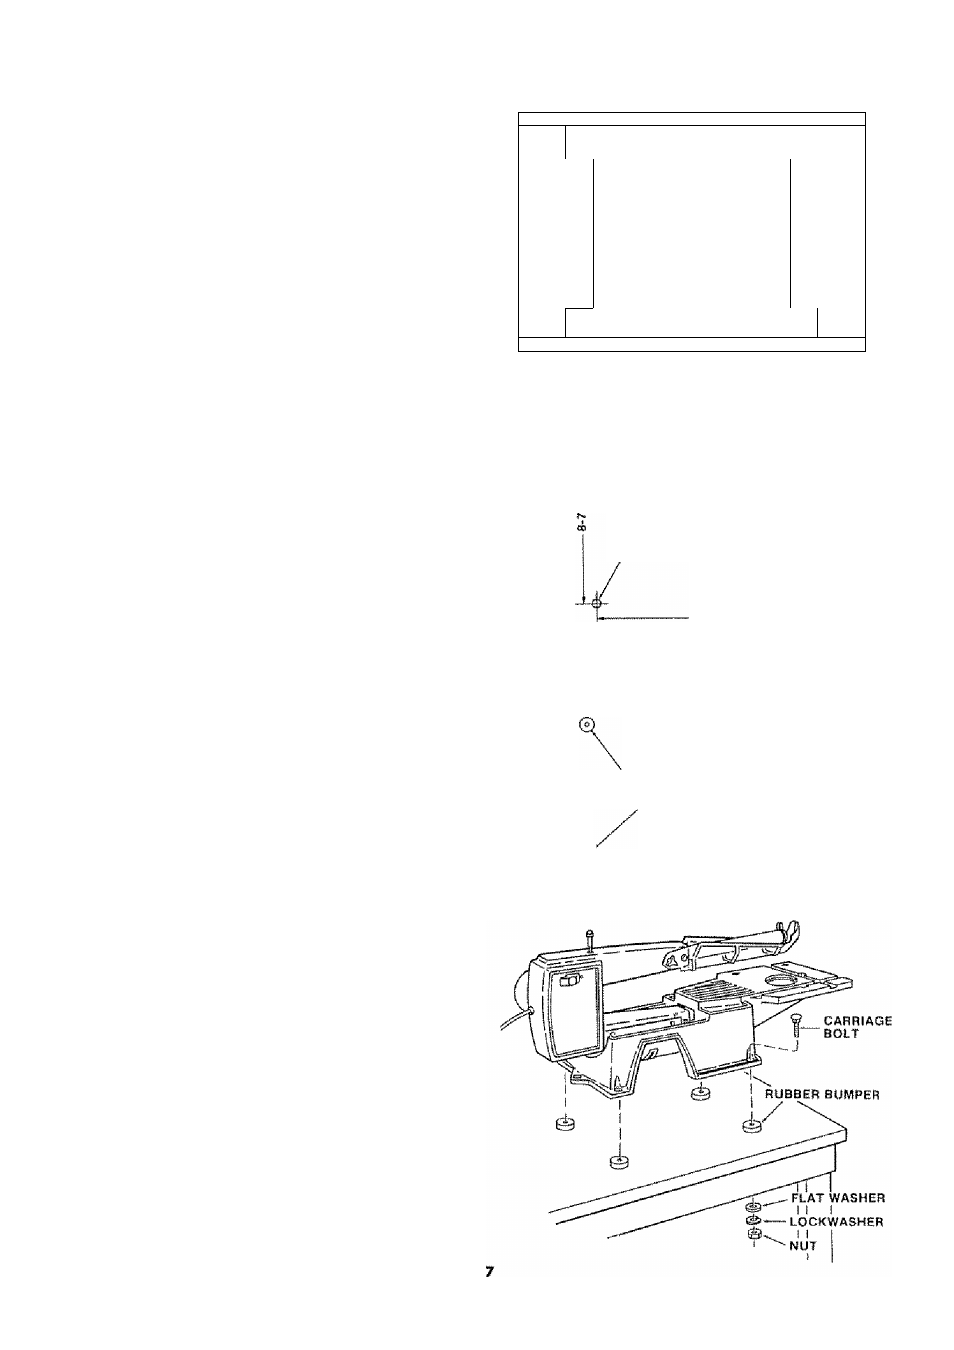
MOUNTING SCROLL SAW TO
WORKBENCH
Anytime the Scroll Saw is in operation, it must be
fastened securely to a firm, supporting surface such
as a Leg Set (9-22239) or a workbench,
When mounting Scroll Saw to a workbench, holes
should be drilled through supporting surface of the
workbench using dimensions illustrated
1, Scroll Saw should be bolted securely using the
following hardware found in Loose Parts Bag:
Four (4) 1/4-20 carriage bolts, four (4) 1/4-20
nuts,
four
(4)
fiatwashers,
and
four
(4)
lockwashers. Bolts must be of sufficient length to
accomodate the saw base, rubber bumpers,
washers, hex nuts, and thickness of the
supporting surface
5/1S ‘ DfA. HOLES (4)
12-1/2'-
2 Locate four (4) rubber bumpers in Loose Parts
Bag, These should be used when mounting Scroll
Saw on a solid surface
3 Locate and mark holes where Scroll Saw is to be
mounted-
4
Drill four (4) 5/16" diameter holes through
workbench
5, Place rubber bumpers over holes in workbench,
with large opening in rubber bumper against top
surface of workbench
j®
PLACE RUBBER BUMPERS
OVER HOLES iN
WORKBENCH
©
©
6 Place Scroll Saw on rubber bumpers and align
holes in workbench, rubber bumpers, and Scroll
Saw Base,
7 Insert and tighten all four (4) bolts, washers,
lockwashers. and nuts using wrench