1, removing printwheel, Installing printwheel, How to change printwheel – Sears 16 User Manual
Page 14
Attention! The text in this document has been recognized automatically. To view the original document, you can use the "Original mode".
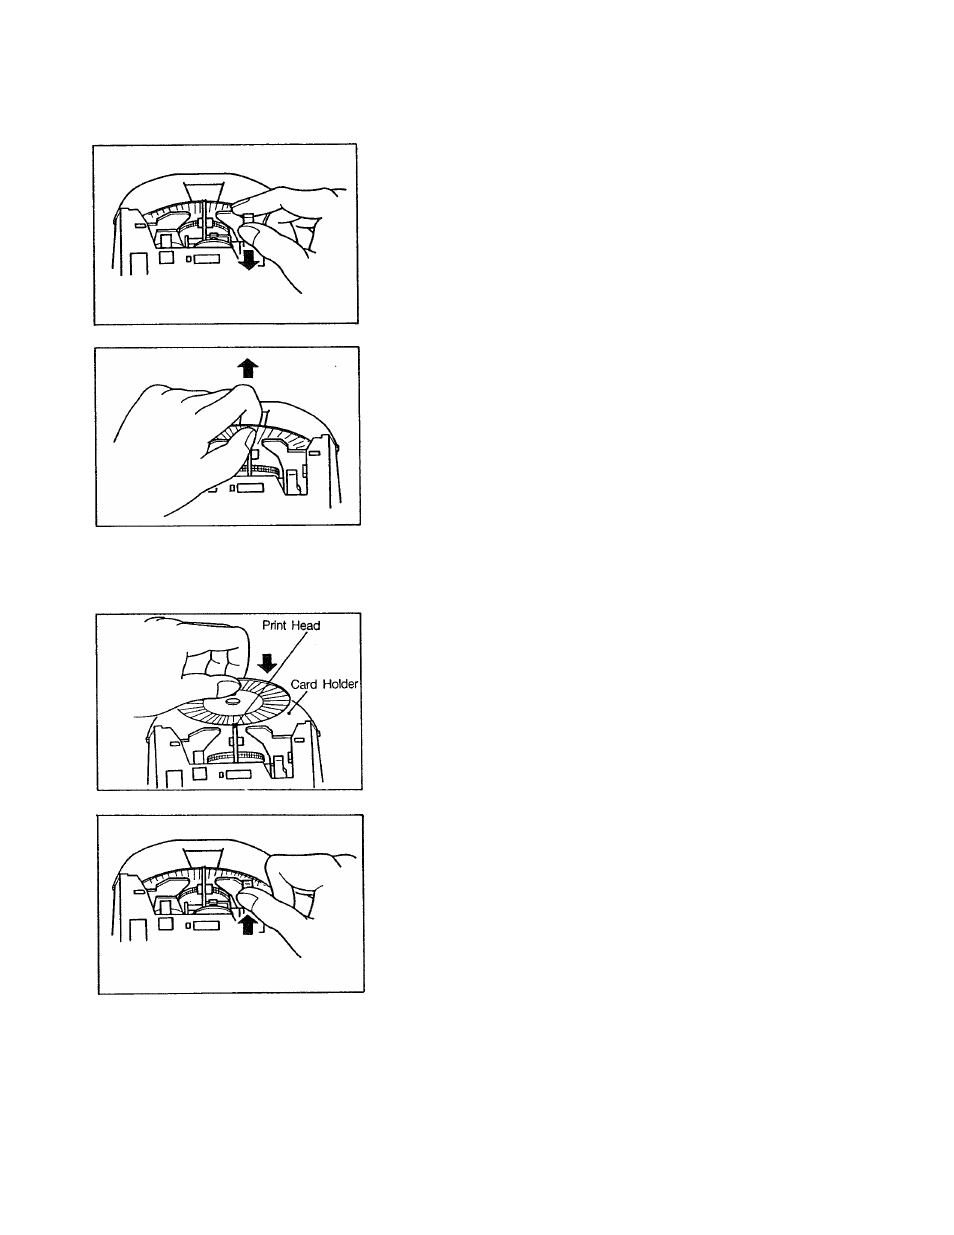
5. HOW TO CHANGE PRINTWHEEL
1,
Removing Printwheel
1)
Turn off the machine. Open the Top Cover and remove
the Ribbon Cassette as explained under “Removing Rib
bon Cassette”.
2)
Pull the Printwheel Set/Release Lever towards you.
3)
Lightly grasp the top of the Printwheel and carefully pull
it up towards you.
2.
Installing Printwheel
1)
Lightly grasp the edge of the Printwheel and carefully
lower it in between the Card Holder and the Print Head.
® Make sure that the typeface (the side with typing style
indicated) faces the Platen.
2)
Press the Printwheel Set/Release Lever away from you
until it snaps into place, locking the Mechanism.
® Press the Lever as far as it goes again to make sure the
Printwheel has been locked into place.
3)
Replace the Ribbon Cassette and close the Top Cover.
® Remount the Printwheel if any abnormal noise is heard or
if incorrect characters are printed.