Attaching starter rope, Attaching discharge chute – Sears 247.37033 User Manual
Page 8
Attention! The text in this document has been recognized automatically. To view the original document, you can use the "Original mode".
Note:
Make sure to route the cables inside the lower
handle. Also do not crimp the cables while lifting the
handle up.
For shipping purposes, the hairpin clip is placed in
the outer hole of the weld pin on each side of the
lower handle.
•
Remove the hairpin clip from the outer hole of
the weld pin.
•
Using a pair of pliers, insert the hairpin clip into
the inner hole on the weld pin. Repeat on other
side. See Figure 3B inset.
•
Raise the upper handle as shown in Figure 3B.
Tighten the wing nuts which are already on the
handle.
•
Attach control cables to lower handle with two
cable ties found on the handle. Pull tight and cut
off the excess.
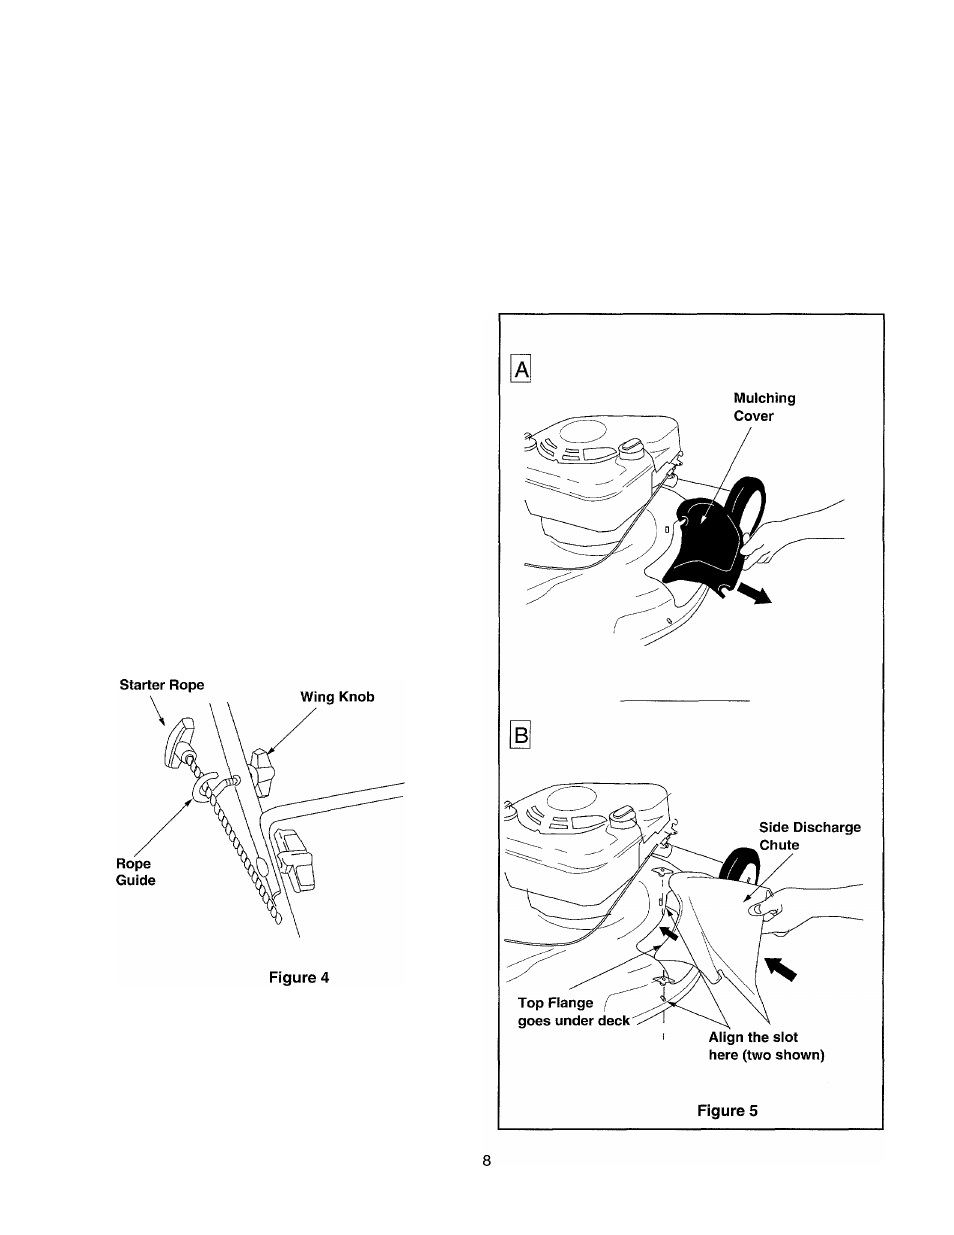
ATTACHING STARTER ROPE
The rope guide is already attached to the right side of
the upper handle of your mower. See Figure 4.
•
With the spark plug wire disconnected and
grounded, hold the blade control handle against
the upper handle, and pull the starter rope out of
the engine and up towards the operator.
•
Slip the rope through the rope guide. Tighten the
wing knob holding the rope guide to the upper
handle..
ATTACHING DISCHARGE CHUTE
Your lawn mower was shipped as a mulcher.
Replace the mulching cover with the side discharge
chute for discharging grass clippings.
• Remove three plastic wing nuts holding the
mulching cover to the deck. See Figure 5A.
Keep the cover in a safe place for future use.
Save the wing nuts.
Place the side discharge chute on the deck in
place of the mulching cover. Make sure that the
top flange of the discharge chute goes under the
deck. See Figure 5B.
Align the three slots on the discharge chute with
the hardware slots on the deck. See Figure 5B.
Insert the three wing nuts earlier removed
through these slots. Tighten the wing nuts.