Sears 247.37033 User Manual
Page 14
Attention! The text in this document has been recognized automatically. To view the original document, you can use the "Original mode".
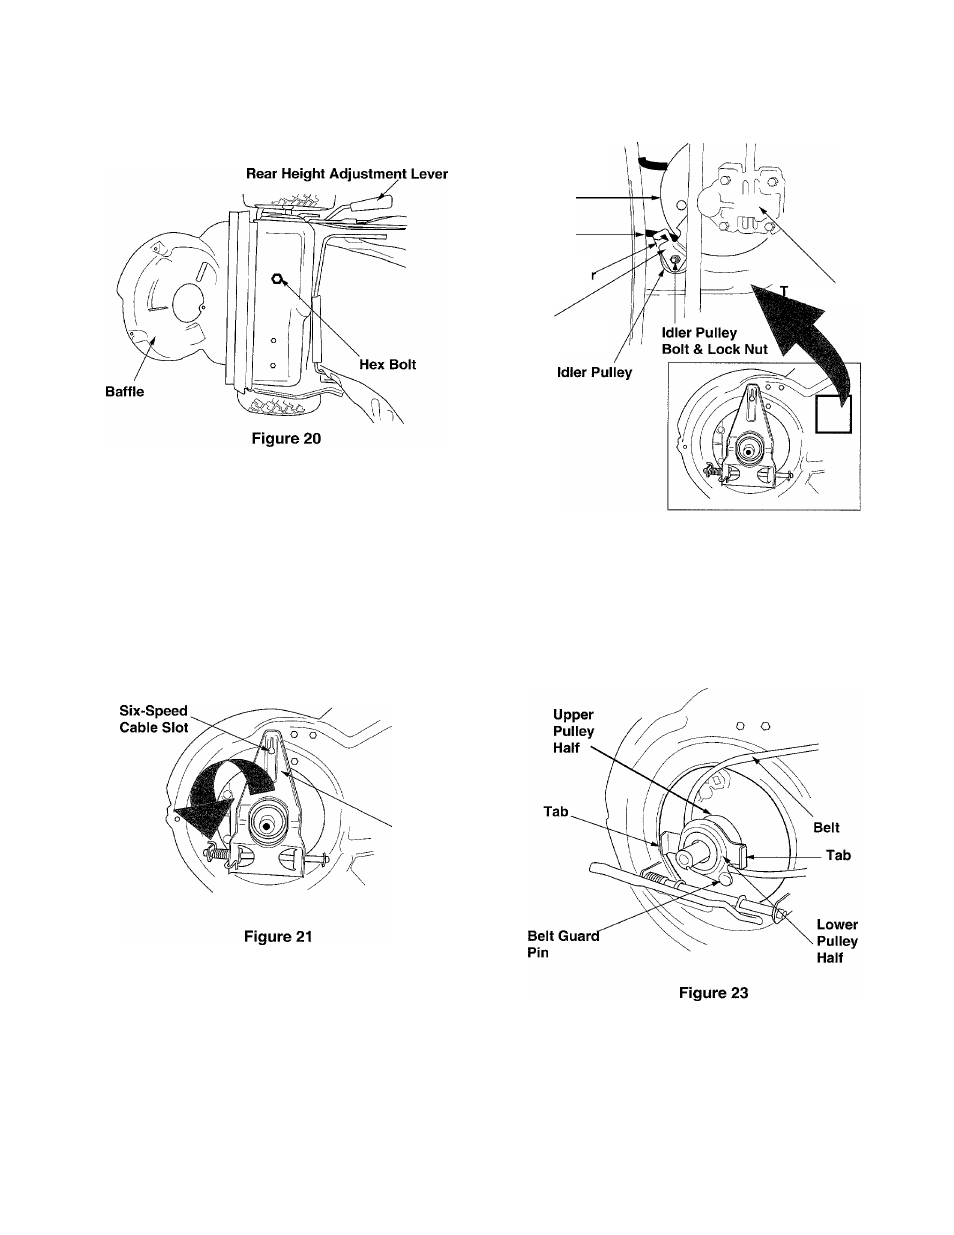
just removed. See Figure 20.
Transmission
Pulley
Belt
Belt Keepe
Bracket
ransmission
Idler Pulley
Bracket
Tilt the transmission forward and loosen the idler
pulley bolt and lock nut 1/2 turn using two 7/16”
wrenches. For location of idler pulley bolt and
lock nut, refer to Figure 22.
Using a pair of pliers, pull back and rotate belt
keeper bracket from slot on idler pulley.
Slide the belt out from between the belt keeper
bracket and the idler pulley.
Push control arm back and remove the six speed
cable from the slot. Pivot the control arm down.
See Figure 21.
Control
Arm
Remove the lower pulley halves from the
crankshaft and slide the old belt out.
Grease the crankshaft.
Feed the new belt over the transmission pulley,
start the belt in pulley groove and rotate pulley until
belt is seated in transmission pulley. For location of
the transmission pulley, see Figure 22 inset.
Place belt between idler pulley and the belt
keeper bracket. See Figure 22.
Using a pair of pliers, replace the belt keeper
Figure 22
bracket so that it snaps into place.
Tighten the idler pulley bolt and lock nut 1/2 turn
using 7/16” wrenches.
Place belt between the two pulley halves on the
crankshaft as shown inFigure 23. Make sure to
route the belt inside the belt guard pin.
IMPORTANT:
For proper assembly, it is essential to
keep the belt guard pin and the two tabs on the lower
pulley half in the position shown in Figure 23.
•
Pinch belt together so that it is not in the pulley
groove, and the lower pulley can be pushed
towards the engine. See Figure 24.
•
Pivot the control arm back to its original position
18