4 - wat c h c – Wilson Audio WATCH Center Channel Series 1 User Manual
Page 55
55
Note: Do not tighten the nut at this time. Wait until the fine tuning has been
completed for the entire system and the speaker has been leveled.
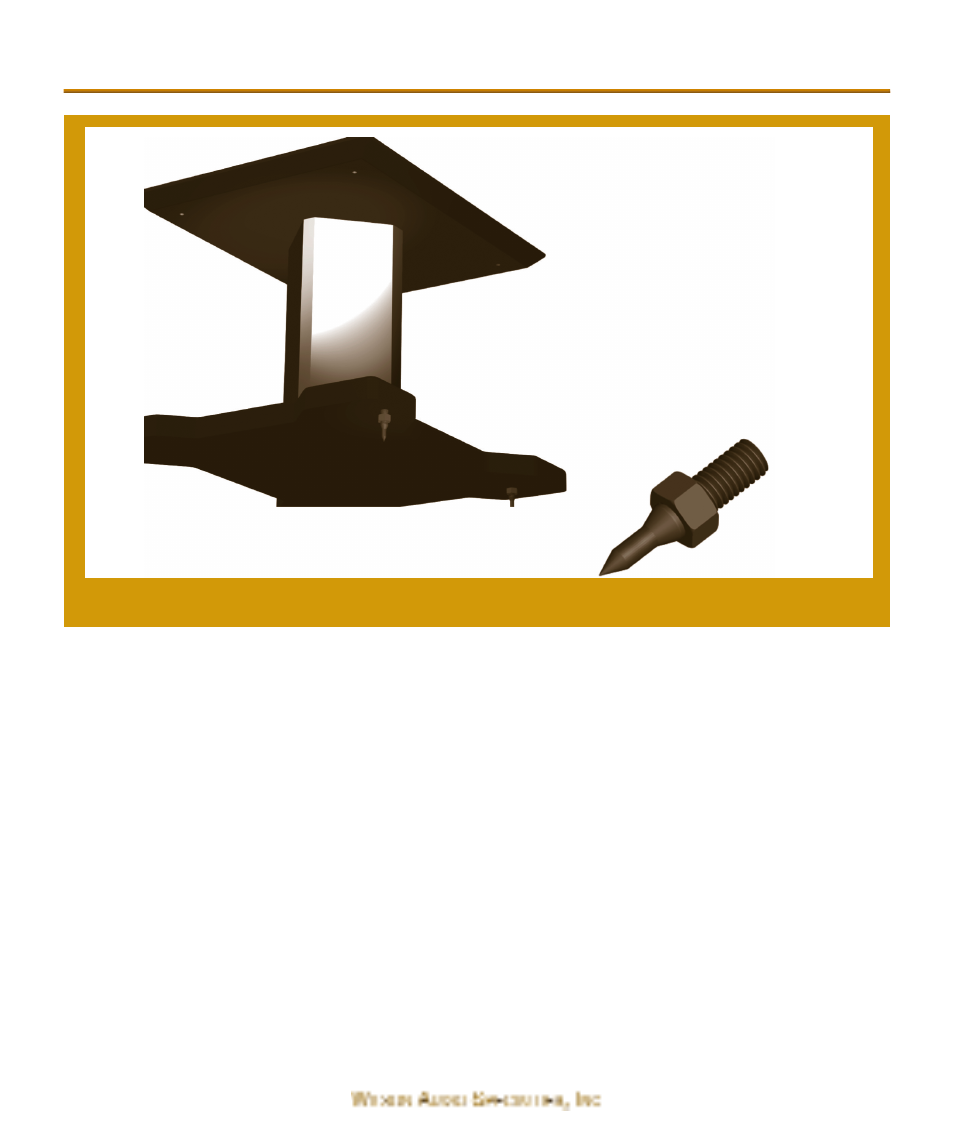
3. Using provided 3/16” Allen wrench, remove the 4 setscrews from the bot-
tom of the Center channel. Keep these as they are the setscrews needed
to assemble your spikes and may be required during final setup.
Note: Four small brass disks have been provided for use as spike pads. Place
these under the spikes to protect the finish of your floors.
4. Bolt the Center channel to the stand using the four 3/8”-16 threaded
socket head capscrews and washer provided (see Figure 10).
Note: Do not over tighten the bolts. A snug fit is all that is required to secure
the Center channel to the stand.
T
H R E A D E D
S
P I K E
C
E N E R
S
TA N D
S
P I K E
F
I G U R E
9 - I
N S TA L L I N G T H E
C
E N T E R
C
H A N N E L
S
TA N D
S
P I K E S
S
E C T I O N
4 - WAT C H C
E N T E R
C
H A N N E L
S
E T U P