Top Flite TOPA1020 User Manual
Page 8
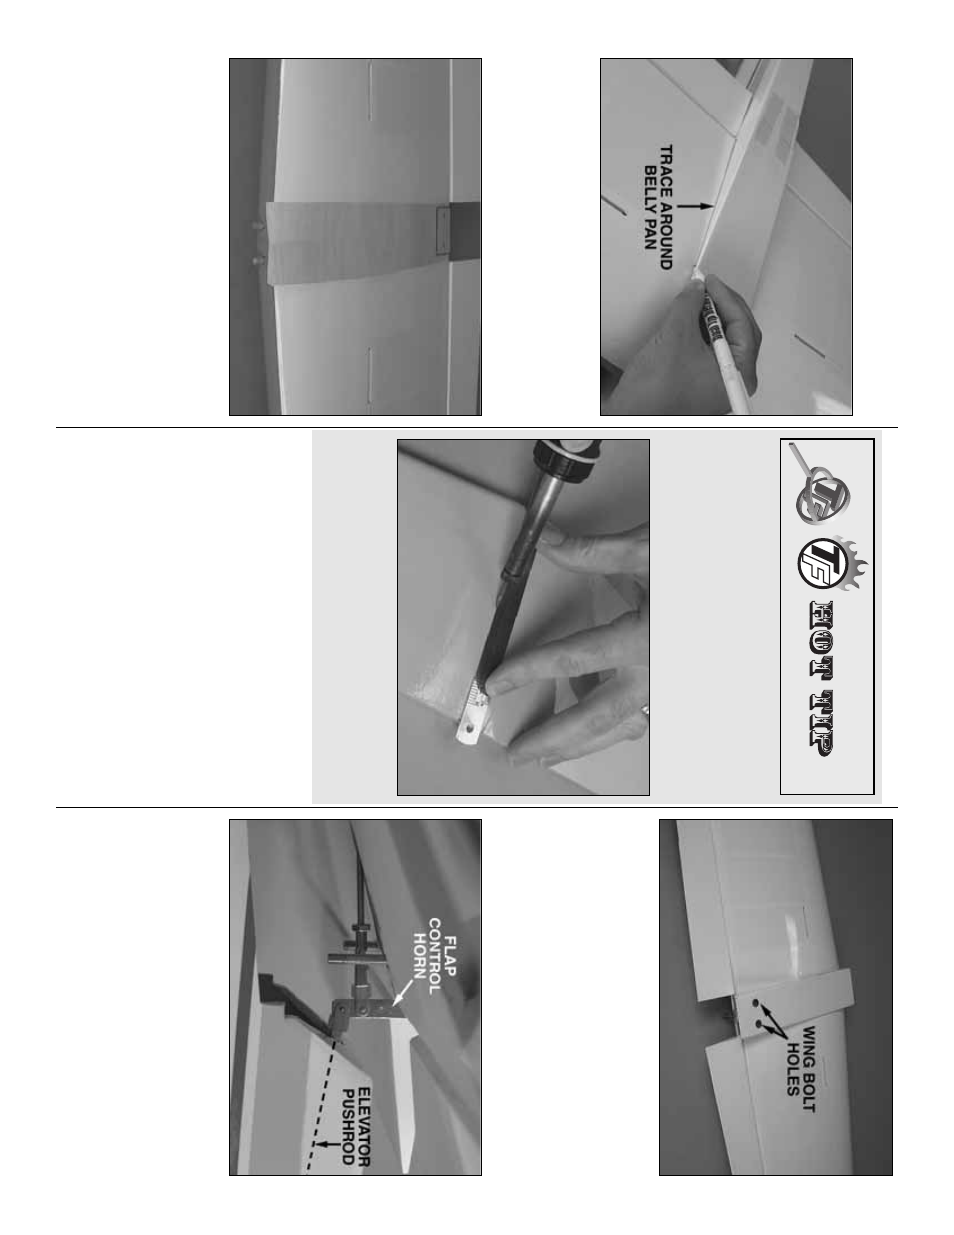
Install the Bell
y P
a
n
❏
1.
Align the
bell
y pan
into position and tape it to
the fuselage
.
Use a f
e
lt tip pen to tr
ace its shape onto
the wing.
❏
2.
Remo
v
e
the belly pan and wing.
Use a shar
p
,
ne
w knif
e
b
lade or a solder
ing iron (see
“Hot
Tip”) to
cut the co
v
e
ring from the wing 1/16" [2 mm]
inside
the lines
.If using a knif
e
, use a
light touc
h
and
great
care
not to cut into the sheeting under the co
v
e
ring
or the wing will be w
eak
ened.
After cutting the
co
v
e
ring, use denatured alcohol and a tissue to
clean the ink lines from the co
v
e
ring.
Then, peel off
the co
v
e
ring.
HO
W
T
O
CUT CO
VERING FR
OM B
ALSA
Use a solder
ing iron to cut the co
ve
ring from the stab
.
The tip of the solder
ing iron doesn’t ha
ve
to be shar
p
,
b
u
t a fine tip does w
o
rk
best.
A
llo
w the iron to heat fully
.
Use a str
aightedge to guide the solder
ing iron at a
rate that will just melt the co
v
e
ring and not b
u
rn
into
the w
ood.
The hotter the solder
ing iron, the f
aster it
m
ust tr
a
v
el to melt a fine cut.
P
eel off the co
v
e
ring.
❏
3.
T
rim the co
v
e
ring from the underside edges of
the belly pan.
Epo
xy the belly pan to the wing and cut
a
w
a
y
the co
v
e
ring from the wing bolt holes if y
o
u
ha
v
e
not already done so
.
W
ic
k thin CA glue into the
wing bolt holes to harden the w
ood in this area.
Attac
h the
Wing
❏
1.
Fit the tw
o wing do
w
els into their mating holes
in the fuselage
.
While tilting the tr
ailing edge of the
wing a
w
a
y
from the fuselage
, use needle nose pliers
to connect the ele
v
ator pushrod to the outer hole in
the flap control hor
n.
Secure the cle
vis with the
silicone retainer
.
❏
2.
Using the 4 x 55 mm scre
ws and 4 mm w
ashers
,
secure the wing to the fuselage
.
- 8
-