Top Flite TOPA0290 User Manual
Page 51
❏
13.
Once satisfied with the fit of the cabin top to
the fuselage
, roughen the inside of the cabin top with
medium-g
rit sandpaper where it contacts the cabin
fr
ame
.
Reposition the cabin top on the fuselage
.
Use
masking tape to hold it in position where
v
e
r
necessar
y so it will not mo
v
e
.
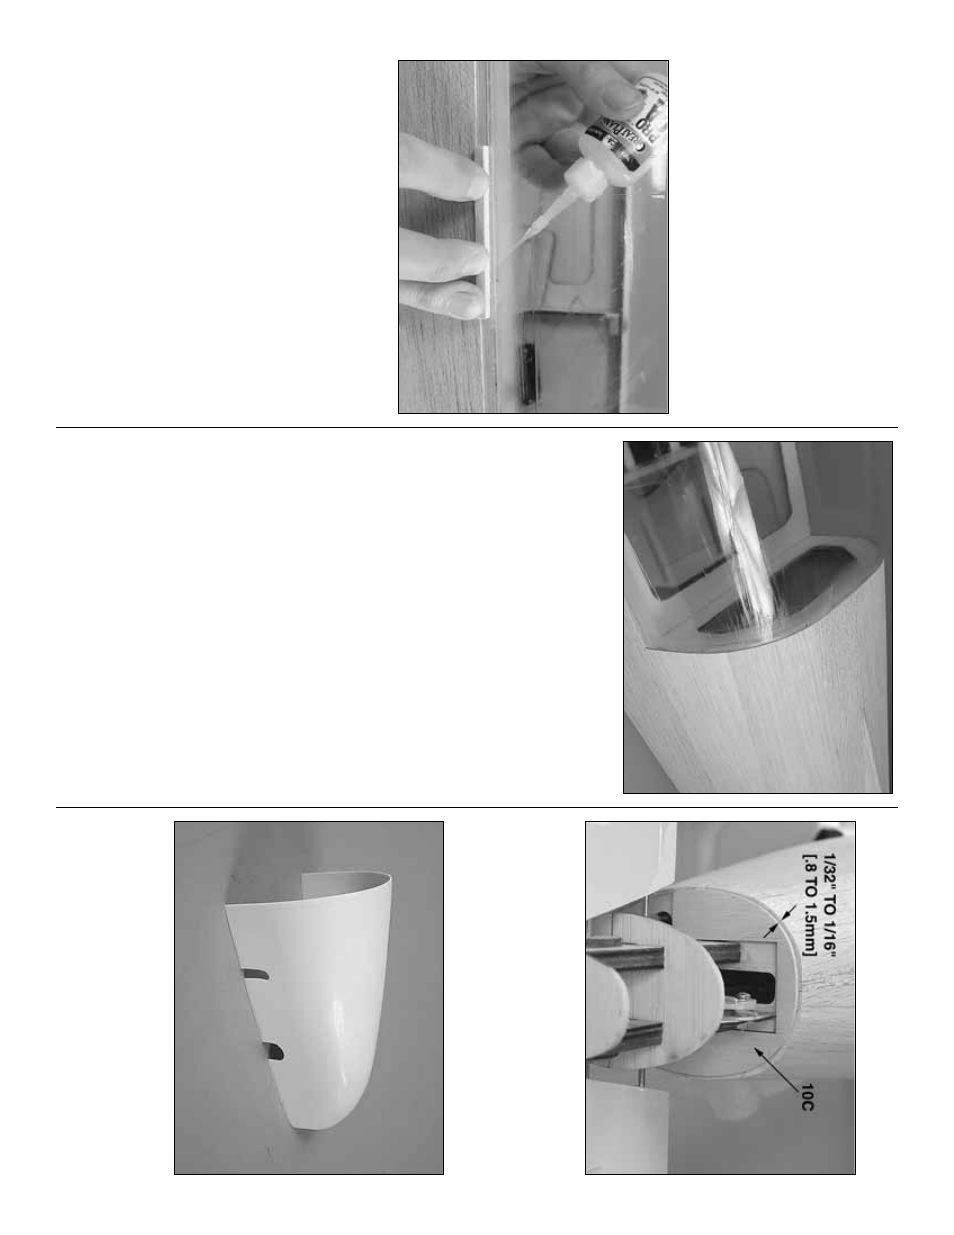
❏
14.
Glue the cabin top to the cabin fr
ame
.
As can
be seen in the photo
, thic
k CA is recommended as it
will not wic
k do
wn past the cabin fr
ame
, inadv
er
tently
gluing it to the fuselage
.
Medium CA could also be
used.
If uncer
tain, y
ou could use thin, plastic
sandwich wr
ap betw
een the cabin fr
ame and the
fuselage str
inger
.W
hen ready to glue
, w
o
rk
along the
base
, gluing just a f
e
w inches at a time
.
Use a balsa
stic
k to hold the cabin to the fr
ame as y
ou go
.
C
A
acceler
ator ma
y be used as necessar
y.
❏
15.
Once the cabin top has been securely glued to
the cabin fr
ame
, loosen the mounting bolts and
remo
v
e
the cabin top
.
M
ak
e an
y more adjustments
that ma
y be needed f
or a good fit, then sand the
fuselage to match the aft end of the cabin top—don’t
tr
im the front end until the co
wl has been fitted and
be careful not to scr
atch the windo
ws
.
O
ther than the
windo
ws
, it’ll be oka
y if y
ou scuff up the cabin top a
little bit because the outside gets painted an
yw
a
y
and y
ou can sand out the scr
atches—b
ut do use a
little care not to mak
e
too m
uch w
o
rk
f
or y
ourself b
y
deeply scr
atching the cabin top
.
❏
16.
Reinstall the fuel tank.
Cut a
w
a
y
the section of
the cabin fr
ame belo
w the front cabin top f
o
rmer to
accommodate the fuel tank.
FIT THE T
AIL
CONE
❏
1.
T
e
st fit, b
ut do not glue the larger par
t of the die-
cut 1/8" [3.2mm] plyw
ood f
o
rm
er
10C
into position.
T
rim the f
o
rm
er so there will be a 1/32" to 1/16" [.8 to
1.5mm] diff
erence betw
een the f
o
rmer and the sides
of the fuselage
.
After the proper fit has been
achie
v
ed, glue the f
o
rm
er into position.
❏
2.
Use cur
v
ed-tip plastic-cutting scissors to cut out
the molded plastic
tail cone bottom
.
U
se a rotar
y
tool with cutting bits or a hob
b
y
knif
e to cut out the
rounded notches f
or the pushrod and the stabiliz
er
tube
.
Remember to cut slightly outside of the cutlines
to allo
w f
or tr
imming and positioning.
- 51
-