Top Flite TOPA0290 User Manual
Page 30
❏❏
9.
Be
v
el the front of the flap to match the angle
of the plyw
ood flap r
ibs
.
❏❏
10.
Dr
ill a 1/16" [1.6mm] hole through the
punchmar
k in the die-cut 1/16" [1.6mm] plyw
ood
flap
contr
ol horn.
Fit b
ut
do not glue
the hor
n into the
flap ne
xt to the flap r
ib where sho
wn on the plan f
o
r
the flap y
ou are w
o
rking on.
Mar
k, then cut the 1/2" x
1" x 24" [13 x 25 x 610mm] balsa
flap leading edg
e
into tw
o pieces at the hor
n.
❏❏
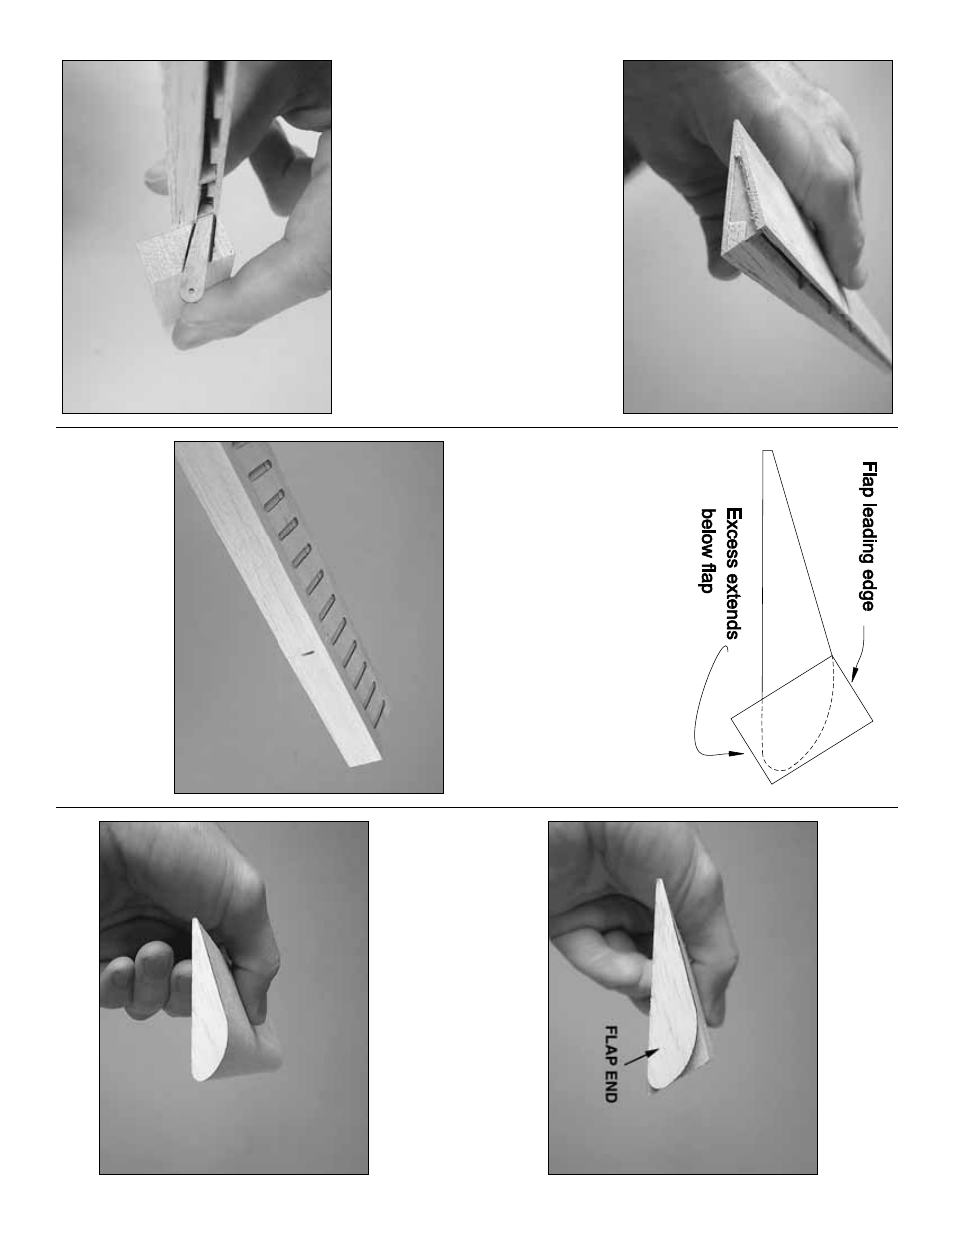
11.
P
osition the shor
ter piece of flap leading
edge on the flap ne
xt to the hor
n.
Note ho
w the flap
leading edge is positioned so that the top aligns with
the top of the flap and the e
xcess e
xtends belo
w the
bottom of the flap
.
Use a ballpoint pen to mar
k the
outline of the hor
n onto the end of the leading edge
.
❏❏
12.
Cut a 1/16" [1.6mm] deep g
roo
v
e
in the
leading edge piece betw
een the lines mar
k
ed noting
the hor
n.
❏❏
13.
With the flap hor
n still in position, per
manently
glue the
long
er
section of flap leading edge to the flap
,
b
ut do not get an
y glue on the hor
n as it will need to be
remo
ved.
Remo
ve
the flap hor
n, then use a couple
drops of thic
k or medium CA to tac
k glue the shor
ter
section of leading edge to the flap
.
❏❏
14.
Shape the top and bottom of the flap
leading edge to match the flap
, b
ut do not round the
leading edge until instr
ucted to do so
.
❏❏
15.
Sand the ends of the flap leading edge e
v
en
with the flap r
ibs on both ends of the flap
.
Glue one
of the die-cut 1/8" [3.2mm] plyw
ood
flap ends
to the
end of the flap and the longer
, per
manent section of
flap leading edge
.
Glue another flap end to the other
end of the flap
, b
ut not to the shor
t section of flap
leading edge that is tac
k glued to the flap
.
❏❏
16.
Shape the flap leading edge to match the
flap ends
.
- 30
-