Top Flite TOPA0290 User Manual
Page 14
❏
6.
Use a r
a
z
or plane and/or a hob
b
y
knif
e f
ollo
w
e
d
b
y
a bar sander to shape the fin and r
udder tip to
match the fin and r
udder
, b
ut do not round the top
until the ne
xt step
.
❏
7.
No
w go ahead and round the tips of the fin and
rudder b
y
sanding.
❏
8.
Remo
v
e
the tape and separ
ate the fin from the
rudder
.
Use a str
aightedge and a ballpoint pen to
mar
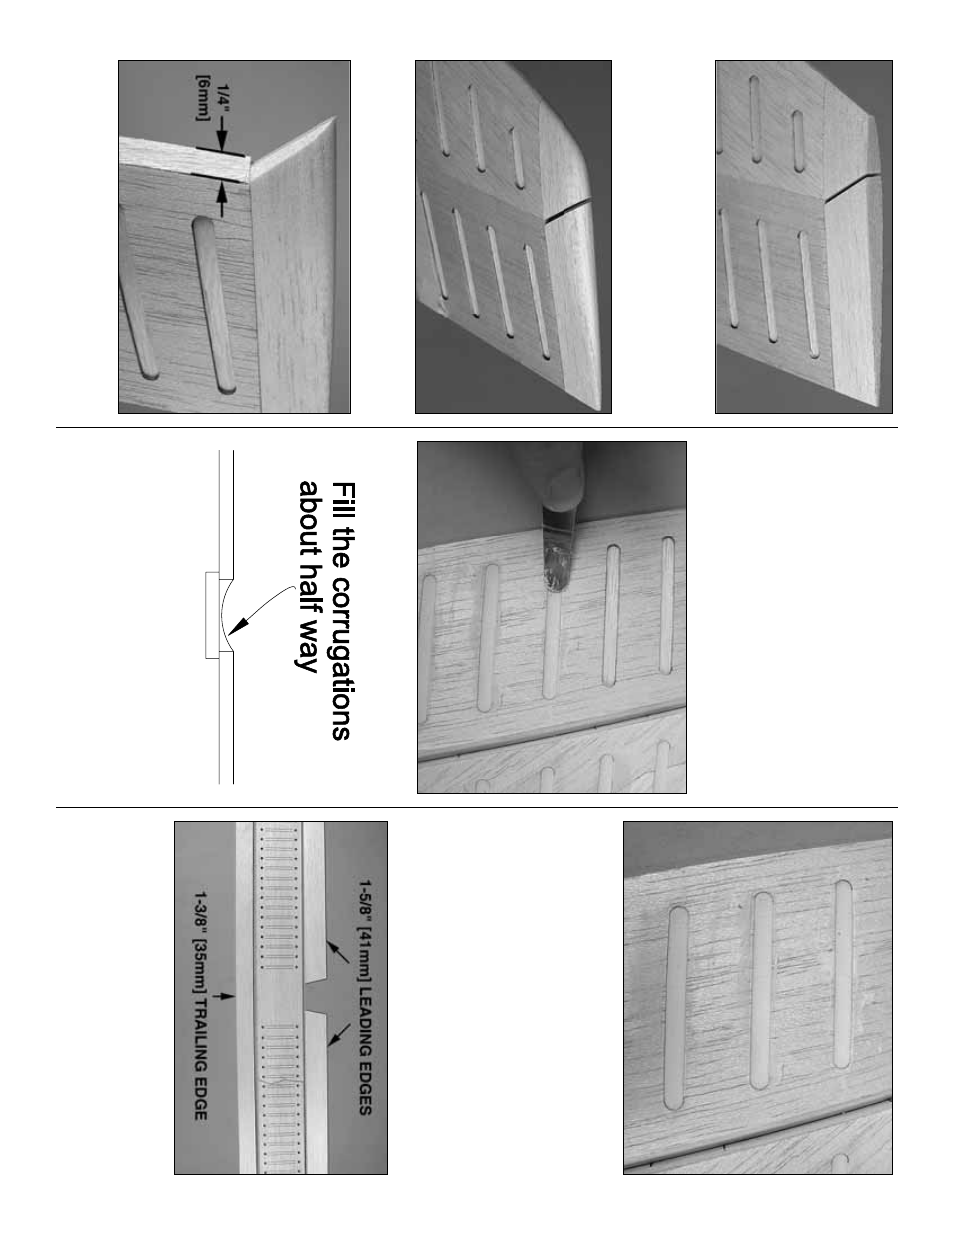
k lines on both sides of the r
udder 1/4"[6mm]
bac
k from the leading edge
.
Using the lines and the
center
line as a guide
, shape the leading edge of the
rudder to a
“V”
shape to allo
w f
or control thro
w
.
Also
shape the front of the r
udder tip as sho
wn.
❏
9.
T
est fit the r
udder to the fin with the hinges
.
Mo
v
e
the r
udder bac
k and f
o
rth to mak
e
sure it
mo
v
es freely
.
M
ak
e an
y adjustments necessar
y.
❏
10.
Use a putty knif
e or the included 1/16"[1.6mm]
die-cut plyw
ood applicator to apply lightw
eight balsa
filler to par
tially fill the corr
ugations
.
T
ry
to be
consistent and fill the corr
ugations about half-w
a
y
as
sho
wn in the sk
etch.
❏
11.
After the filler has dr
ied, sand the surf
ace of
the skins and do
wn into the corr
ugations
.
Set the fin and r
udder aside while y
ou b
uild the stab
.
B
U
ILD
THE HORIZONT
AL ST
ABILIZER (ST
AB)
Don’t f
o
rg
et,
this is a one-piece
,
“fl
ying”
stabiliz
er and has no ele
v
ator
s.
Let’
s star
t b
y
making the top and bottom stab skins…
❏
1.
Cut a 1-3/8"[35mm] str
ip from a 1/16"x 3"x
30"[1.6 x 75 x 760mm] balsa sheet to be used as the
trailing edg
e
por
tion of one of the die-cut
1/16"[1.6mm] balsa
stab skins
.
Use the remaining
1-5/8"[41mm] sheet to mak
e the r
ight and left
leading edg
e
por
tions
.
- 14
-