Top Flite TOPA0706 User Manual
Page 16
16
❏
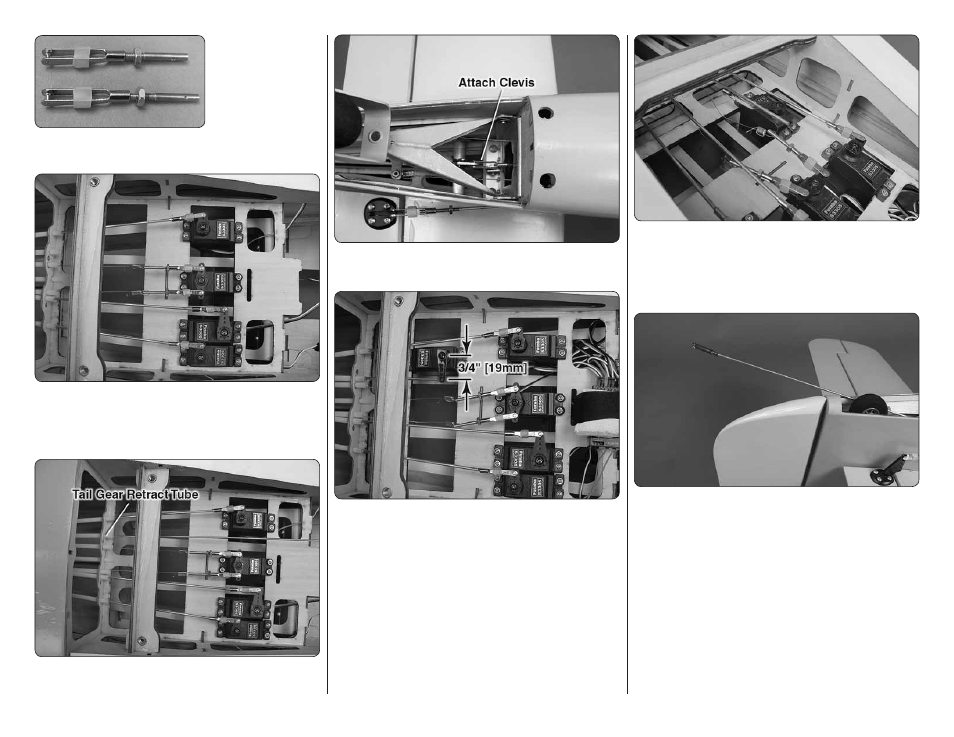
13. Thread a 4-40
nut and a 4-40 metal
clevis on to each
of the 4-40 rigging
c o u p l e r s. S l i d e
a silicone clevis
retainer over each
clevis. Install the clevises on the steering servo arm in
the hole 3/8" [9.5mm] from the center of the servo arm.
❏
14. Center the servo arm and the tail gear. Install a
swage on each cable, securing it following the same
procedure used on the tail gear. Use a pliers to crimp
the swage tightly on the cable.
❏
15. Insert a 4-40 x 48" metal pushrod in the tail gear
retract outer pushrod tube.
❏
16. Thread a 4-40 metal clevis 14 turns onto the
threaded end. Attach the clevis to the tail gear retract arm.
❏
17. Install a 3/4" [19mm] servo arm on the tail gear
retract servo. Install the servo in the aft servo tray so
that the hole 3/4" [19mm] from the center of the servo
arm is aligned with the tail gear retract pushrod.
❏
18. Connect the servo to the receiver. Position the
servo horn on the servo so that it moves approximately
the same distance both directions.
❏
19. Position the retract switch so that the gear is in
the down position and lock the tail gear in the down
position. Install a 4-40 solder clevis on the servo arm.
Following the same procedure as before, mark and cut
the pushrod to length.
❏
20. Remove the pushrod from the fuselage and
remove the 4-40 threaded metal clevis. Reinsert the non-
threaded end of the pushrod into the outer pushrod tube
from the servo end. Pull the pushrod out from the retract
opening enough to solder the 4-40 solder clevis on the
pushrod. Do not pull the pushrod all the way out. It will
be very diffi cult to insert the pushrod from the aft end.
❏
21. Slide a silicone clevis retainer over the solder
clevis. Connect the solder clevis to the tail gear retract.
❏
22. Thread a 4-40 nut and then the 4-40 metal clevis,
with the silicone clevis retainer, on the threaded end of
the tail gear retract pushrod. Connect the clevis to the