Installation – Toa VX-200PS SA User Manual
Page 9
Previous VX-200PS
Screw
Spacer
9
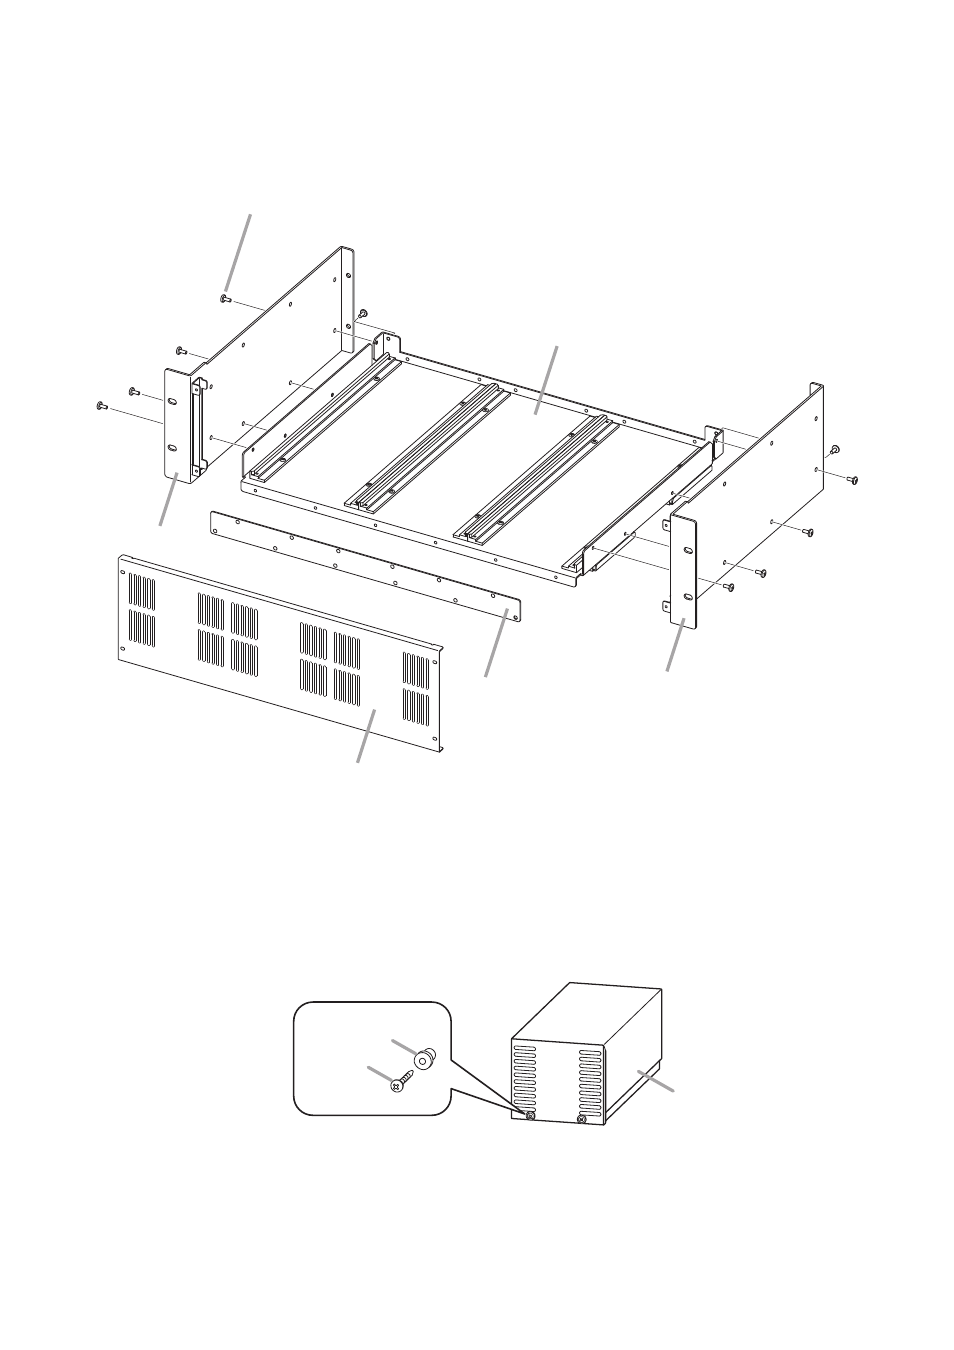
3. INSTALLATION
3.1. Assembling the VX-2000PF Power Supply Frame
Chassis
Side panel
Side panel
Fixing bracket
Front panel
Self-tapping screw 4 x 10
(supplied with the VX-2000PF)
Note: Mount the front panel and fixing bracket after installing the VX-200PS units on the chassis.
[Installation Precautions]
The VX-2000PF and VX-200PS units are slightly different in specifications between the previous and current
production lots.
The previous unit differs from the product explained in this manual in the following points.
Previous VX-2000PF: A Fixing bracket is not supplied.
Previous VX-200PS: A spacer is placed between the front panel and screw. (See the figure below.)
The mounting method for the combination of the current unit and previous unit differs from the steps shown on
the next page.
• When mounting the previous VX-200PS in the current VX-2000PF;
Use only the removed screws without using the spacers removed from the VX-200PS's front panel in Step 3.
• When mounting the VX-200PS (previous or current unit) in the previous VX-2000PF;
There is no need to secure the VX-200PS units using the screws in Steps 2, and 3.