Warning – Toa HY-CN7W-WP User Manual
Page 7
7
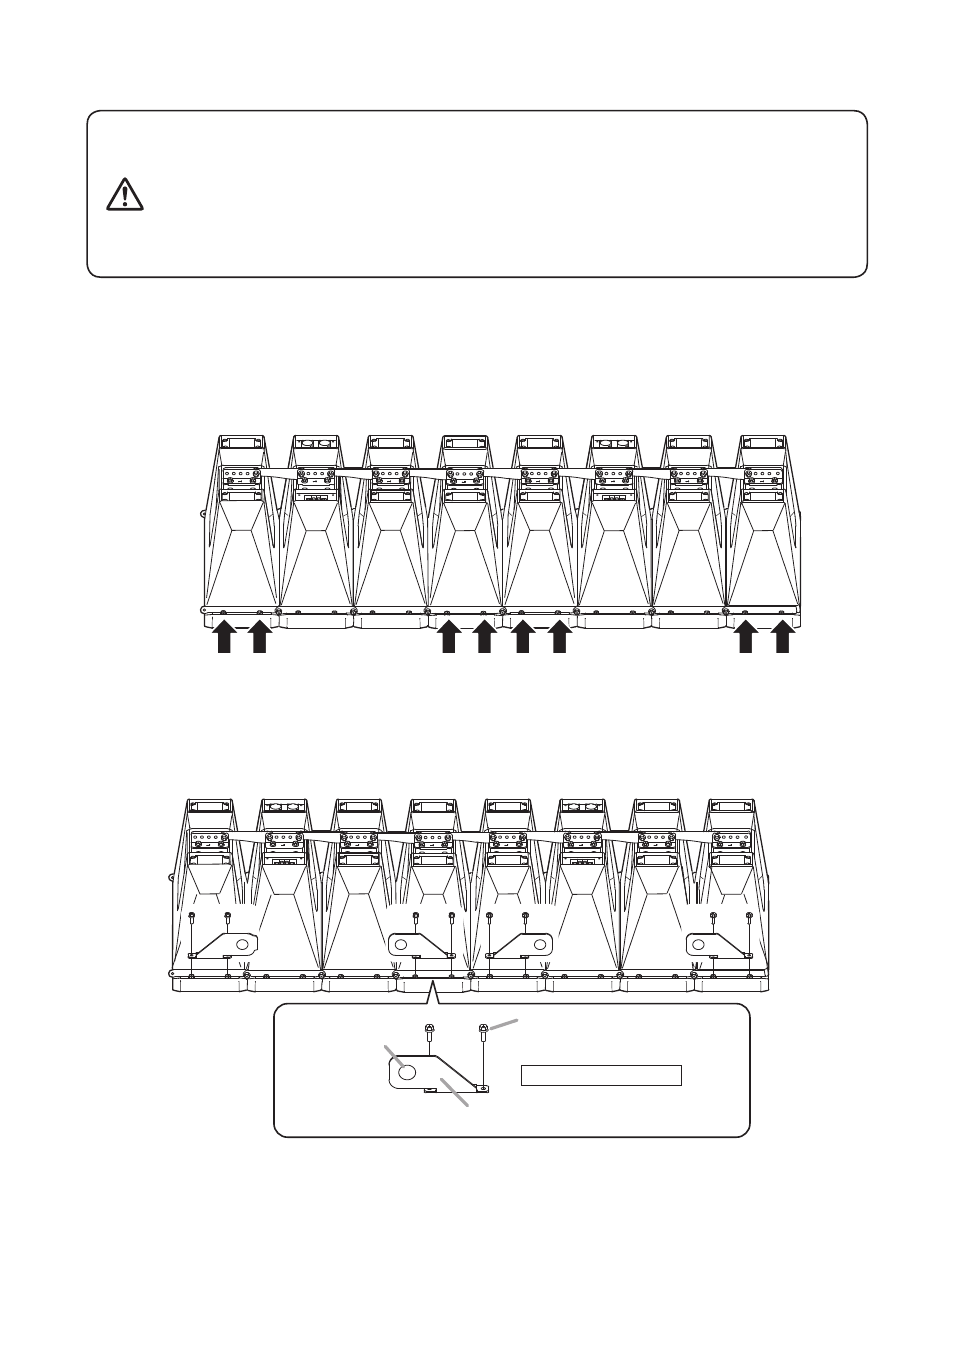
Suspension hole
Suspension bracket
(Speaker's accessory)
Hex head bolt M6 x 20
(with spring and plain washers,
speaker's accessories)
Tightening torque: 3 N
·m
[Installation method of suspension brackets]
Tighten the bolts securely, as instructed below. Failure to follow
instructions precisely could result in a falling speaker and potential
personal injury.
• Ensure that all bolts are securely inserted as far as their threads go,
then securely fasten each bolt with a nut.
• Tighten all the bolts with the designated tightening torque. For
tightening, use a Phillips screwdriver, or open- or box-end wrench.
WArNING
Before installing suspension brackets, lay out a protective sheet, corrugated cardboard or other soft material on
a flat surface, and perform all work on the 2 speakers with their front baffles facing downward.
Step 1. Remove the side angle plate bolts (indicated by the arrows in the figure below).
Step 2. Using the bolts supplied with the speaker, tighten the suspension brackets and side angle plates.
Combine the brackets supplied with the two speakers, and attach them with the suspension holes
facing outward, as shown in the figure below.
Note: Do not use the bolts detached in Step 1.