Warning – Toa HY-CN7W-WP User Manual
Page 3
3
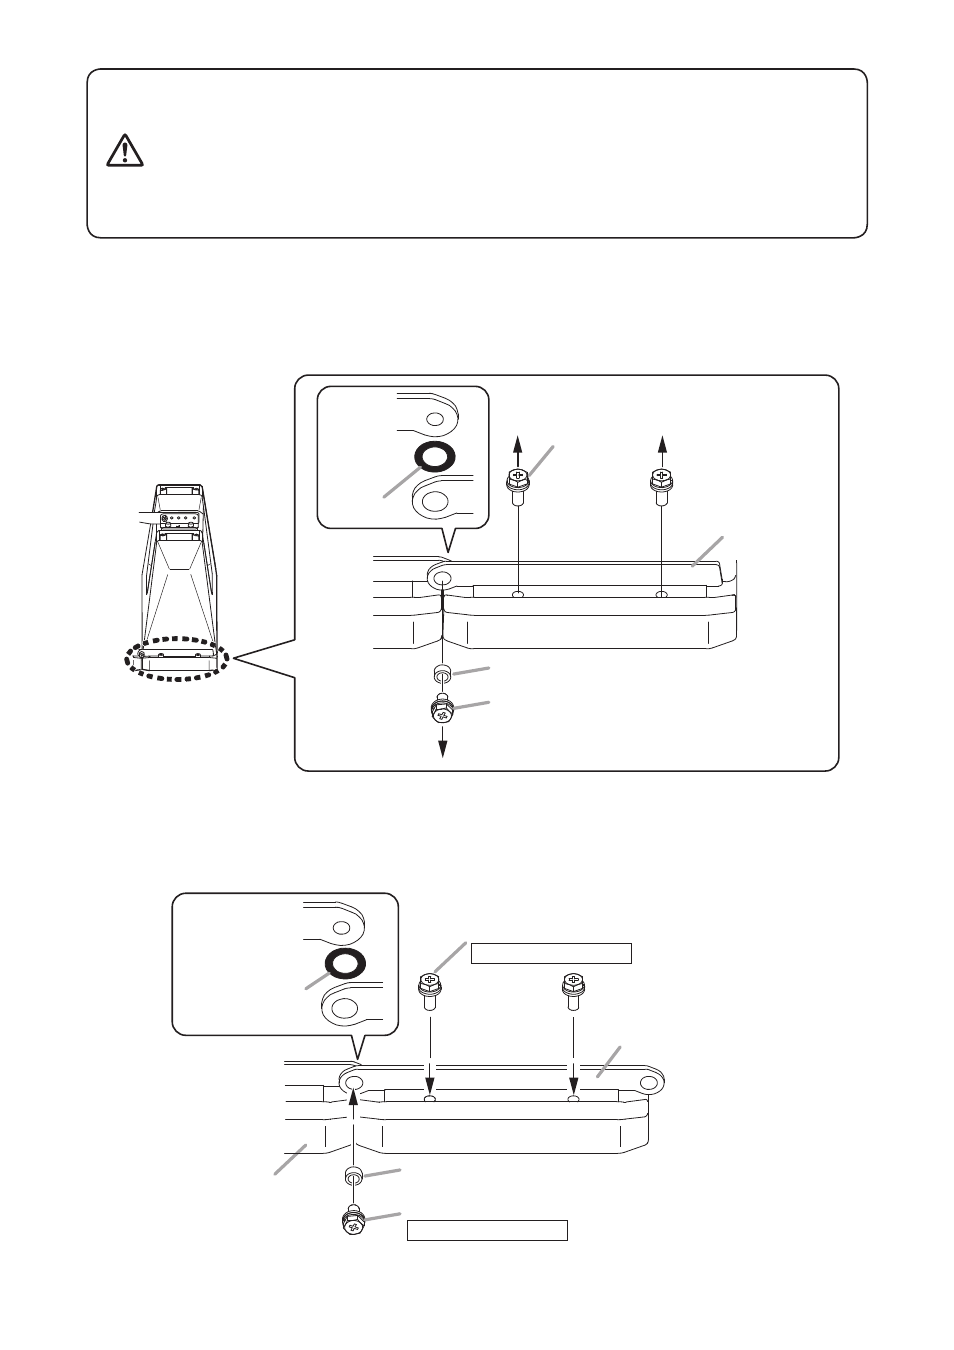
Speaker molule A
Hex head bolt removed in Step1-1
Rubber ring removed
in Step1-1
Side angle plate of this bracket
Speacer (golden) removed in Step1-1
Hex head bolt removed in Step1-1
Tightening torque: 3 N·m
Tightening torque: 3 N·m
Speaker molule A
Rubber ring
Speacer (golden)
Hex head bolt
Side angle plate
Hex head bolt
Tighten the bolts securely, as instructed below. Failure to follow
instructions precisely could result in a falling speaker and potential
personal injury.
• Ensure that all bolts are securely inserted as far as their threads go,
then securely fasten each bolt with a nut.
• Tighten all the bolts with the designated tightening torque. For
tightening, use a Phillips screwdriver, or open- or box-end wrench.
WArNING
Step 1. Detach the side angle plates located on either side of speaker module A, and replace them with the
HY-CN7 bracket's side angle plates.
1-1. Remove the two mounting bolts to detach each side angle plate.
Note: Take care not to lose the removed bolts, spacers and rubber rings, as these are used in the next
step of the procedure.
Similarly, replace the side angle plate on the opposite side of the speaker module.
1-2. Attach the HY-CN7 bracket's side angle plates in the same position where the speaker's side angle
plates were mounted.
Attach the HY-CN7 bracket's side plates in the reverse order shown in Step 1-1.
Similarly, attach the side angle plate on the opposite side of the speaker module.