Vector dynamics system for concrete applications – Tie Down Vector Dynamics Foundation System for Wind Zones IBC 2009 User Manual
Page 17
Page
17 4/3/2013
9. Put a washer and nut on one of the 3/8” x 3-3/4” wedge anchors. The nut should be screwed on
enough to have 1 or 2 threads showing on the top of the bolt. Place the wedge end of the bolt into
one of the holes, going through the outside tension bracket, metal Vector pad and into the concrete.
10. Using a hammer, tap the wedge bolt into the hole. Maximum height for expansion bolt above
concrete is 2”.
11. Repeat for the other hole in the outside tension bracket and the two holes on the other Vector
system pier set.
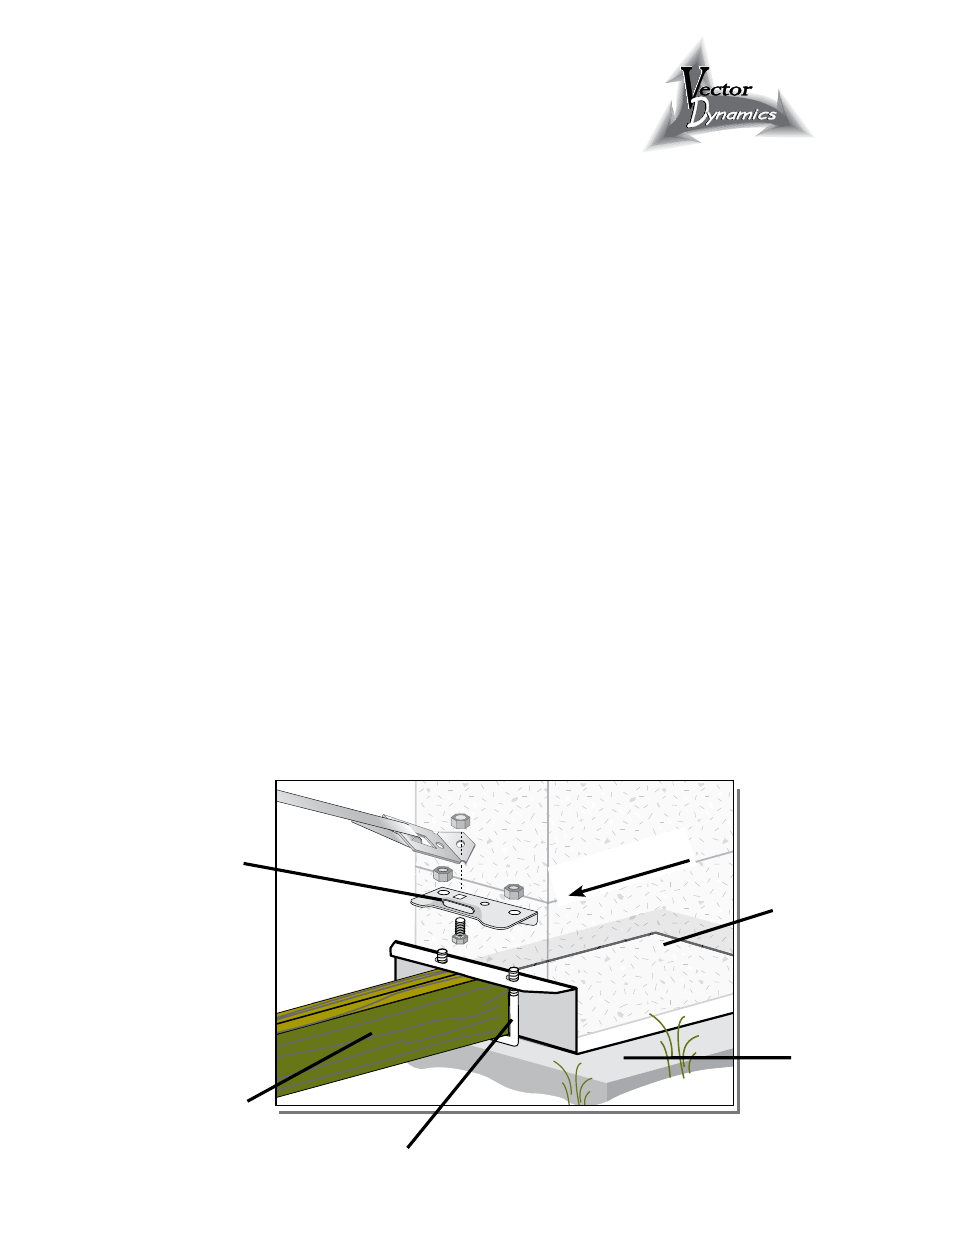
12. Place an inside tie bracket over the u-bolt so that the lip of the bracket is between the Vector plate
and concrete blocks. Place washers and nuts on each U-bolt. Do not tighten yet (see illustration Two).
13. Attach a hook or swivel strap to the inside tie bracket, with sufficient length to go over the
opposite pier and down to the outside tension bracket, plus 12 inches for wrapping the slotted
bolt. (If using hook, place hook underneath the inside tie bracket, flat against compression board)
Repeat for the opposite side.
14. Tighten inside u-bolts at this time.
15. Use the outside tension brackets to remove any space between the outside tension brackets,
concrete blocks and the inside edge of the Vector pad, by tapping the brackets with a hammer.
Wedge the pier set at this time.
16. Using a 9/16” socket wrench, tighten all of the wedge/anchor bolts, securing the outside tension
bracket and Vector pad to the concrete.
17. Using a slotted bolt in the outside tension brackets, insert strap through slotted bolt with end of
strap aligned with outside edge of bolt. Turn slotted bolt until straps are tight using at least five
turns on the slotted bolts.
Vector Dynamics System
for Concrete Applications
Instructions
Vector pad
for
concrete
Compression
boards or
PVC Pipe
Concrete
footer
Inside
Tie Bracket
U-bolt
Illustration Two
Inside of home