Tie Down Brake Solenoid Kit for use with Tie Down's Brake Actuator User Manual
Out to brakes return inlet
• Installs directly in line between the trailer hydraulic actuator and the
brake
line.
• Adapts to hydraulic actuators with provisions for inlet tubes
• Only one electrical connection required between solenoid and vehicle
backup
light.
DIRECTIONS - VEHICLE WIRING
1. Disconnect trailer hitch and any wiring connectors from the vehicle.
2. Connect a 14 gauge wire to the backup (reverse) light wire of the
vehicle. This wire should be of sufficient length to attach to the
existing vehicle/trailer wire receptacle. The end of this wire will require
a female end that will match the solenoid male connector wire.
3. For ease of use, tape or band the end of the reverse light wire to the
vehicle's trailer electrical connector.
DIRECTIONS - SOLENOID INSTALLATION
Caution: Brake fluid can cause damage to painted areas. Use a cloth
rag under the actuator/brake line connection to collect any spilled
brake fluid.
• Back Flow model. Can only be used with actuators designed for back
flow solenoids. Master cylinder must have a pre-drilled and tapped
hole that provides a return flow of brake fluid. All Tie Down model
actuators have this provision. The instructions and pictures refer to
Tie Down Actuators.
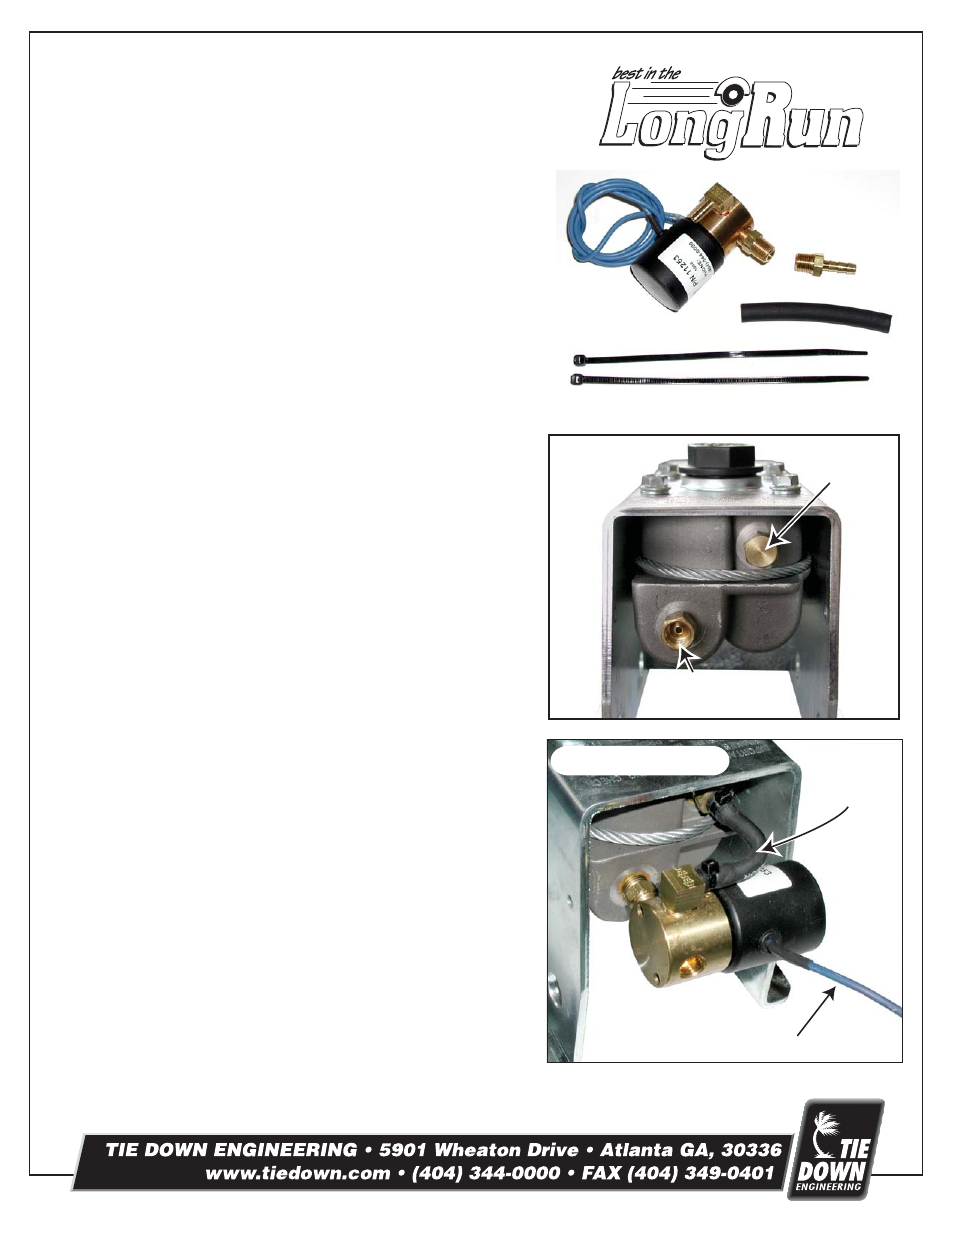
1. Remove the brake line and pipe fitting (if so equipped) from the rear
of the actuator/master cylinder.
2. Remove the brass plug from the master cylinder that is in the upper
right hand corner of the rear of the master cylinder.
3. Screw in the actuator inlet fitting into the “return inlet” until tight. Use
a liquid type thread sealant, be careful not to allow sealant to block
fluid
movement.
4. Attach the small short hose to the inlet fitting. Band the tube to the
fitting with a cable tie, cutting off excess tie after tightening.
5. Screw the solenoid valve into the master cylinder where the brake line
was removed. Use a thread sealant making sure not to place near the
end of the threads so as not to obstruct fluid flow. “Finished” position
of the solenoid should be as pictured.
6. Attach the other end of the small tube to the solenoid as shown. Tie
band with cable tie provided. Cut off excess cable tie.
7. Attach brake line to solenoid. Do not use thread sealant
on this connection.
8. Bleed brakes according to brake and actuator manufacturer’s
instructions.
9. Install electrical wire from solenoid to the reverse lights of the
tow
vehicle.
10. Test vehicle in a protected area before traveling on streets or highways.
Instruction #08070
060204,C690
Back Flow Style Brake Solenoid
Installation Instructions
Actuator Housing
Solenoid
w Reverse light
wire
Cable Ties
Return Tube
Actuator
Inlet Fitting
Brake Solenoid
Reverse Light Wire
Return
Tube
Out to brakes
Return
Inlet