SeaLand 8100 Series MasterFlush Installation User Manual
Page 10
10
Dometic 8100 Series MasterFlush Toilet
Installation
5.4
Toilet system with through-the-wall
connections
5.5
Toilet system with “full tank” shut-down relay and
tank monitor system
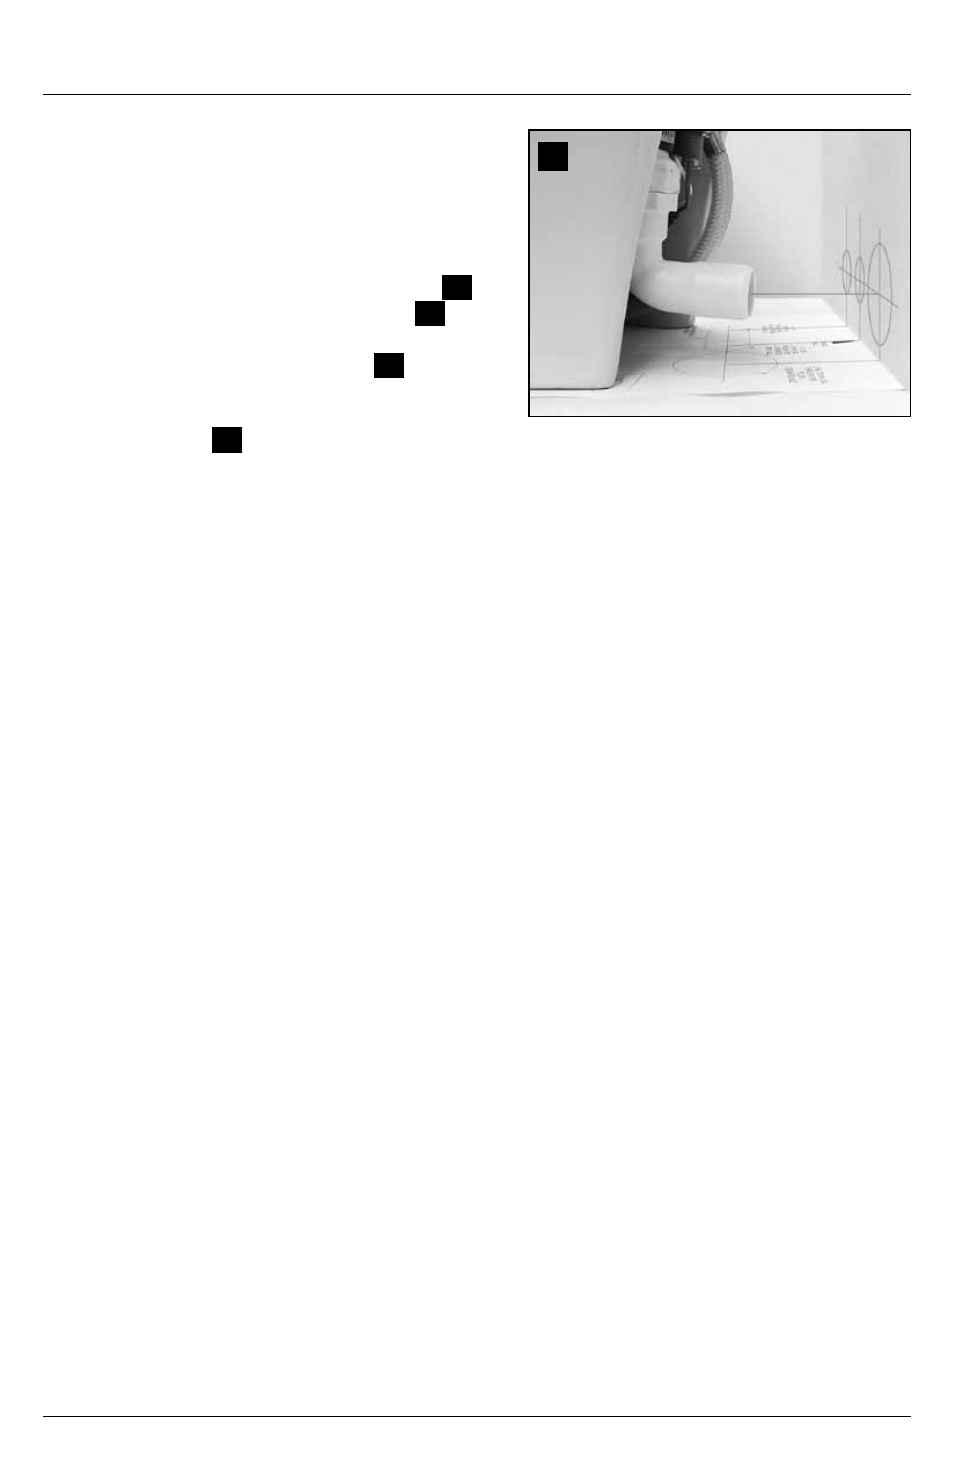
1 . To route wiring and plumbing connections through
the wall, use floor template to locate the vertical
centerline of each hole .
2 . Loosen band clamp on discharge loop outlet and
remove straight discharge hose fitting (fig .
2
5,
p . 2) from discharge adapter fitting (fig .
2
4, p .
2) .
3 . Attach discharge elbow fitting (fig .
1
K, p . 2) to
discharge adapter fitting .
4 . Place toilet in proper position and mark horizontal
centerlines (fig .
17
) .
5 . Drill holes sizes as indicated on template .
6 . Route wiring and plumbing through holes, then follow toilet installation instructions beginning at
Section 5.3, step 10 .
Dometic macerator toilets will operate with Dometic’s DTM01C Tank Monitor and DTM04 Four-level
Tank Monitor systems (available separately) . In these installations, the 8100 series toilet receives
electrical power through the “full tank” shut-down relay (see Wiring diagrams (pages 11-12 .)
1 . Route input power wires from “full tank” shut-down relay (previously installed according to tank
monitor system instructions) to 8100 series Flush Switch Panel .
2 . Follow toilet installation instructions beginning at Section 5.3, step 10 .
17