3 recommended spare parts, 4 during extended periods of non-use – SeaLand 4700 Series VacuFlush Operation Manual User Manual
Page 9
9
SeaLand 4700 Series VacuFlush Toilet
Maintenance/winterizing/service
7.2
VacuFlush system maintenance
Maintenance procedures vary widely and depend on factors such as frequency of use, quality of
flushing water, etc . The chart provides a general guideline for keeping your toilet system ready for
use at any time .
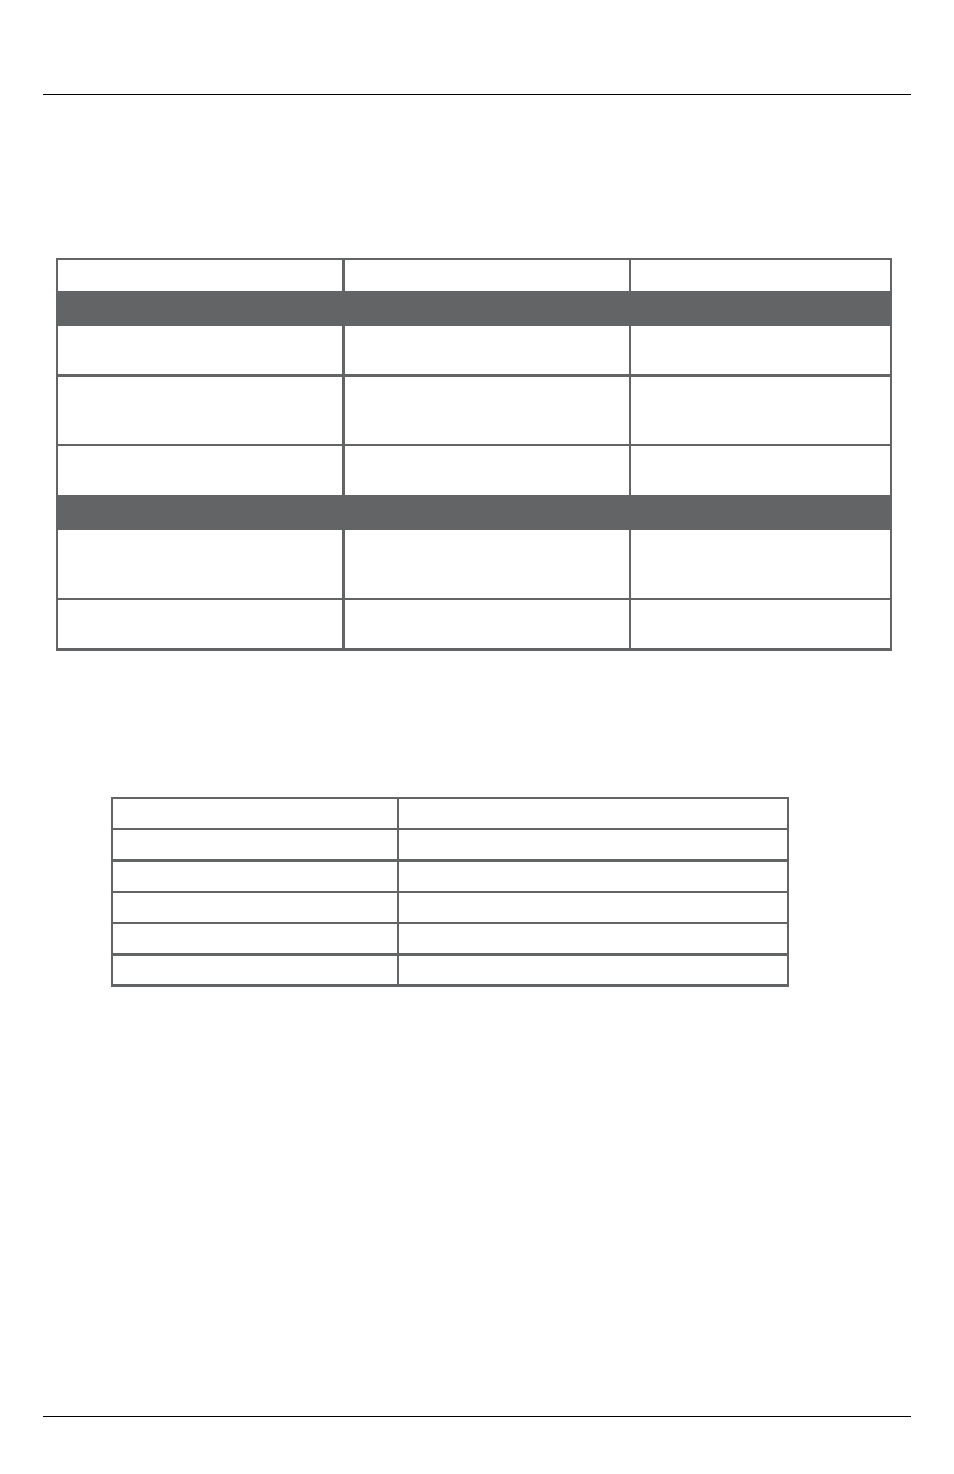
Maintenance procedure
Service interval
Notes
ROUTINE
Check all clamped hose joints
below water line for leaks .
Monthly
—
Check filter screen in water valve .
After first year of service, then as
needed if water flow is noticeably
slower .
Screen is located inside water
valve inlet .
Replace vent filter (if installed in
holding tank vent line) .
Annually
—
MAJOR SYSTEM MAINTENANCE
Replace duckbill valves in vacuum
generator or vacuum pump .
Every three years
See vacuum generator or
vacuum pump parts list for
replacement kit part number .
Replace flush ball seal and flush
ball (if required) .
Every three years
See toilet parts list for replace-
ment kit part number .
7.3
Recommended spare parts
When operating boat or other vehicle in remote areas, keep the following spare parts on hand to
assure continuous toilet system operation .
Description
Where used
Flush ball seal
4700 series toilet . See parts list .
Flush ball
4700 series toilet . See parts list .
Electric water valve
4700 series toilet . See parts list .
Vacuum switch kit
Vacuum tank or vacuum generator . See parts list .
Duckbill valves
Vacuum tank or vacuum generator . See parts list .
To order spare parts, refer to Customer Service section .
7.4
During extended periods of non-use
Toilet system sanitation hoses should be cleared if toilet will not be needed for an extended period of
time (more than two weeks) .
1 . Fill toilet bowl with water and add 4 oz . (120 ml) of liquid biodegradable laundry detergent
(should NOT contain bleach) .
2 . Open flush ball in Service Mode (see directions in Section 6 .5) . Press the “Add Water” switch
down, or raise flush handle up, until water stops flowing . Push Service Mode button to return to
Normal mode, then push again to return to Service Mode . Repeat “Add Water” process about
12 times . Return to Normal mode .
3 . Turn off water supply to toilet .
4 . Flush the toilet without water, allowing the vacuum pump to shut off after the flush . Repeat three
times . (This procedure will minimize any remaining water in the sanitation hoses .)
(continued on next page)