Receive reduction, Calibration, Noise burst adapt – ClearOne AP10 User Manual
Page 17
13
Configuration
~ Calibration
Technical Services Group ~ 1-800-283-5936 (USA) ~ 1-801-974-3760
Receive reduction
In some applications, it might be necessary to duck (lower) the receive audio coming
in through the telephone line when transmit audio is present. To enable receive
reduction, set DIP switch 7 to the On position.
DIP Switch
Position
Description
7
On (up)
Receive reduction enabled
7*
Off (down)
Receive reduction disabled
Calibration
The following information will help you make adjustments to optimize your system
performance. Verify all components and all connections. Ensure that proper power is
supplied to the AP10 and that the unit is off (indicated by the red Off LED). If the
green On LED is lit, press the Off button [E].
There are two calibration methods for the AP10: noise burst and auto-adapt.
Which procedure is used depends on whether you have DIP switch 1 on (up) for
noise-burst adapt, or DIP switch 1 Off (down) for auto-adapt. Either will suffice to
calibrate the AP10. The difference is the application and/or personal preference.
Some applications are not suited for a .75-second noise burst, and might require
the gradual adaptation over time.
Noise burst adapt
If DIP switch 1 is on (up), have someone call the AP10 from another location.
Answer the line by pressing the On button [D]. (If the auto-answer feature is active,
the unit will answer the call after one complete ring.)
The caller will hear a short white noise burst (it will sound like static) and a
short beep. This automatically adapts the AP10 to the telephone line.
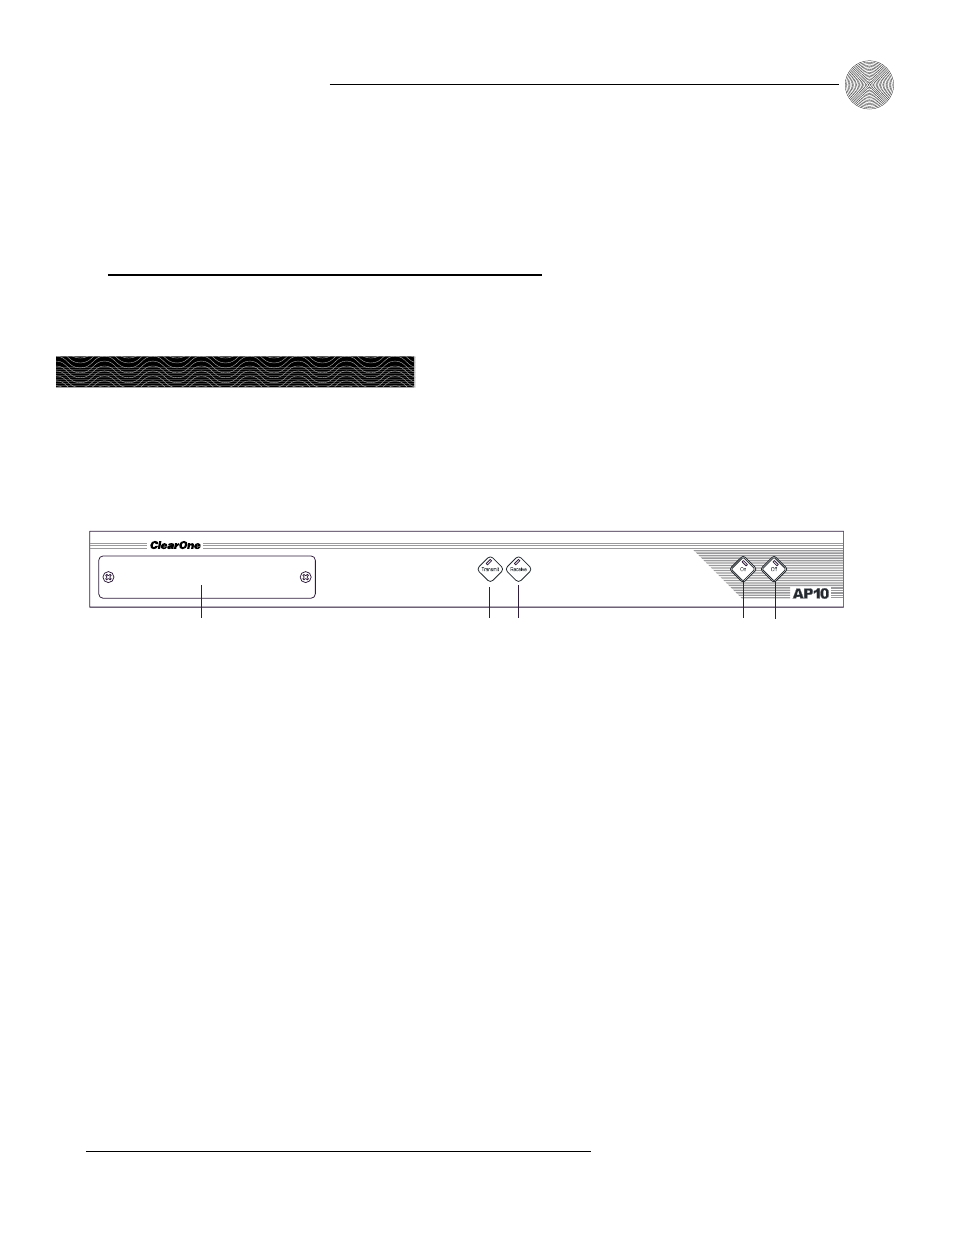
A
B C
D
E
Figure 3.2. AP10 front-panel controls
Some echo and ringing
might be heard while
calibrating the AP10.
Disregard it and continue with
calibration until the end of the
procedure. The echo and ringing
will disappear.
✍