Interlogix NX-592E User Manual
Page 4
4
NX-592E NetworX Cellular Module Installation Sheet
installer code to check), you must change the wireless gateway
keypad address.
To change the gateway keypad address:
1. Press *, then 8.
2.
Enter the “Go to program” code (the default code is 9, 7, 1,
3). If the code is valid the keypad display will prompt you
for a device address.
3. Enter the address of the NX-592E (7, 8) then press #. At
this point, the keypad display will prompt you for a
programming location to be entered.
4. Enter 0, followed by the # key. Location 0, which is the
LCD address will display. The default is 192. For a list of
address, see Table 3 below.
5. To change the LCD keypad address, enter the new
address, followed by the * key. The display will return to
the location prompt.
6. To exit this location without changing the data, press the #
key.
7. To review the data, repeat the above procedure, pressing
the * key without entering data first. If you attempt to
program an invalid entry for a particular segment, the
keypad sounder will emit a triple error beep and remain in
that segment waiting for a valid entry.
8. Press the Exit key to exit this programming level. Press
the Exit key again to exit Program Mode.
While in programming mode and not in a location, the number
in parentheses is the location you were previously changing.
For example, if th
e display reads “Enter location, then # (2)”, it
is reminding you that location 2 was the last location you
programmed.
Location 0: LCD keypad address
Certain commands in the module require it to know the location
of at least one LCD keypad (if one exists in the system). If
your system has an LCD keypad we recommend that you
place it in Partition 1 Keypad 1. This will allow Location 0
to be left at the factory default. If the LCD keypad is
selected as something other than Partition 1 Keypad 1,
program the appropriate address in Location 0.
Table 3: Addresses
Keypad
Partition
1
2
3
4
5
6
7
8
1
192
193
194
195
196
197
198
199
2
200
201
202
203
204
205
206
207
3
208
209
210
211
212
213
214
215
4
216
217
218
219
220
221
222
223
5
224
225
226
227
228
229
230
231
6
232
233
234
235
236
237
238
239
7
240
241
242
243
244
245
246
247
8
248
249
250
251
252
253
254
255
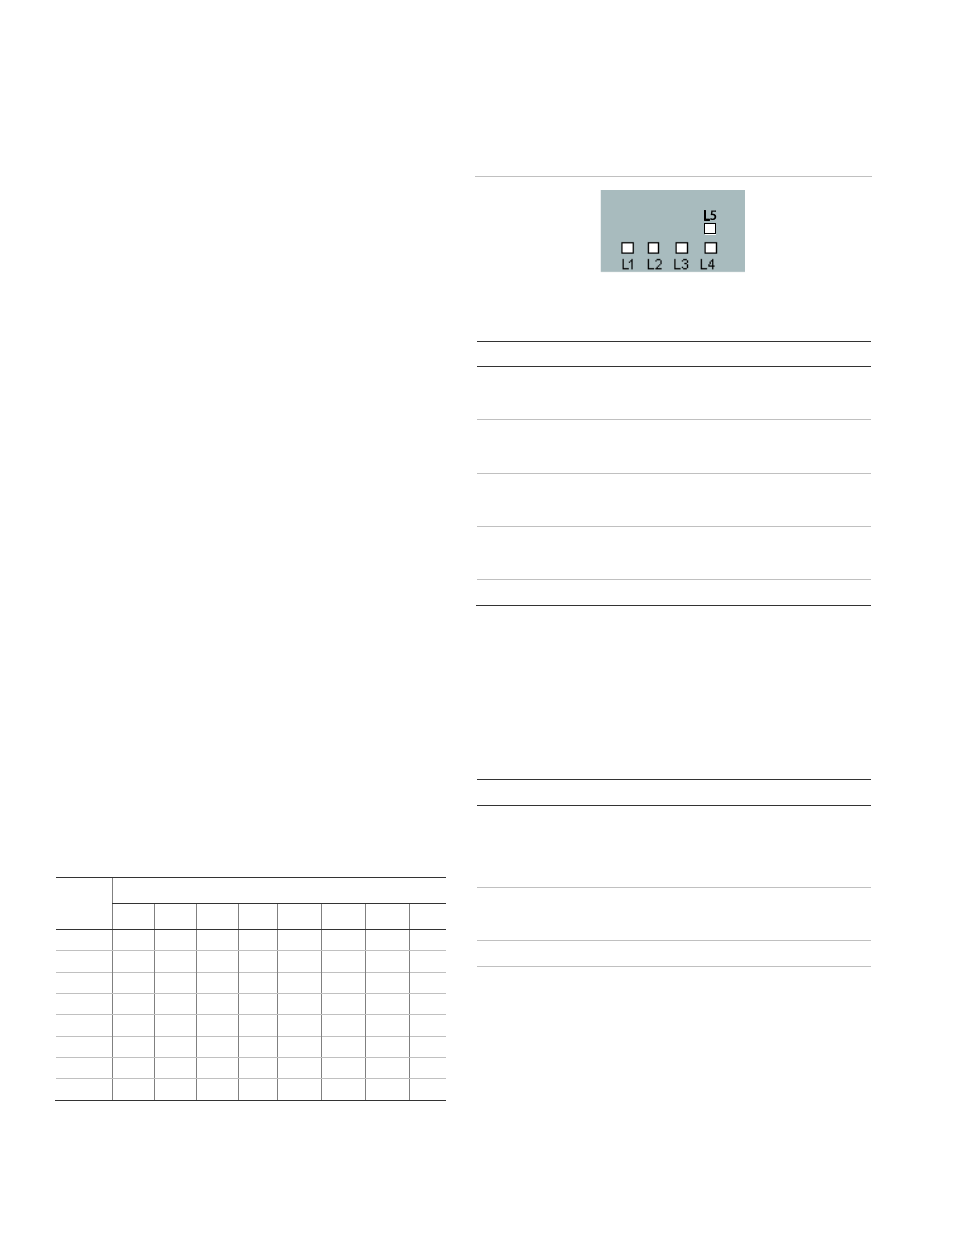
Cellular Status LEDs
The cellular radio status LEDs are five small LEDs located
near the bottom of the radio daughter board.
Figure 5: Cellular Status LEDs
Table 4: Cellular Status LED Functions
LED
Function
L1
Error LED. Flashes 1 to 8 times in an 8-second interval to
indicate a specific error. See Table 6 for errors and
common fixes.
L2
Panel Communication and Z-Wave status messages.
Flashes every time the module communicates with the
panel and flashes in patterns to indicate Z-Wave status.
L3
Cellular Communication. Flashes every time the cellular
signal level is checked and when packets are exchanged
with Alarm.com.
L4
Cellular Signal Level. Flashes 0 to 5 times to indicate signal
strength, or toggles on/off slowly when communicating with
Alarm.com servers.
L5
Z-Wave Error LED. See Table 7 for error descriptions.
LED Details
LED L1 (red). L1 flashes when there is an error. The number
of flashes indicates the error number. If there are two or more
errors at the same time, the errors will flash one after the other.
The LED will stay off for at least four seconds between errors.
Table 5: LED L1 errors
Flashes
Error
1
Module cannot communicate with the panel. Perform a
power cycle on the panel. If the error persists lift the module
out of the gateway and re-insert it. If the error is still
observed try a different module. Finally, if that does not fix
the problem try a different panel.
2
The SIM card is missing. The SIM card holder can be found
on the module. Verify that the SIM card holder is closed
securely and that there is a SIM card in the holder.
2 then 4
The module provisioning process could not be completed.
2 then 5
The module provisioning process could not be completed
because the module is currently roaming on the carrier’s
network.